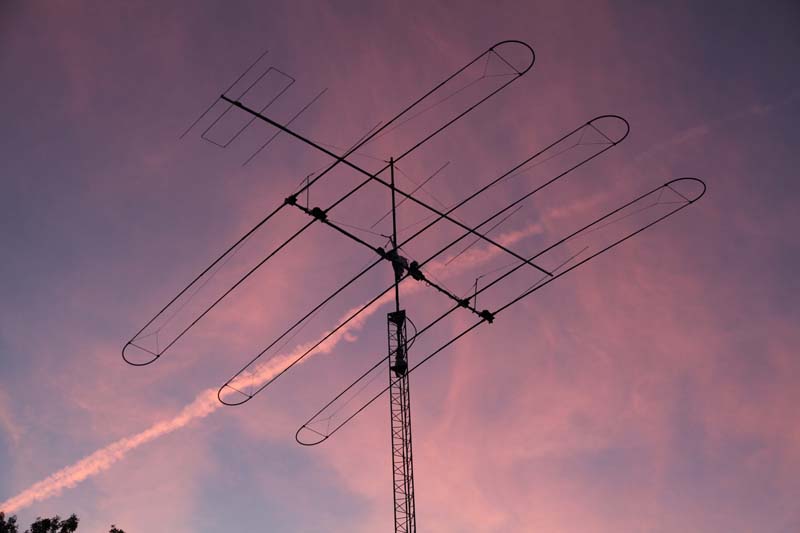
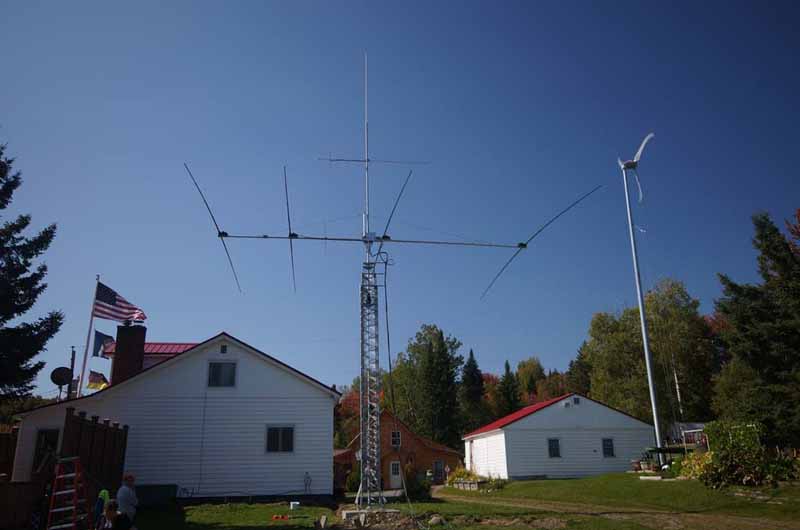
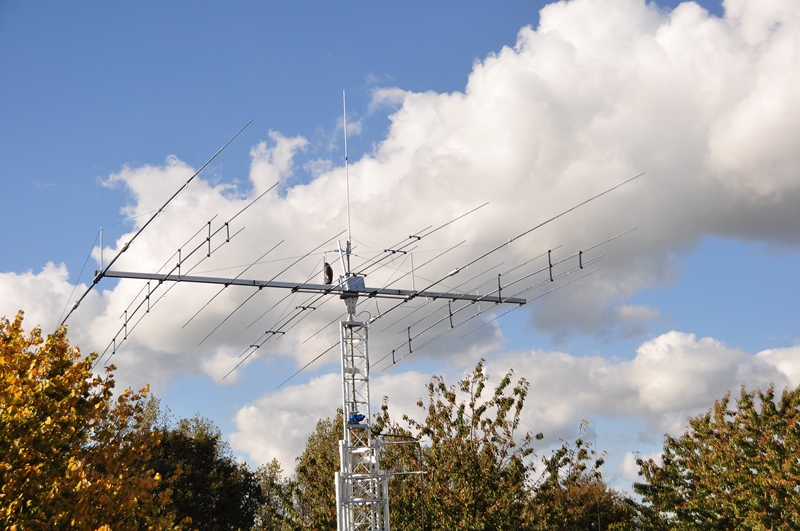
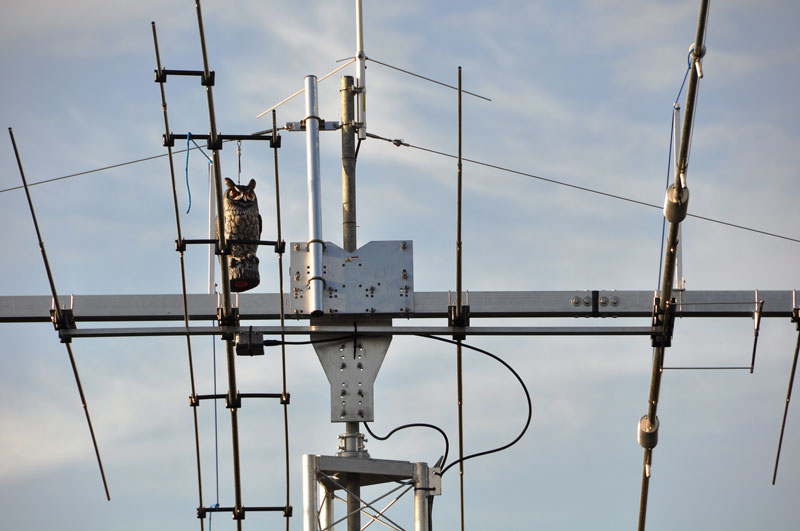
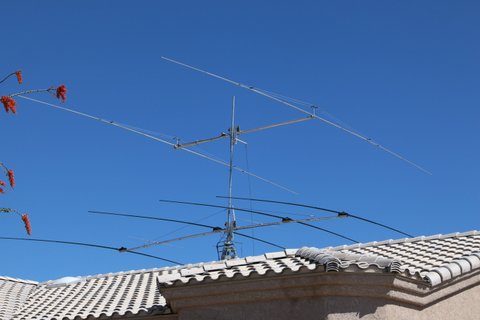
Customer Pictures and Comments

Index - Click CALL to Jump to Pictures and comments
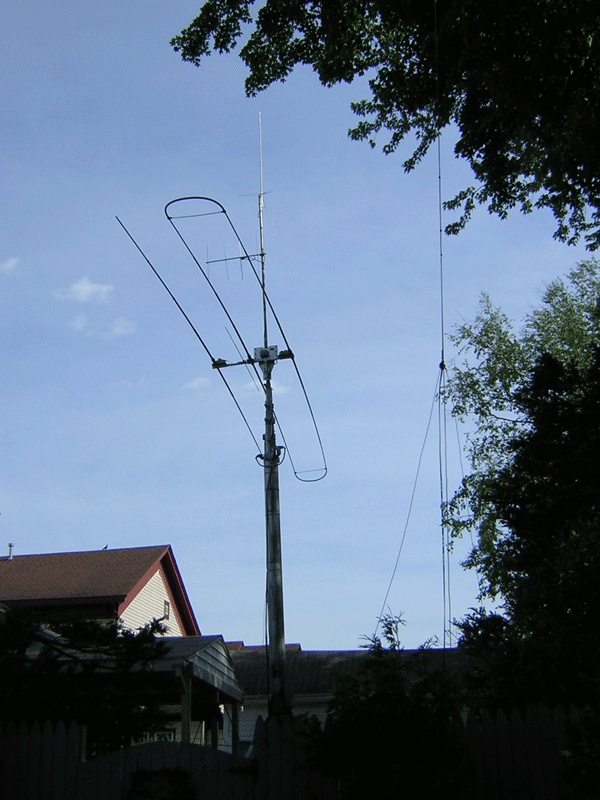
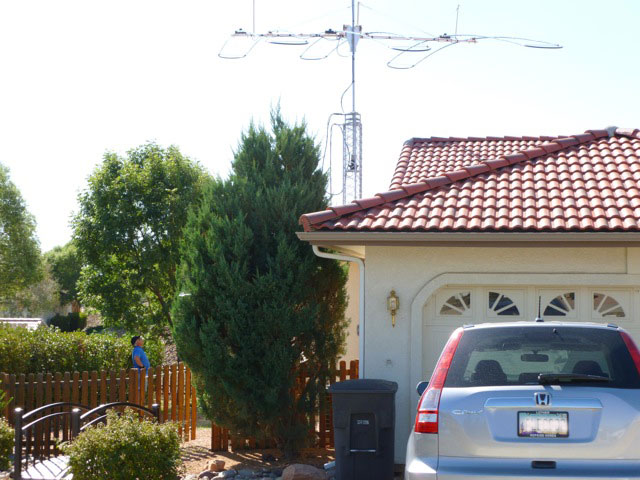
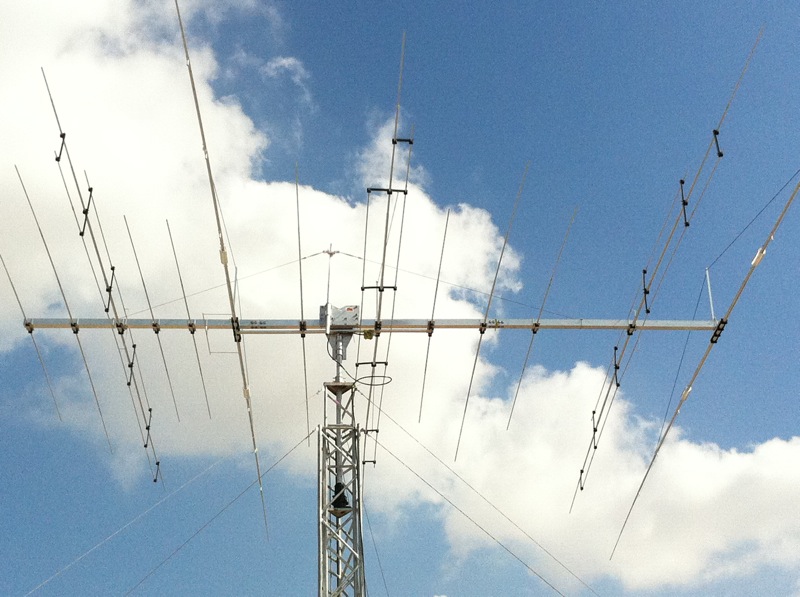
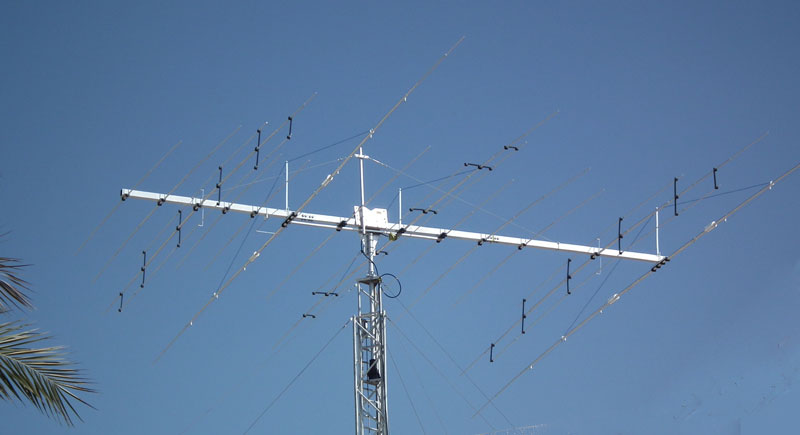
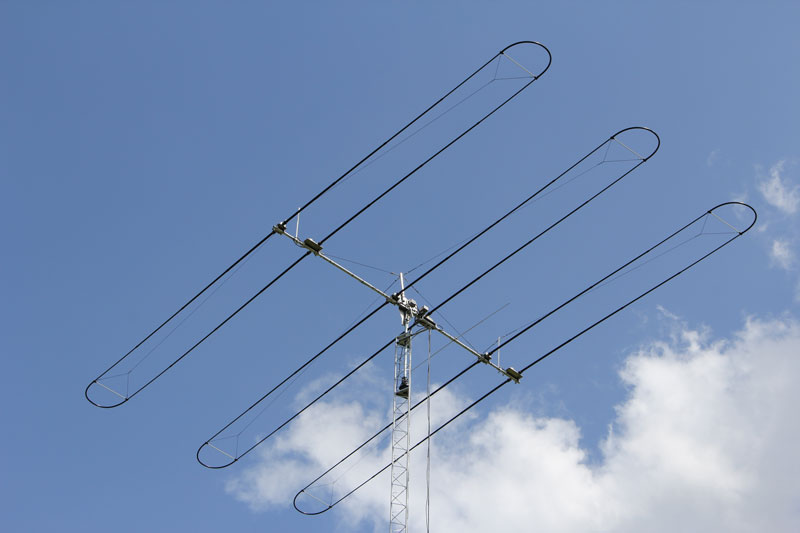
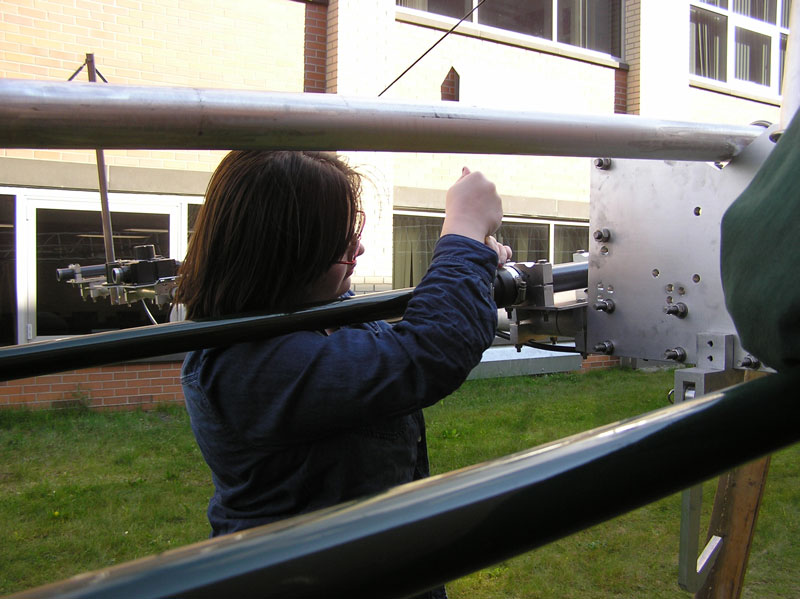
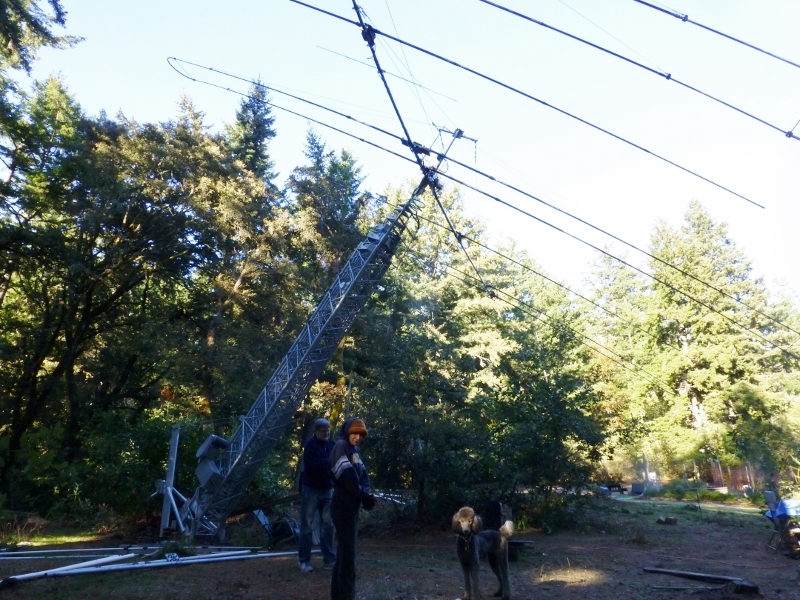
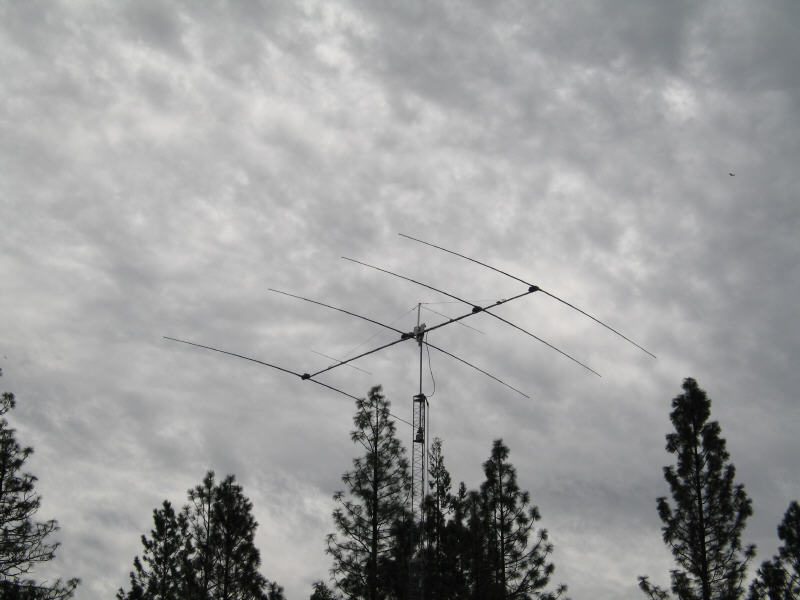
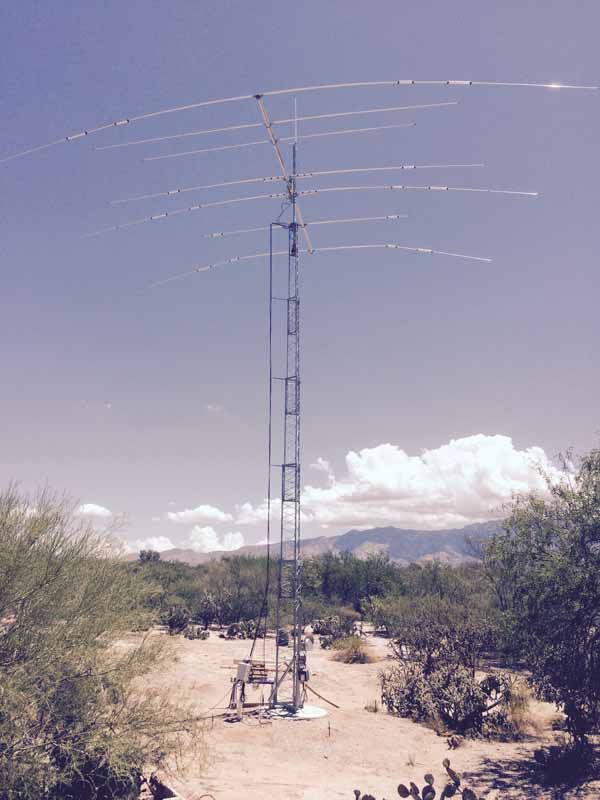
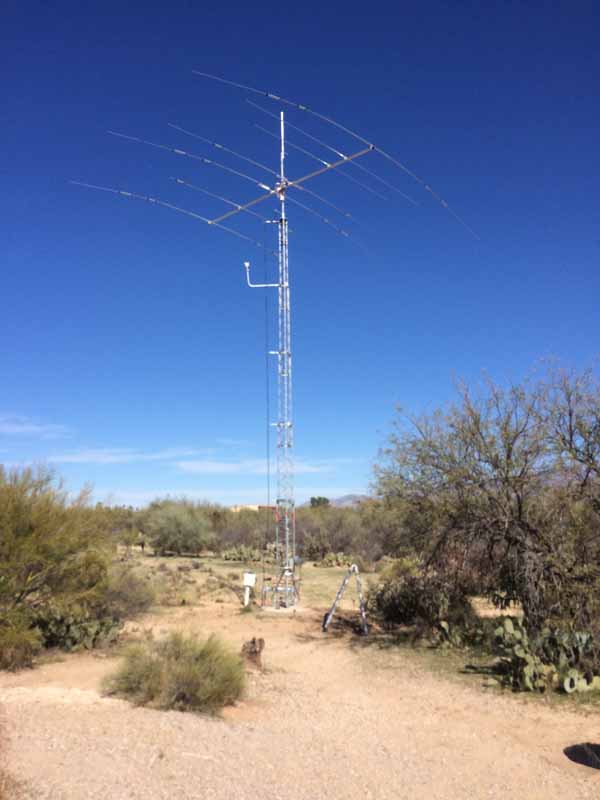
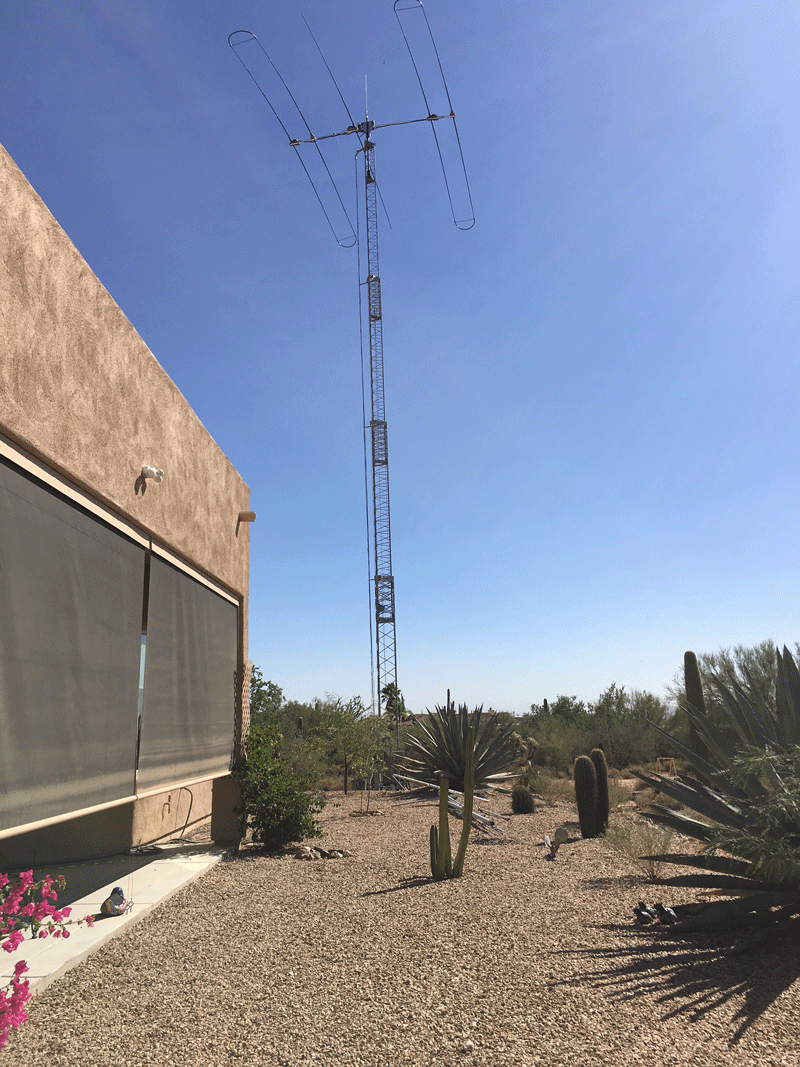
Tomy / KF7GC 4el SteppIR 40/30 option Joe / WDØM 4el SteppIR 40/30 option
Bob / WA5VSK 4el SteppIR 40/30 option Mike / KM4H 4el Rohn 25 tiltover tower
Owen / KB5XE 3el SteppIR 40/30 option (Rohn 45 foldover) Gunther / VA3GA 4el SteppIR 40/30 opt.
Gary / W2CEA 2el SteppIR 40/30 option W0PL / Paul DB18 (installation tips)
Kirk / K6KAR 4el SteppIR 40/30 opt. (inspiration for KARLock) Jerry / K3BZ 4el SteppIR (TiltPlate #1)
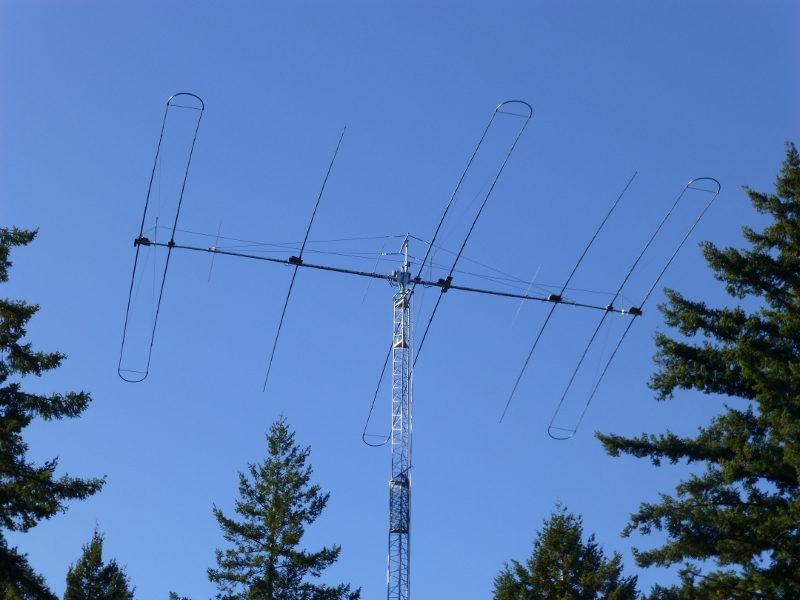
Bill / KM1C Optibeams 40-6M (3 yagi stack on 2 TiltPlates) Russ / K4WB Tennadyne T12 Log Periodic
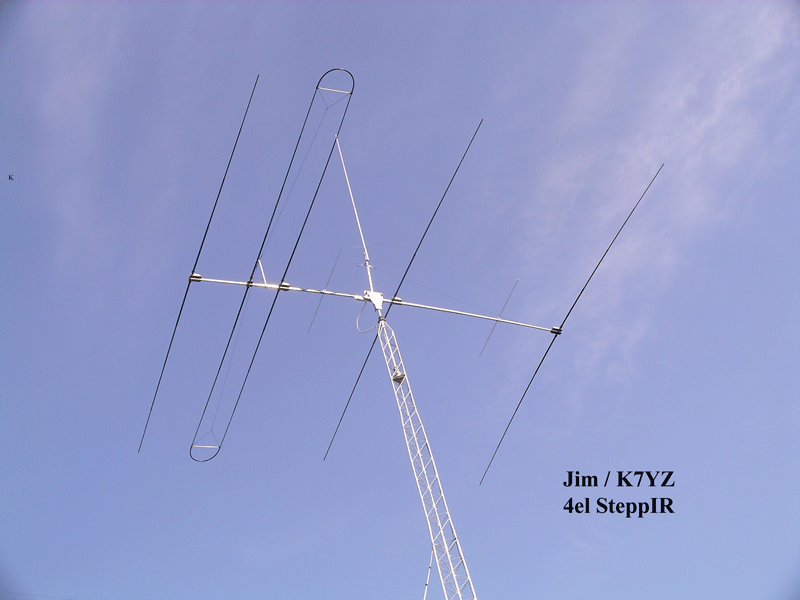
Del / KG6LQ 4 el SteppIR (US Tower MA-850) Jim / K7YZ 4el SteppIR
Tommy / W6IJ M2 Log Periodic Jeff / W0JM DB36 (lateral strut)
Dave / K8DH 4el SteppIR ("remove a tube" leveling) Bernard / WA4OEJ 3el SteppIR 40/30 opt.
Lou / W0FK DB18 stackable Adil / A65EE Optibeam 13-6 40-10M
Joe / KC2TN 4el SteppIR Fred / W8FLC Mosley TA-63N (phase lines)
John/ WC0W 4el SteppIR (U S Tower 572) Mark / WA2ILB 4el SteppIR (leveling tip)
Guy / ON4AMG Optibeam OB13-6 Tom / K5AX TH11DX (no KARLock mounting)
Bill / ND0B SteppIP with dual 30/40 loops Ivan / WK1W Stacked TiltPlates
Kim / K4ATX DB18 and U.S. TX 472 - Stackable Matt / KI6VJY Mini-TiltPlate & 2el Steppir
Pete / N4KW Bencher SkyHawk & 40M dipole Herb / K4HMK Pix of tilt operation and hurricane tie-down
Will / K4AAV M2 Log Periodic (phasing tube example) Ron / KB9NW DB36 - making a repair
Gary / W7DO 4 el SteppIR Jack / WE5ST DB 42
Bill / K5UY DB18 on US Tower Dennis / N8ERF DB18E at Midland HS Club
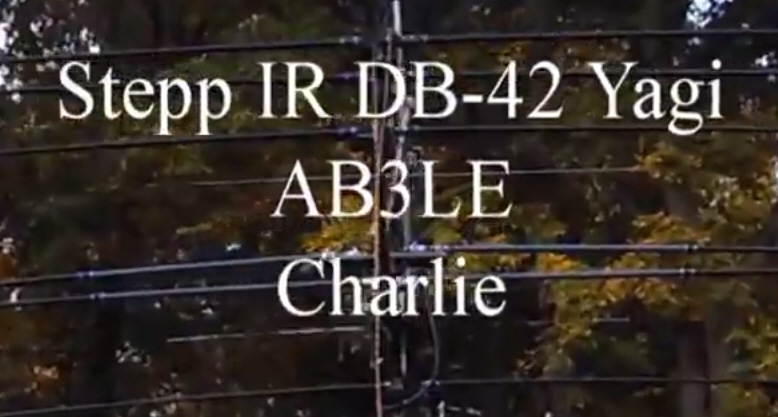
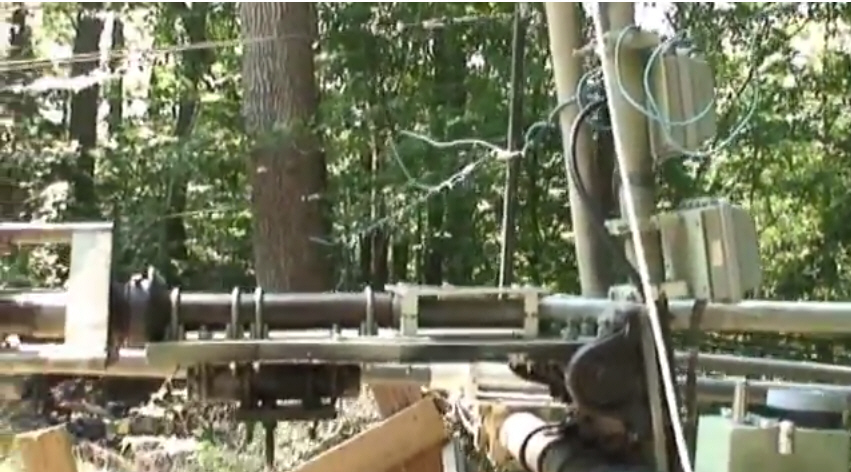
Rulon / W7QR DB42 with 80M dipole and 144/440 yagi Charlie / AB3LE DB42 and VIDEO
Rich / W9YAC DB18 on US Tower Steve / N6SJ DB42 HDX589
Tad / WF4W Mosley PRO67C (phasing tubes) Paul / WY7I Stack - 4el SteppIR & 2el OB2-40
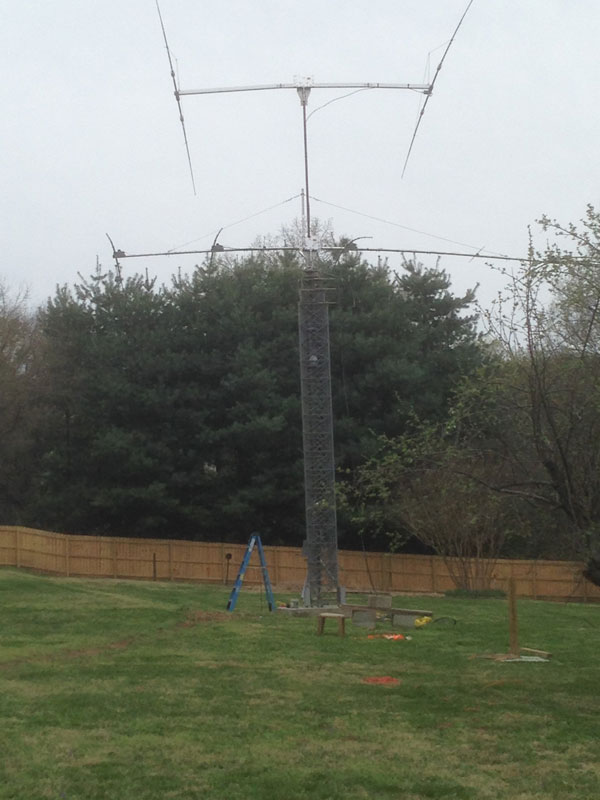
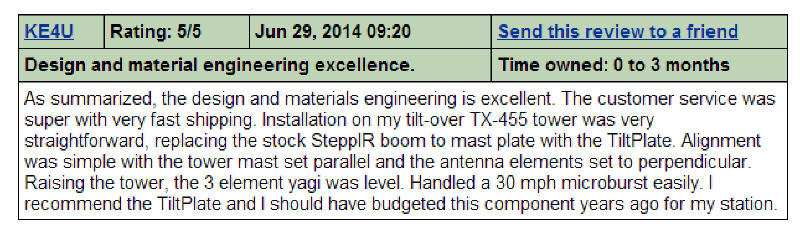
Mike / K4EU US Tower 455, 3el SteppIR Chris / N6CPL 4el Steppir and KARLock
Richard / W7ZR 4el SteppIR and 40M yagi - Tipping Fred / W2HZ Mosley Pro 67-C-3 (phasing tubes)
Jack / N7JP Mini-TiltPlate on MA-550 tower Keith / KJ8DO Mosley Pro 67C (phasing tubes)
John / W5ODJ Standard Stackable - 4el SteppIR - 4030 loop Al / K0CN SteppIR DB18E - Excellent VIDEOs
Kent / NC6B Monster, DB36, Unique assembly process NG7M / Max SteppIR DB-18 - Excellent videos and pictures
Rick / K7RCS Mosely TA 54 XLN 6/40 non-Stackable / KARLock Gene / K5GS DB-18 - Interesting Installation method
Xavier / F6FKQ Ultrabeam 3 el with 60mm square boom Ed / N3CMI - DB18E on U S Towers HDX-555 with 2M and 300X on top
Tracy / KC7WFD Steppir DB32 Scotty / K7MIX - Tennadyne T-8
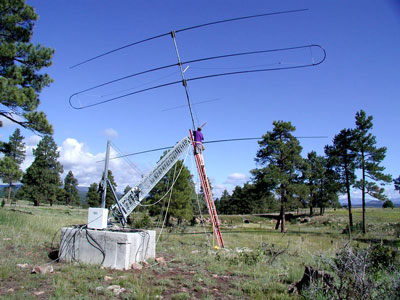
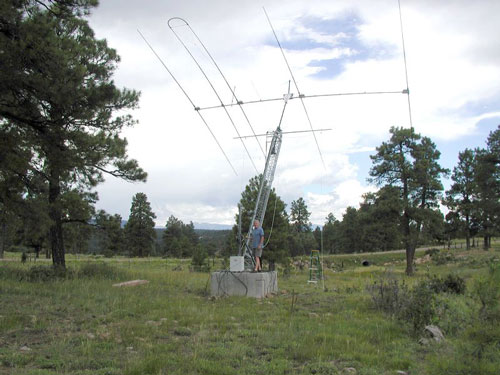
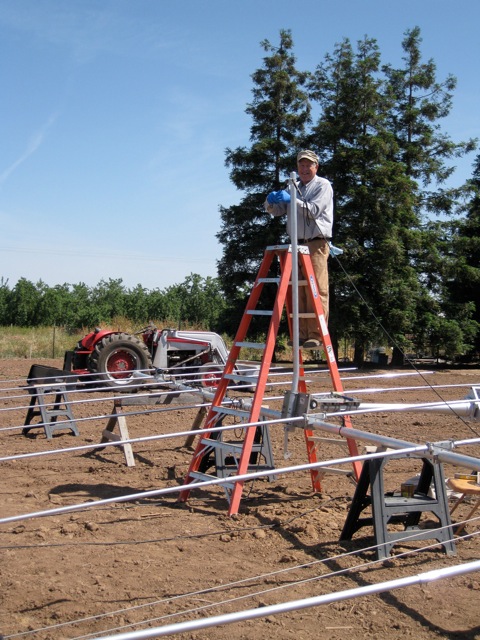
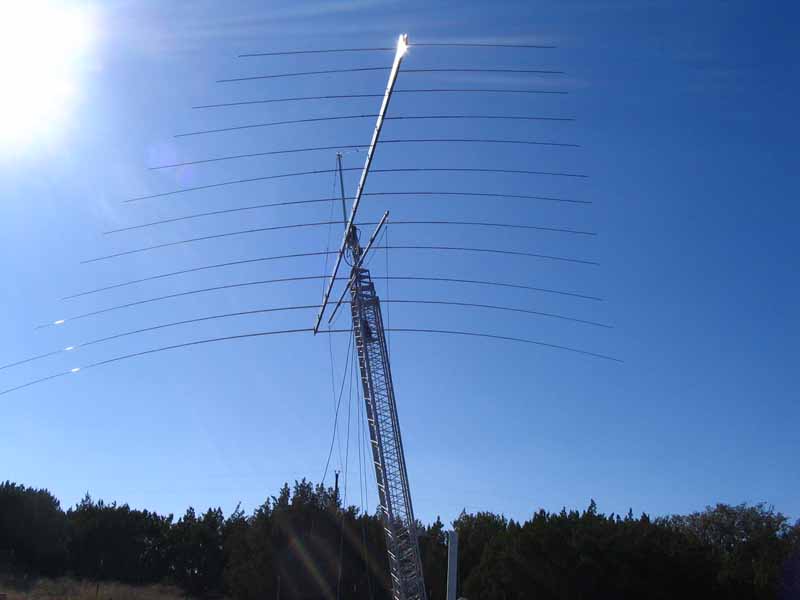
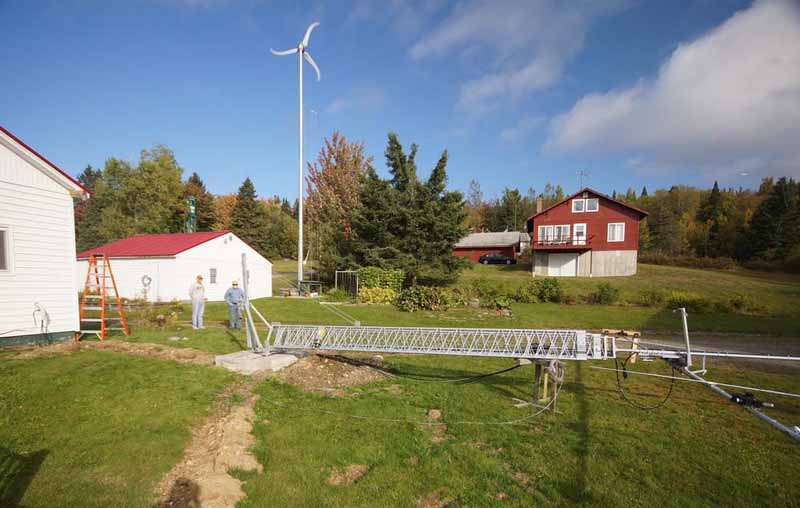
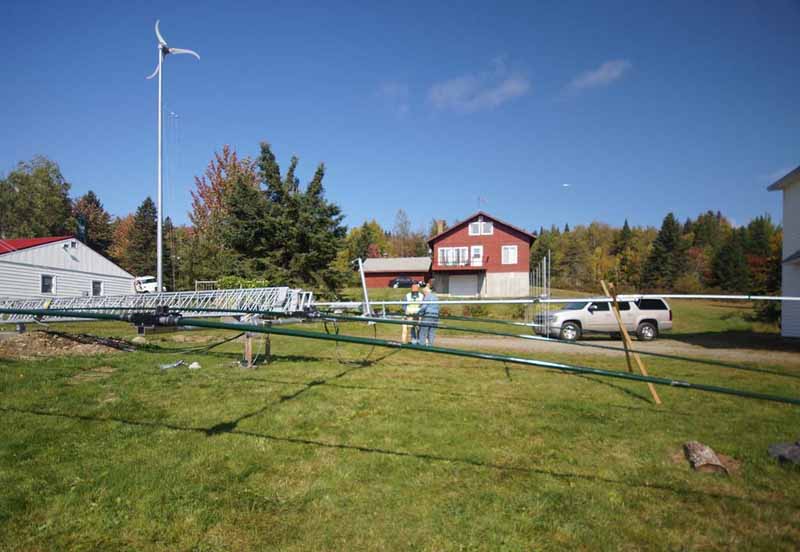
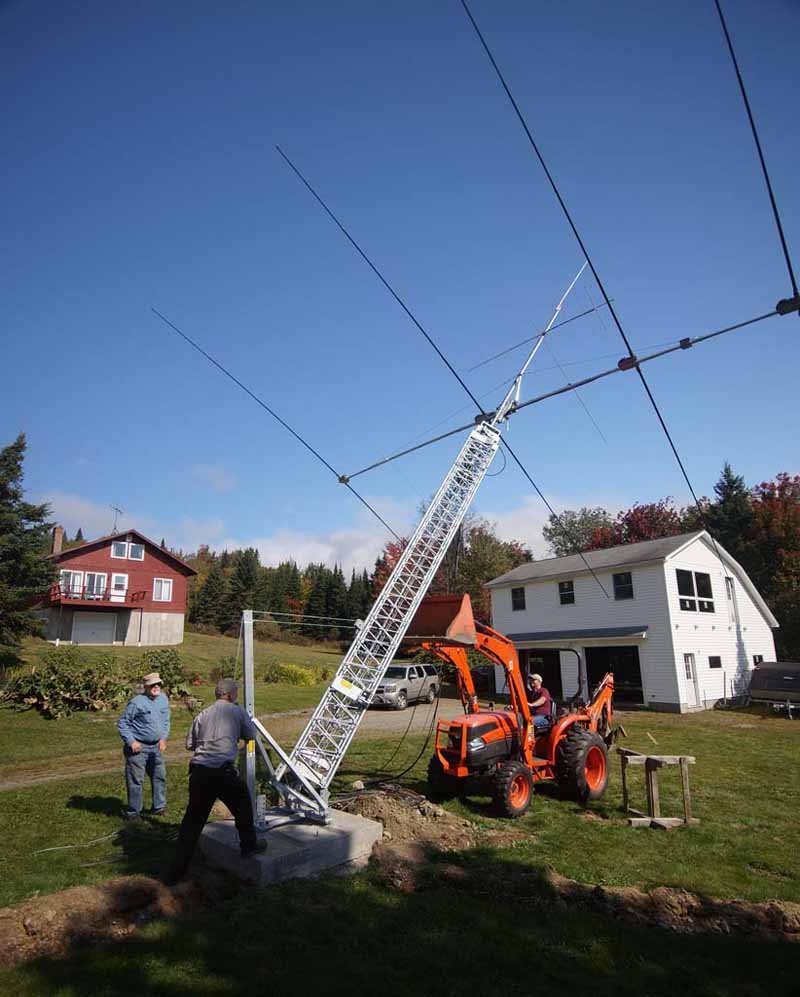
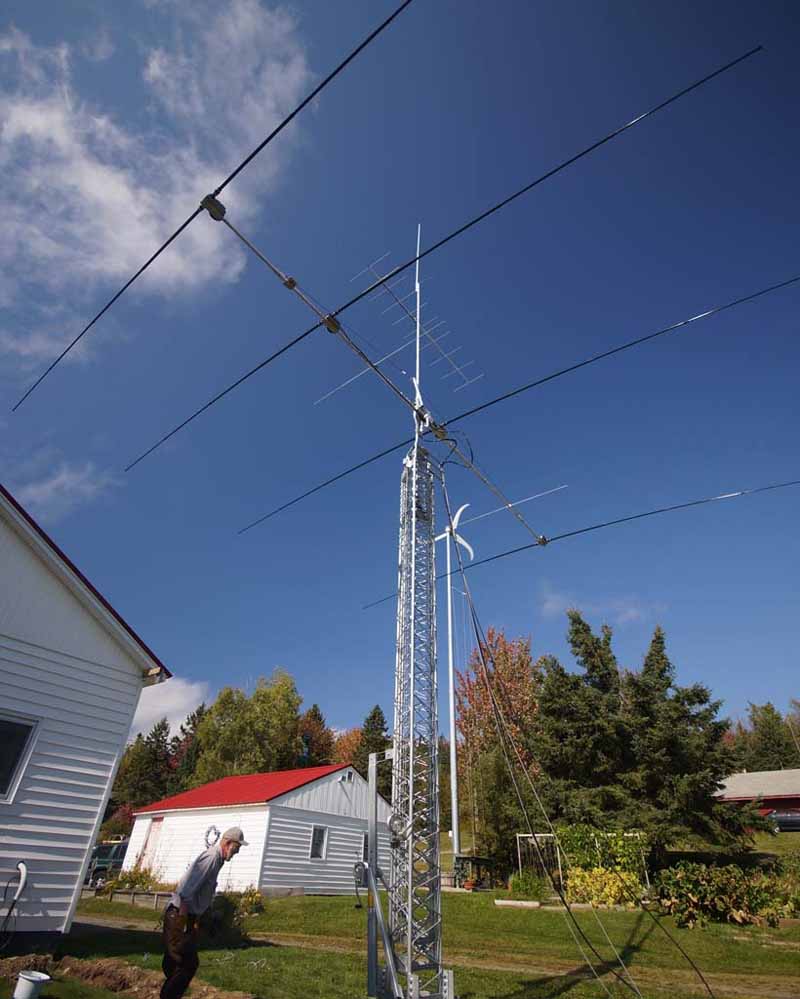
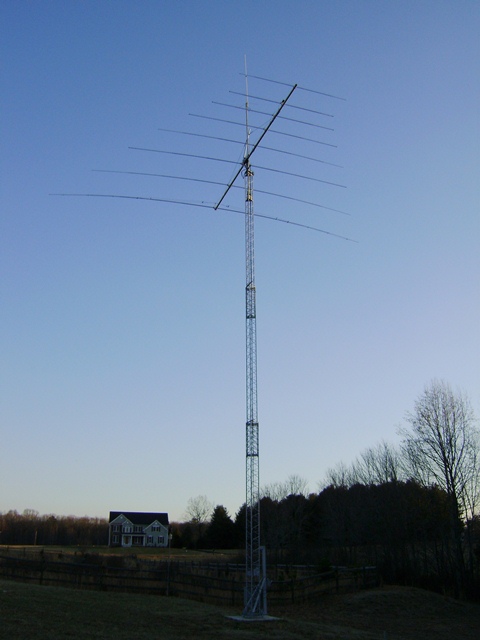
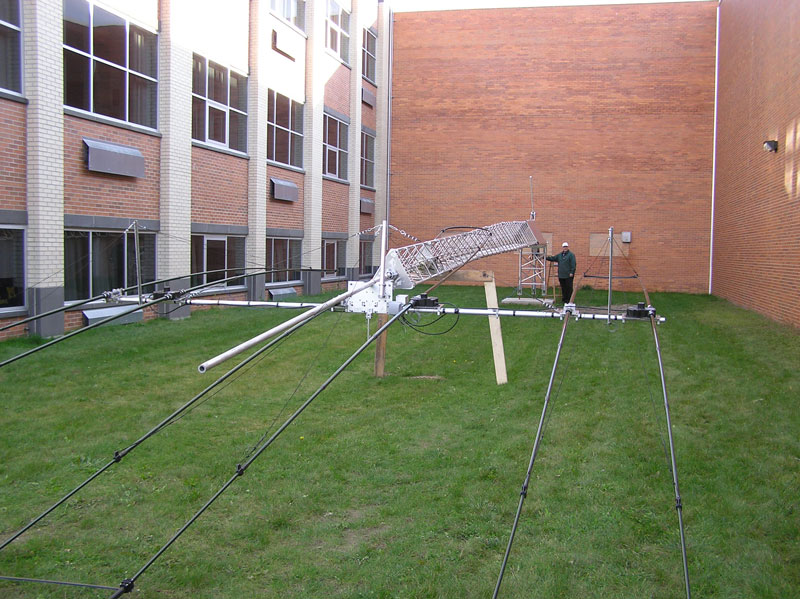
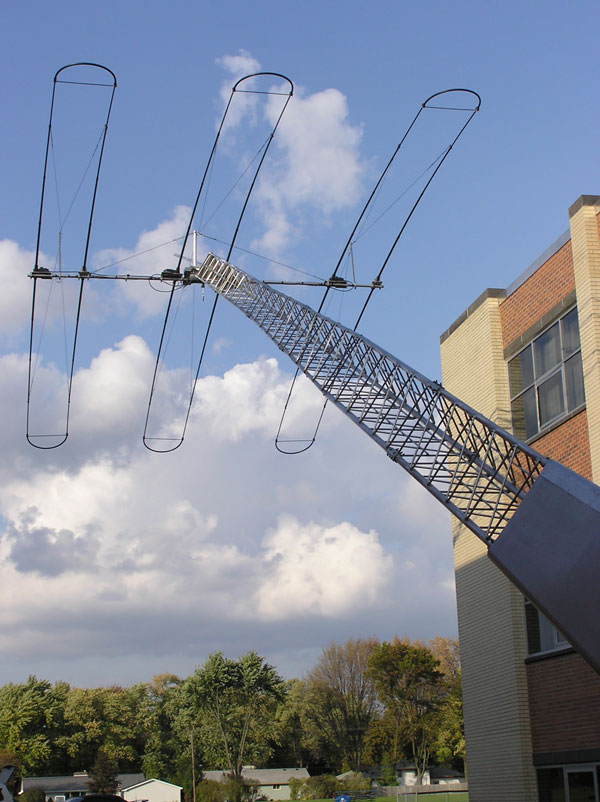
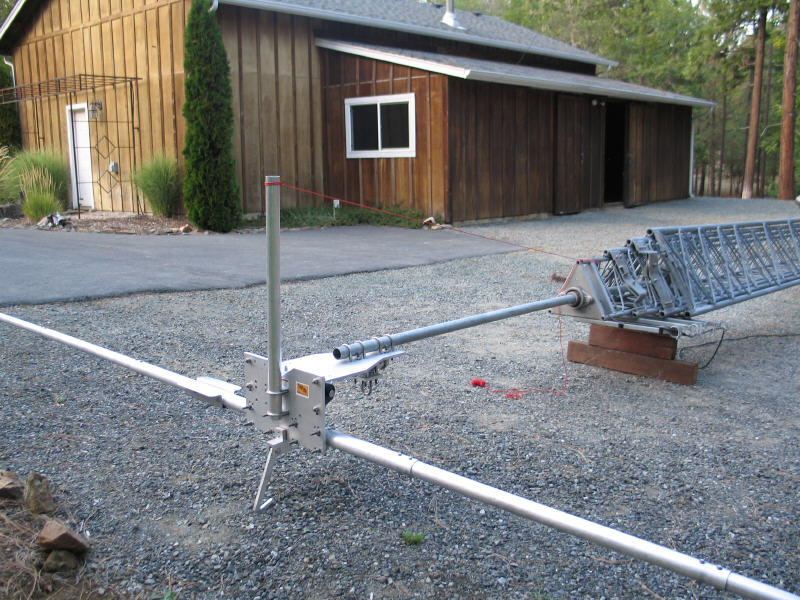
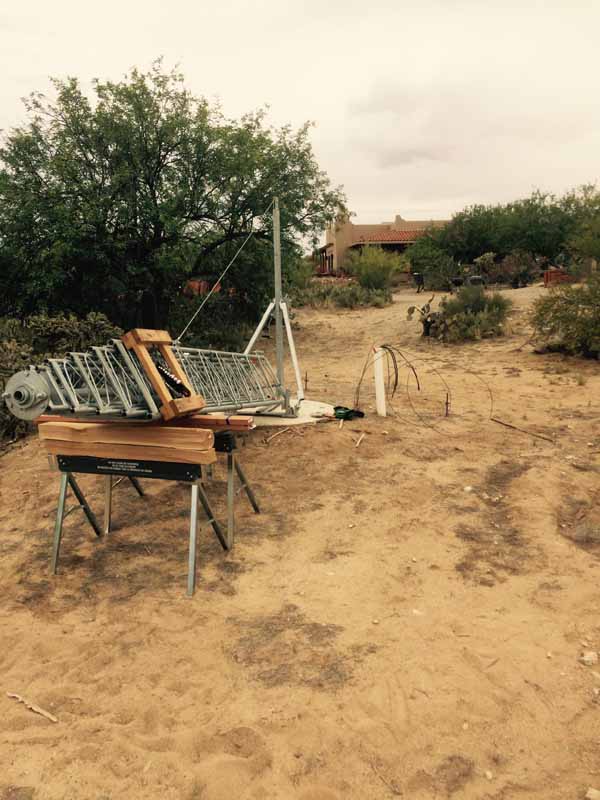
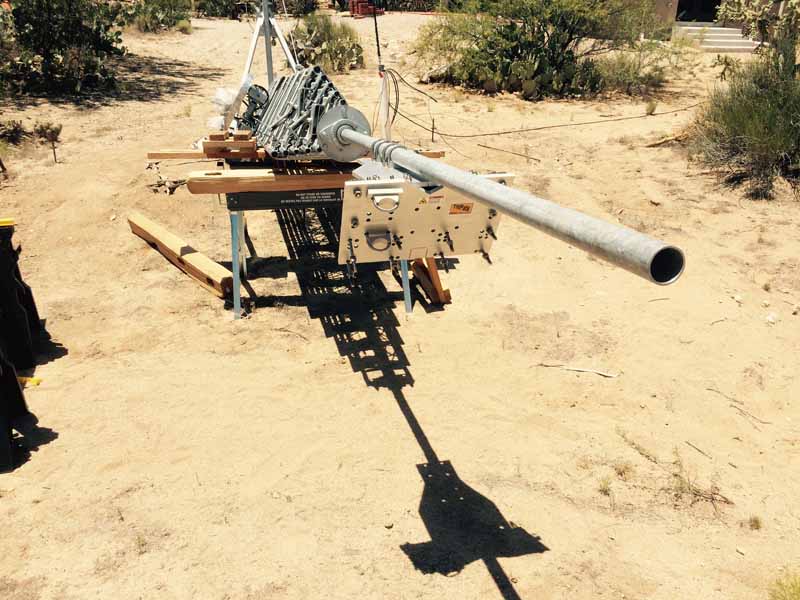
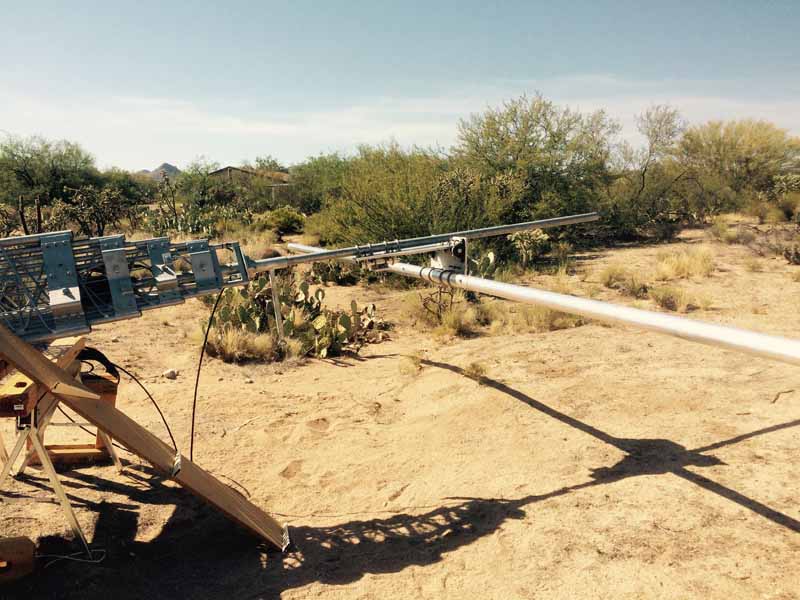
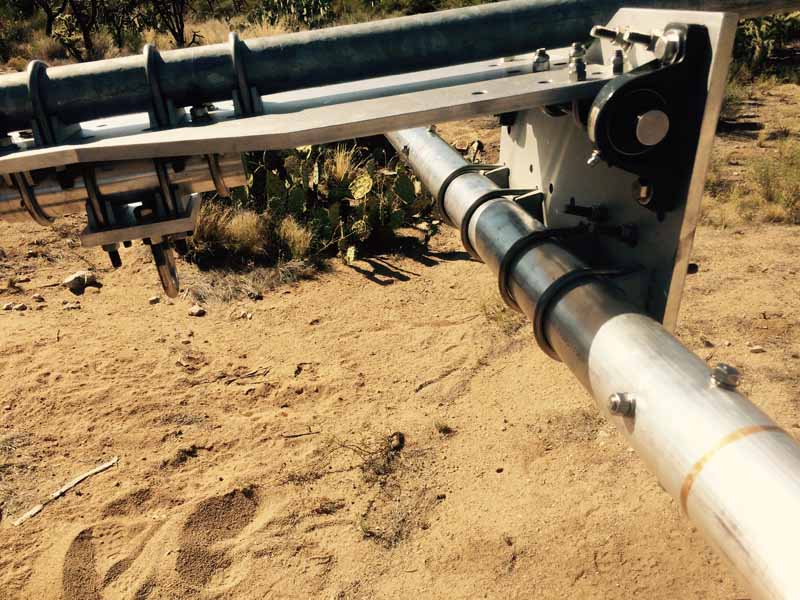
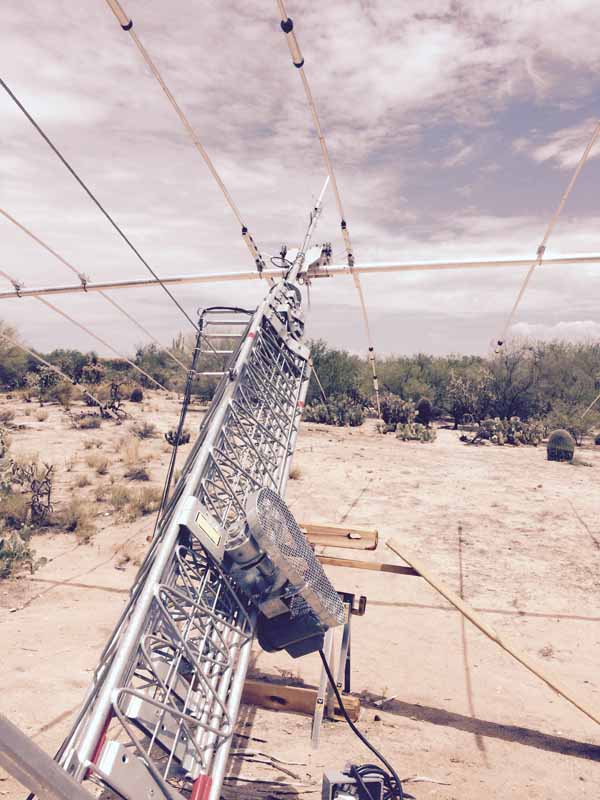
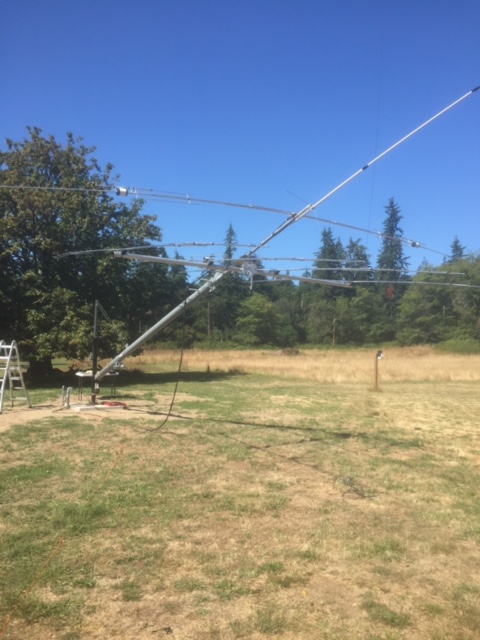
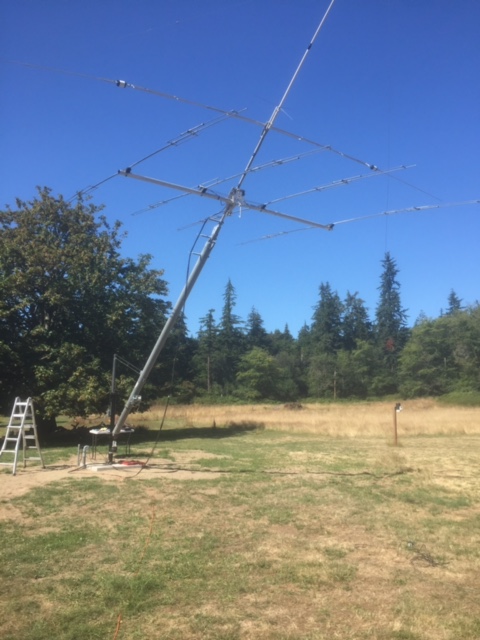
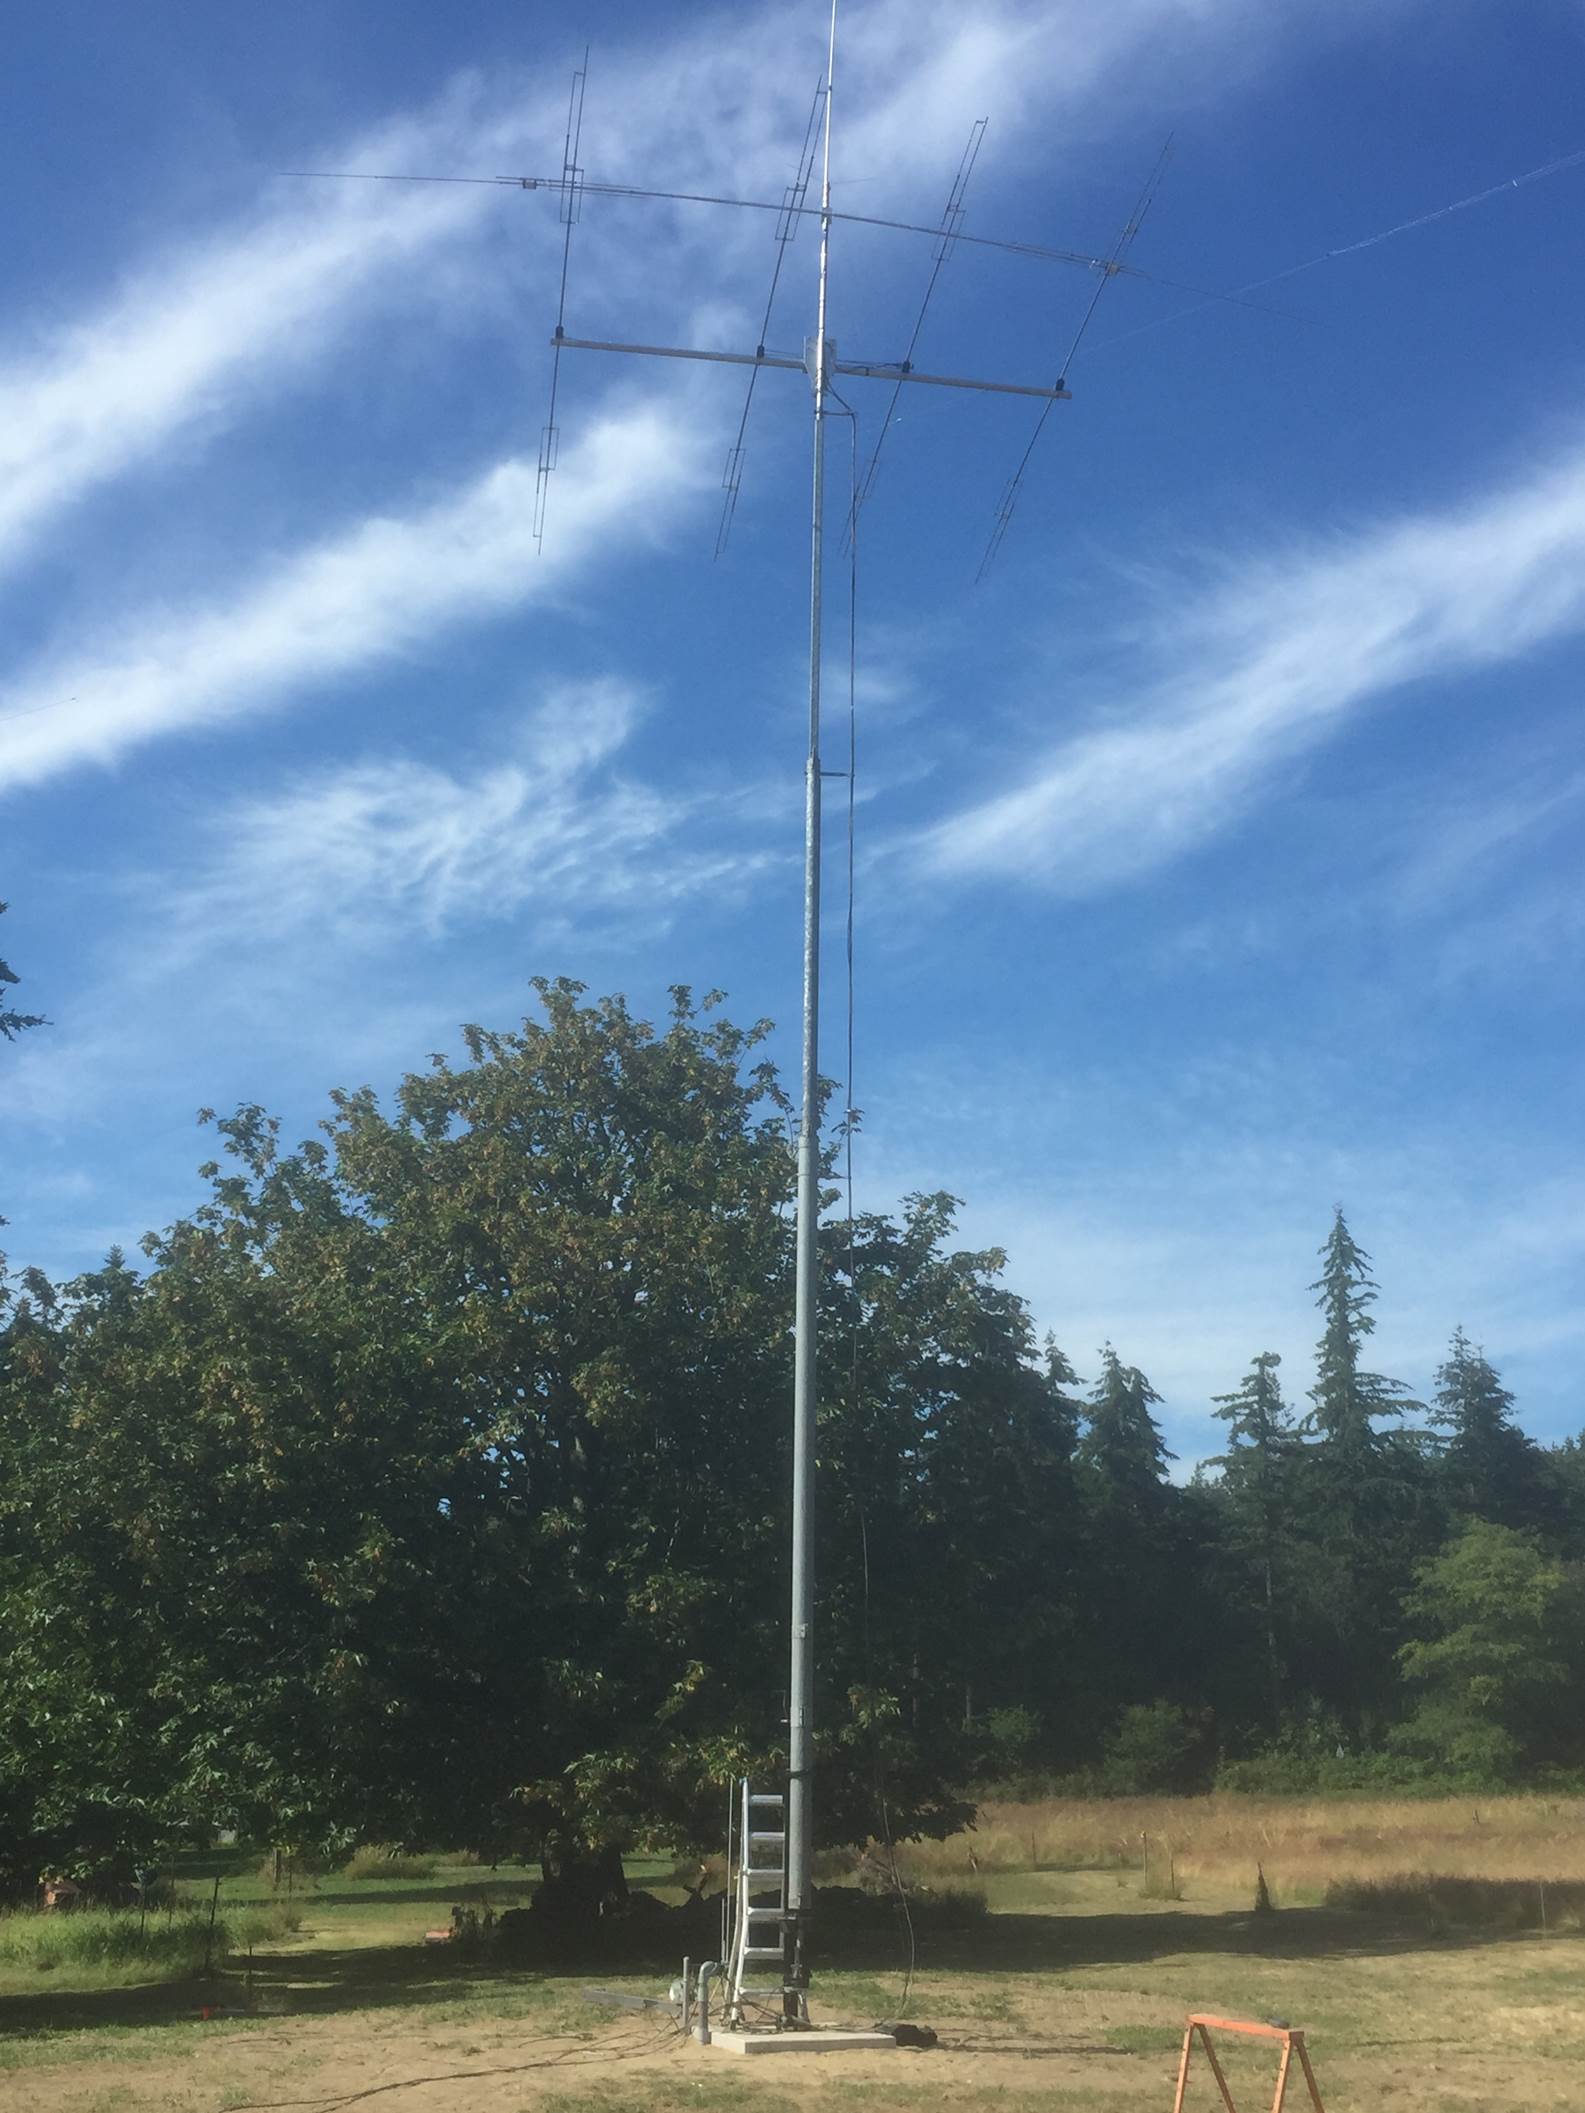
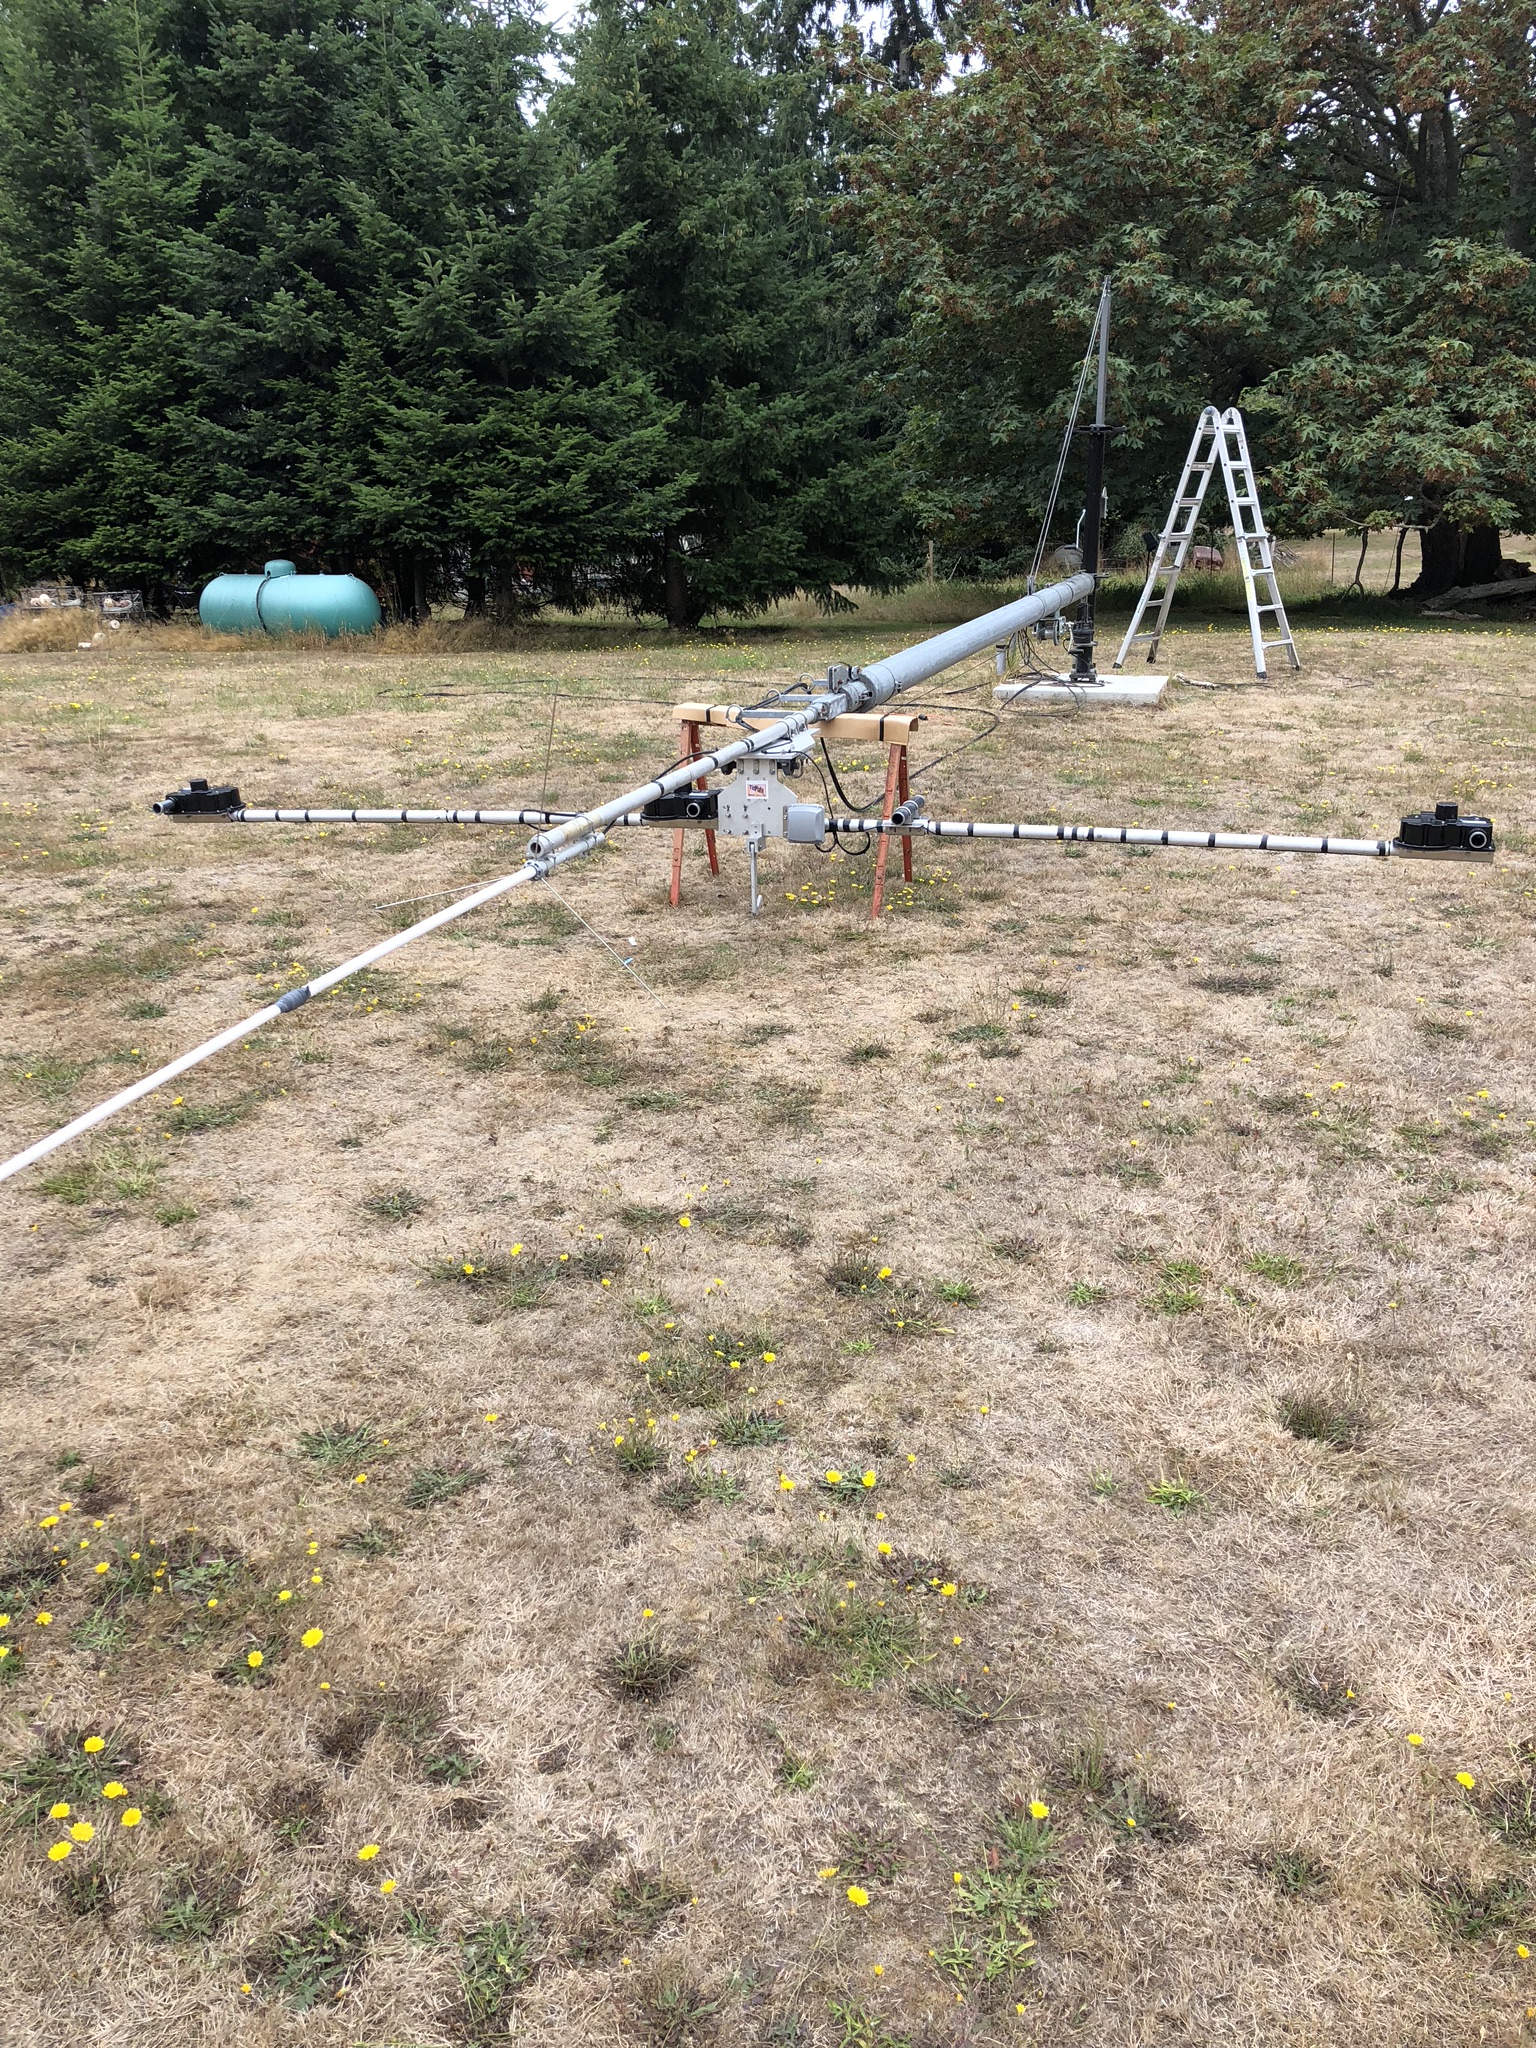
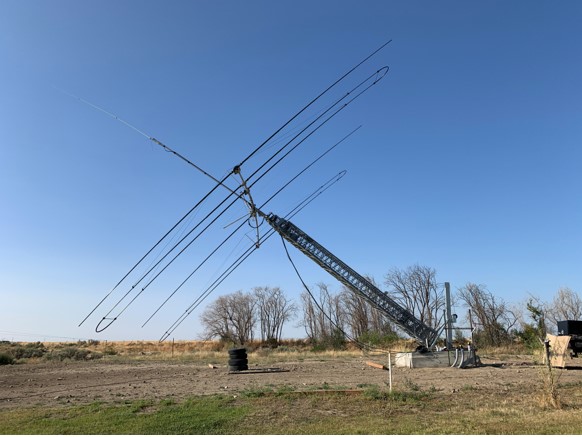
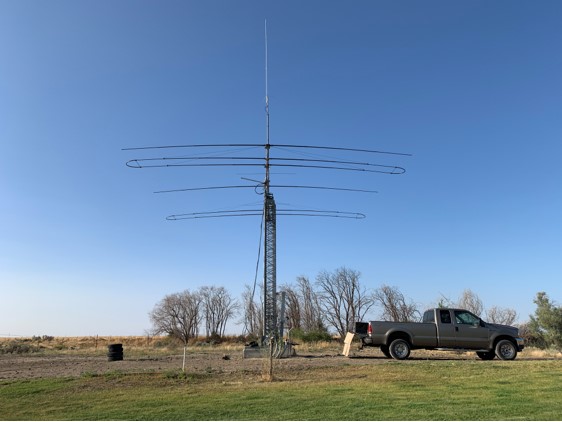
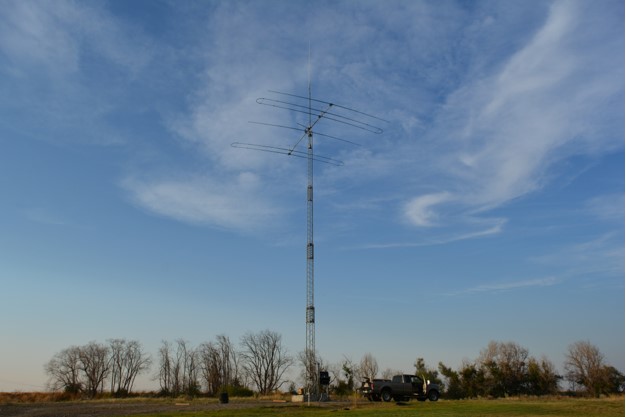
Here are a few Pics of my Steppir 4 EL with 40/30 installation, to a TX-455 tower.
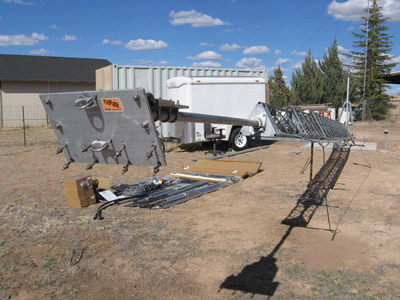
All of the antenna installation was done on the ground by myself.
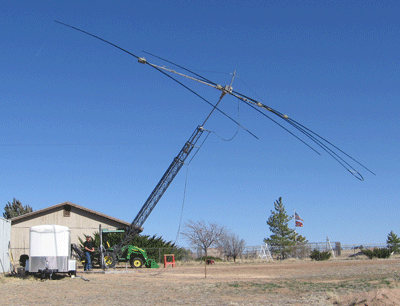
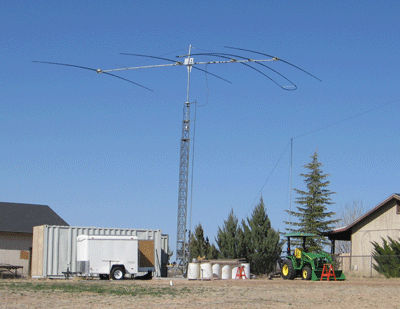
Thanks for a great idea and product. The only thing I added was a couple of 12v winches.
73! Tomy Ivan kf7gc
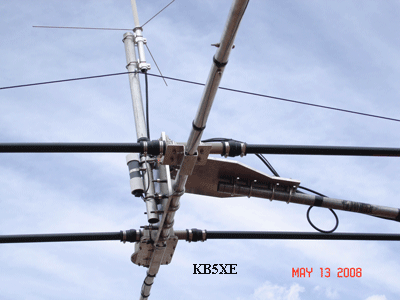
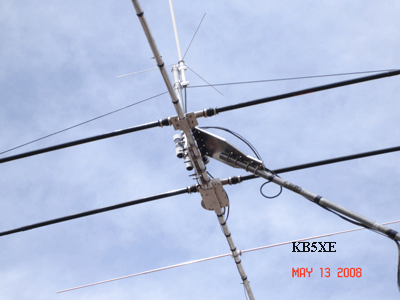
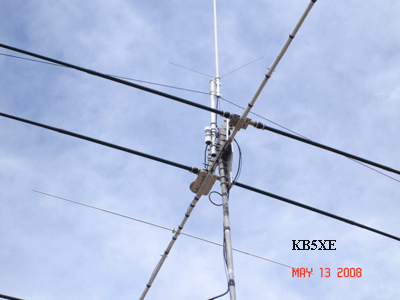
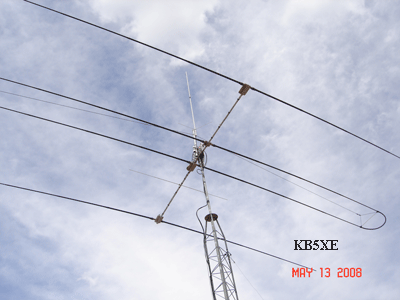
I sure am proud of the plate. I no longer have to climb tower. It is a Rohn 45 fold-over.
Happy Days are here again !!!!!!!!!!!!!!!!
Owen KB5XE
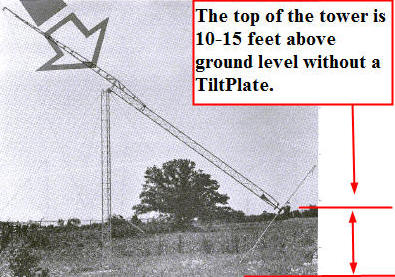
Tower in the tilted over position Tower coming up at 45 degrees
Tower in the operational position Tower in the operational position
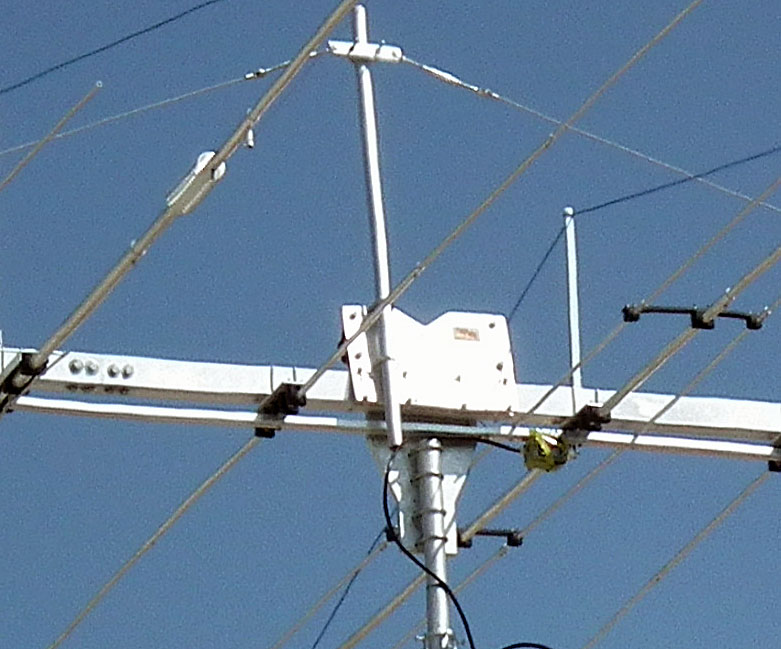
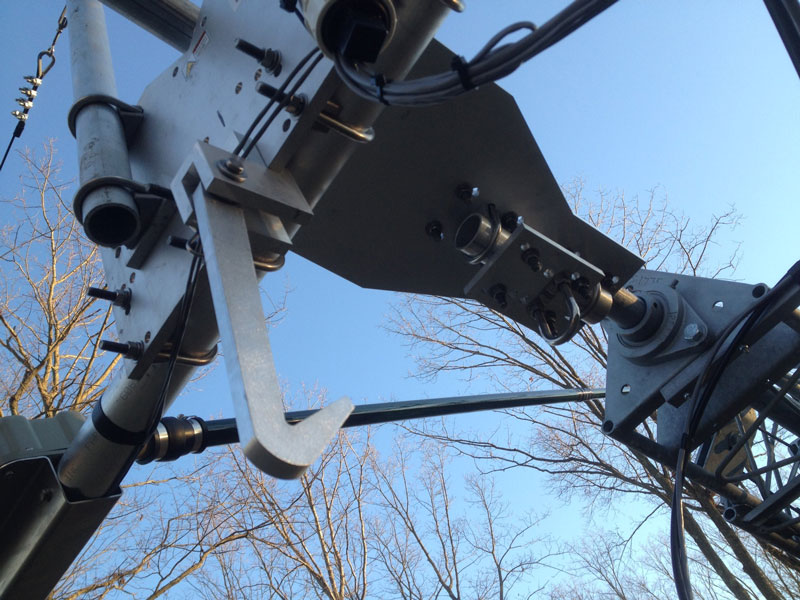
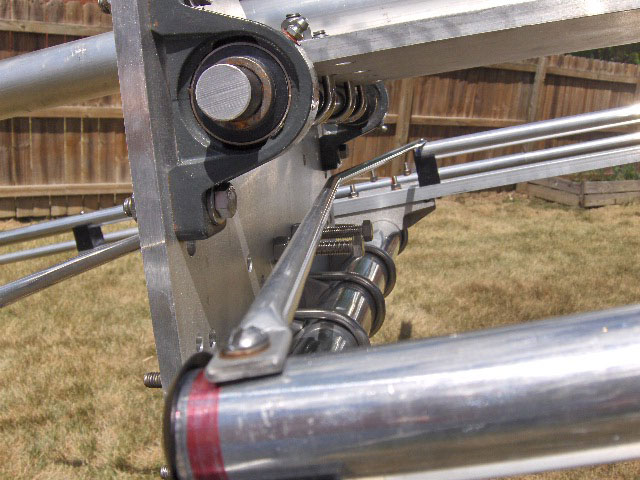
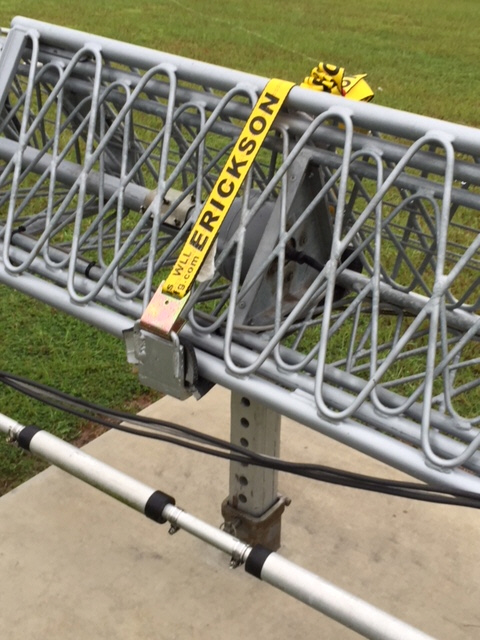
KARLock (named for Kirk / K6KAR and his suggestion to offer an optional lock) .
Ready to raise.... Time for some DX
I wanted to take this opportunity to thank you and congratulate you on a great product. Your TiltPlate is built like a tank, with very high quality parts and precise machining. It was a pleasant experience to have the U-bolts slide so easily into their respective holes. Your design has resolved a long standing problem that I've suffered regarding antenna operation and maintenance.
I bought the MA850 tower so that I would never have to climb a tower again. However, when lowering it to ground I had to stop at the 18' length of my antenna elements.
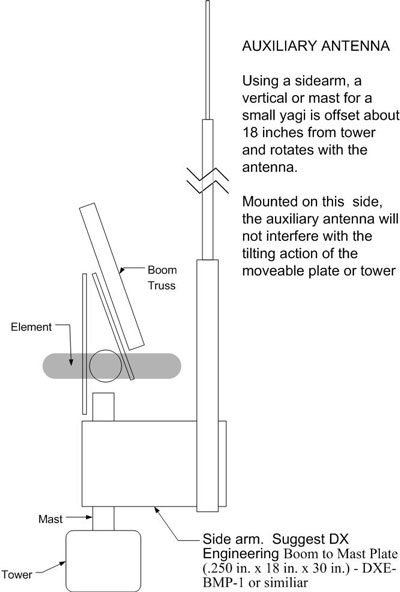
Dave wanted to continue using a tall vertical in addition to the yagi/TiltPlate but didn't have enough mast to use the sidearm option and came up with a different solution. Dave also provided the "remove a tube" method of leveling your antenna during installation.
Thanks for your ham brand ingenuity!
Dave's homebrew solution to attach a mast that is independent and rises above the TiltPlate. He constructed a mount that lets the TiltPlate boom truss rotate between the cage that supports his vertical mast.
The sidearm option noted in the FAQs attaches below the TiltPlate and would have required a new mast about 2-3 feet longer. And in Dave's case, cutting and lengthening his cables.
Joe / WDØM has a great web page with more pictures and commentary about his TiltPlate installation. Here are a few shots, check out his web page for more.
LEFT - Joe's "last time on a ladder" removing his antenna and getting ready to install the Tiltplate.
RIGHT - The TiltPlate is on the mast and ready for his SteppIR
Joe enlisted the help of his XYL Deb for the installation. She installed the U-bolts as Joe lifted the antenna in place.
Another successfull TiltPlate installation on a very small city lot.
73 Gunther VA3GA.
(check out the weather vane on the boom truss, a neat idea...Al)
Jerry has TiltPlate #1 and was one of the
beta testers for the KARLock.
(You might know Jerry better as the SteppIR support Guru)
Hi, Al... I've had the tower up and down twice and the KarLock performs just as expected.
I definitely like the whole arrangement. I can tilt the tower over, do whatever maintenance or repairs I need to do without a ladder, and tilt it back up again.... all in a couple of hours, safely, and easily. That doesn't seem to be a lot, but believe me, it's HUGE. This is the tower and antenna set-up I always dreamed of, and the TiltPlate and KarLock just add the frosting to the cake. This set-up will enable me to independently take care of my own antennas and equipment.... in virtually any physical condition, as long as I can move around.... for as far into the future as I can imagine.
73, Jerry K3BZ
MY NEW TILT PLATE IS UP AND DOING WELL.
I HAVE A DIAMOND DUAL BAND ABOUT 17 FEET LONG ON TOP. WE OFFSET IT TO
MAKE UP FOR THE OFFSET OF THE TILT PLATE AND HAVE HAD NO PROBLEM WITH THE
TILT PLATE DOING EXACTLY WHAT ITS WAS DESIGNED TO DO.
I AM VERY HAPPY WITH IT AND THANK YOU FOR THE PRODUCT AND HELP. I DIDN'T LOOK FORWARD TO HAVING TO CLIMB A 20 FOOT LADDER OR THE TOWER.
The tower is a MA-850 and the antenna is a Steppir 3el with the 40/30 add-on.
Show here in the retracted position.
By the way, we have had some pretty strong winds at the lake and it's operating just as advertised. Good Job!!!
73s, Bernard Vatz / WA4OEJ
Stackable Tiltplate and KARLock with lower antenna installed....
Click for more pix of the stackable TiltPlate

Pic shows the wind blowing at about 30 MPH with gusts as high as 40 MPH (Note the trees). This is why I bought the KarLock. Pic shows the antenna really tilting but the KarLock engaging. It works nicely.
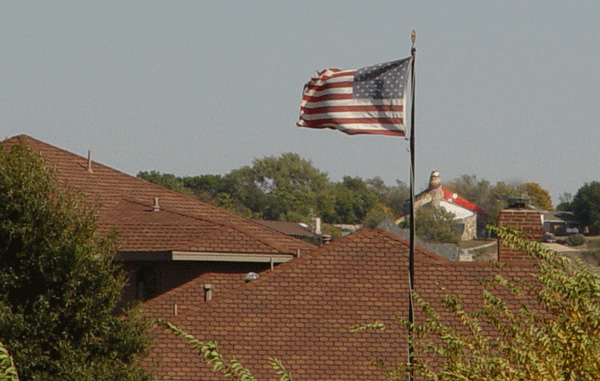
This, is a picture of my wind speed indicator, my
neighbors flag. Yes sir it was blowing that day. God Bless America!
73, Bob / WA5VSK
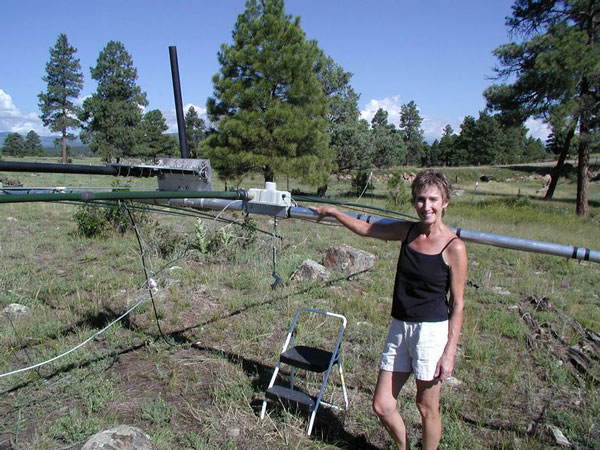
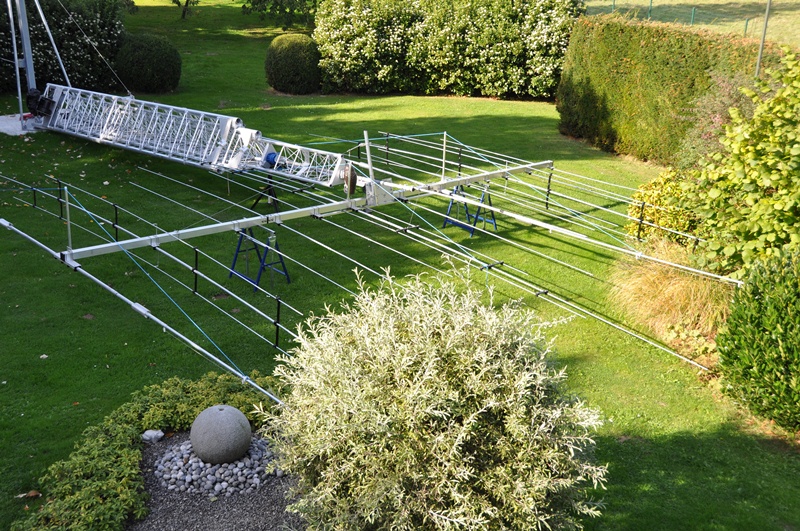
Gary has a 2el SteppIR, and U.S Towers MA-850. He is using a stackable TiltPlate with another antenna up above in this creative application and use of the garden gate. Who says you need a lot of room for a tower and beam.
Below is a picture of his project in process.
The SteppIR boom is in place, elements are next. Gary will have to raise the tower to just above the fence to install the far side elements.
Up and ready to raise....
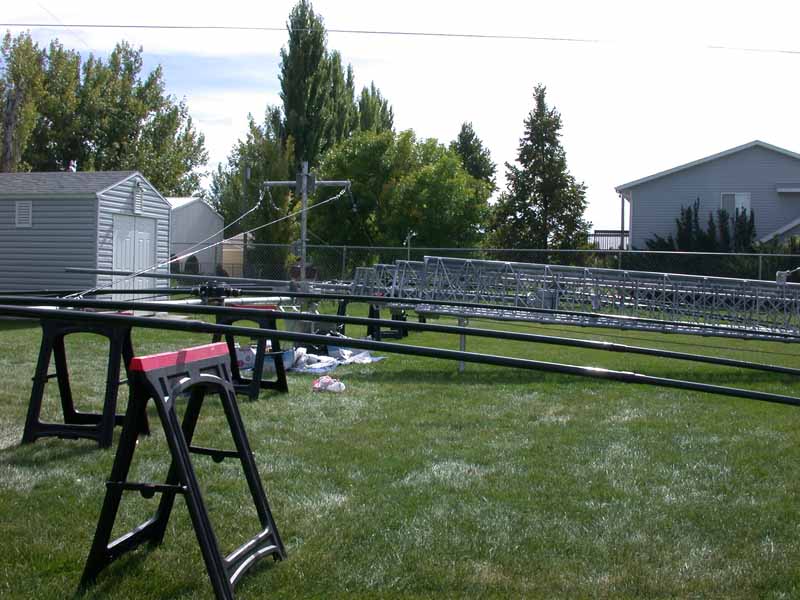
The KM1C project is
3 yagis on one tower
with 2 Stackable TiltPlates.
Bill provided pictures, commentary and video for his project. Anyone considering stacking TiltPlates should take a look at "The KM1C Project" page.
Bill says he was going to do wires and verticals and low power for the rest of his ham radio live until he spotted the ad for the TiltPlates. Read the rest of the story.
Click the PICTURE or link to go to "The KM1C Project" page.
16-Dec-2011 -- Update from Bill
"The day came that I had to do some maintenance on my OptiBeams: Easily done by virtue of my TiltPlates. Cranked the tower down and over, did all the work by myself, cranked everything back up. No tower climbing. All antenna work done at chest high, ground level, except for the 6 meter beam. That required a 2-step step ladder, because it does not have a TiltPlate and the boom is just out of reach from the ground. This was far, far easier than the beam maintenance I used to do at 110' off the ground while strapped to a 2" mast. I would sell my pets and children before I would sell my TiltPlates!" .... KM1C
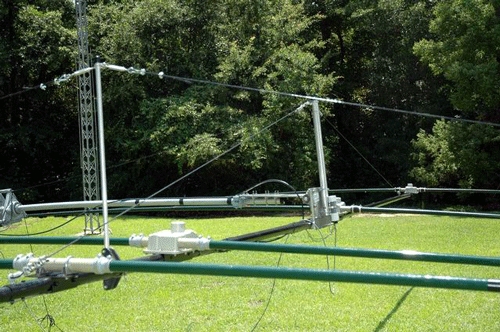
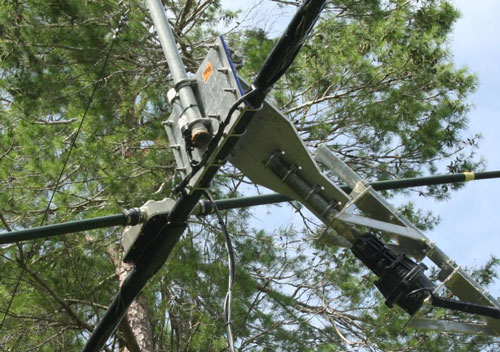
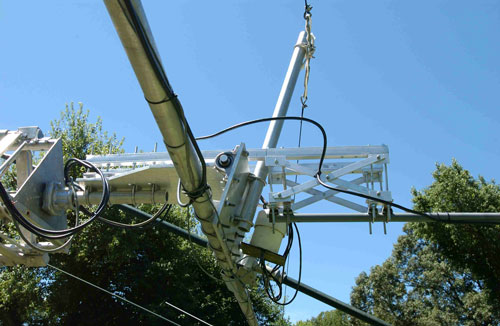
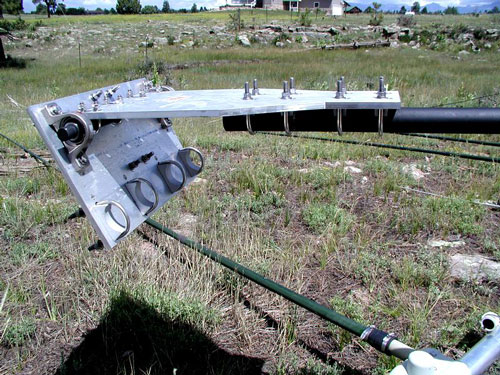
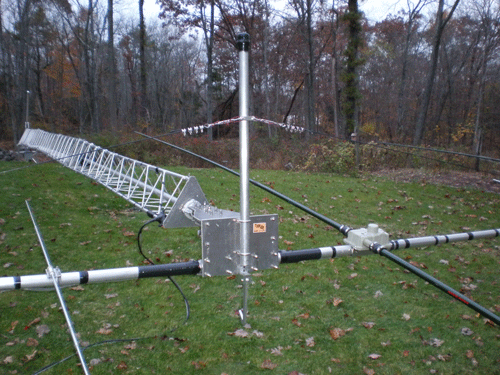
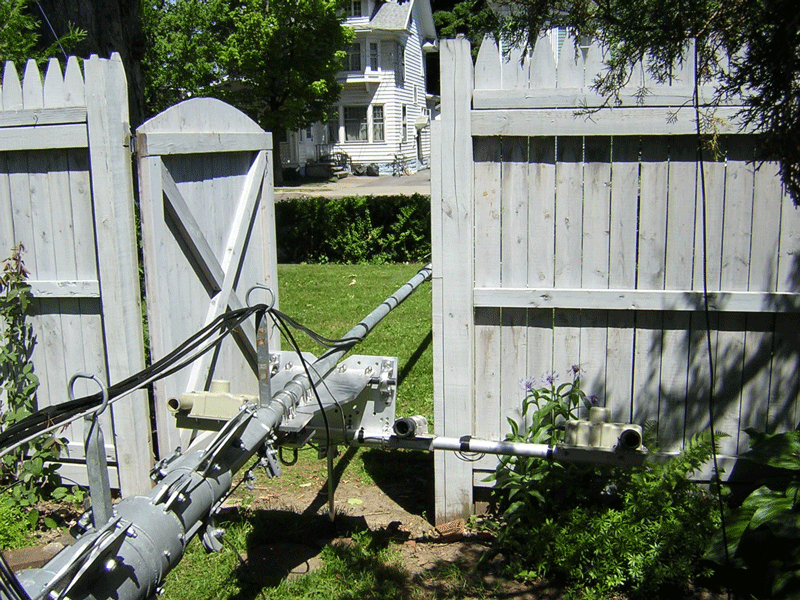
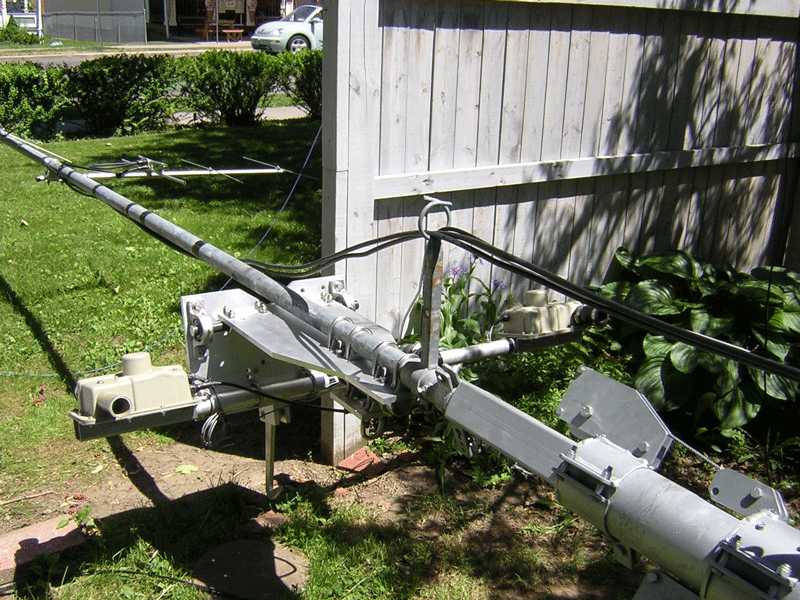
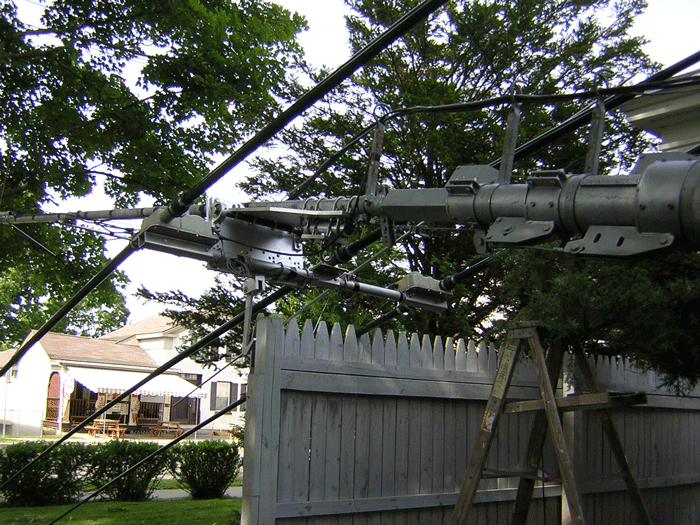
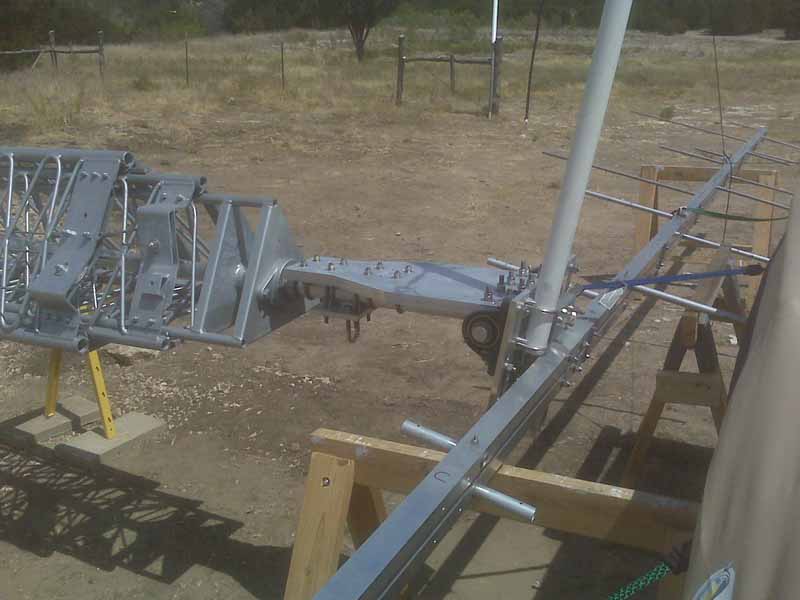
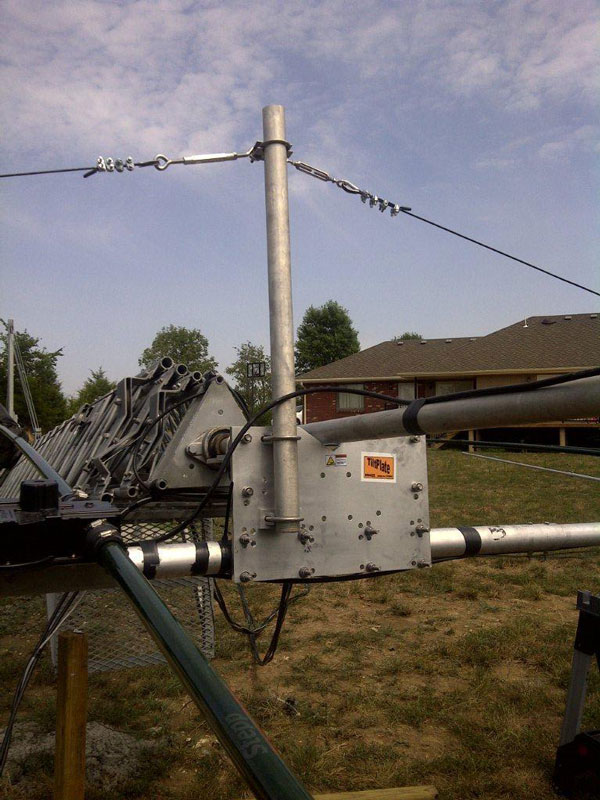
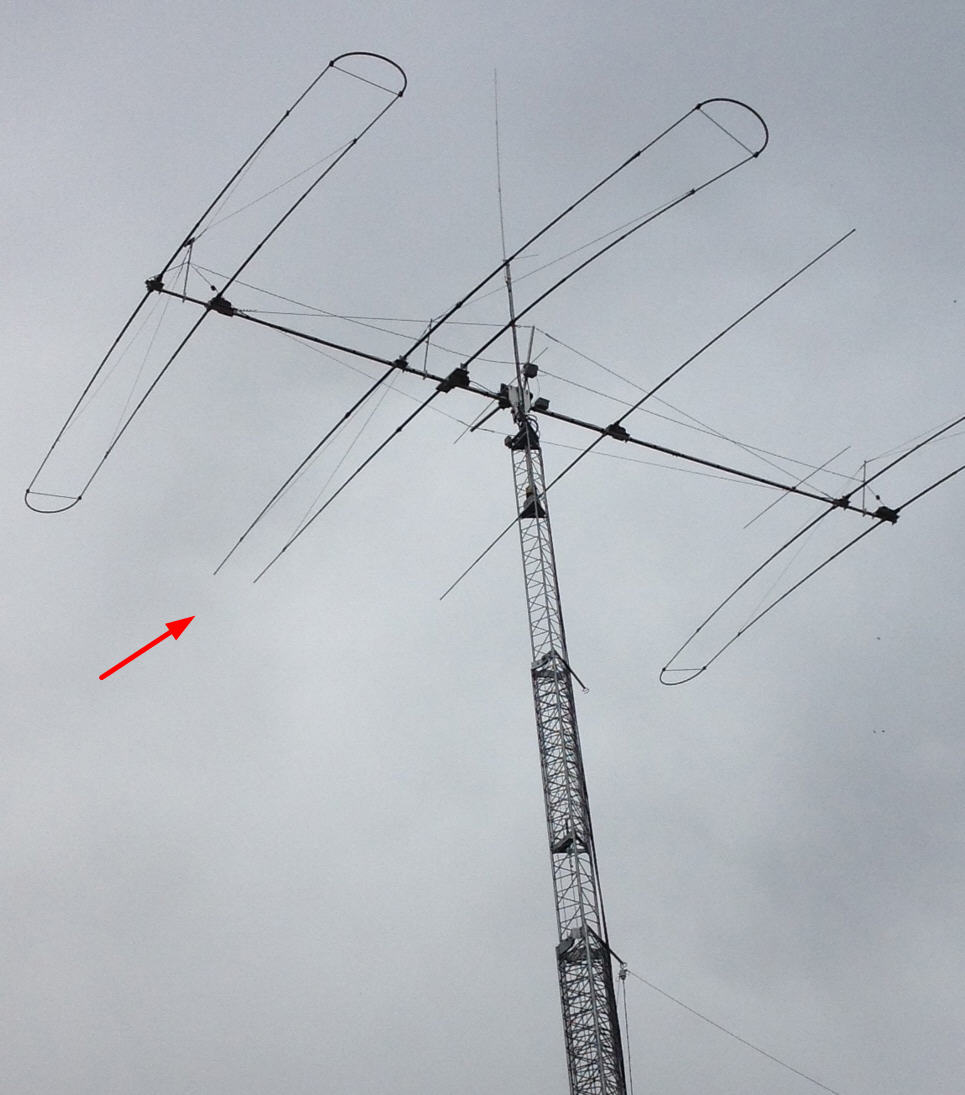
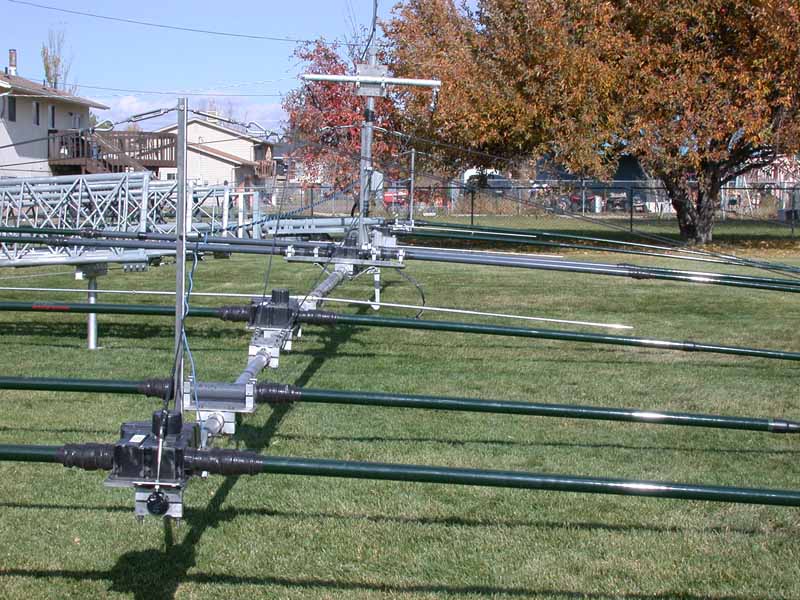
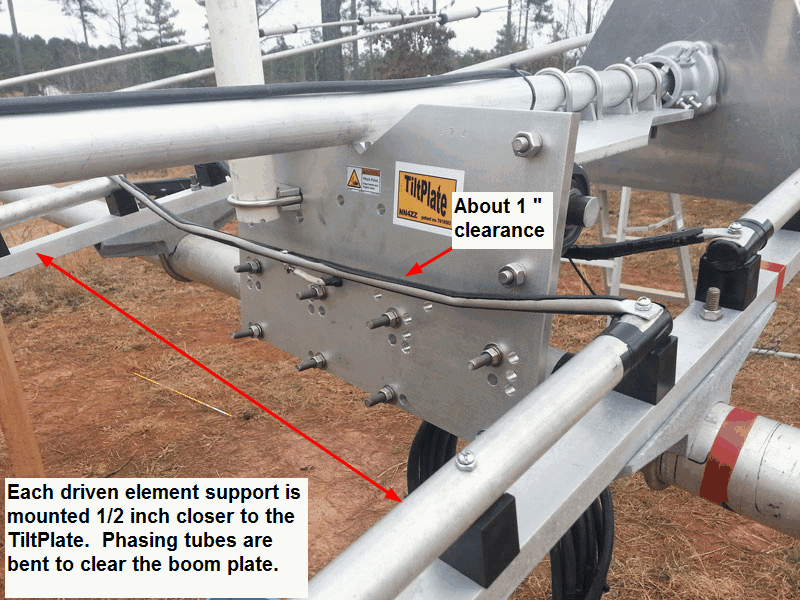
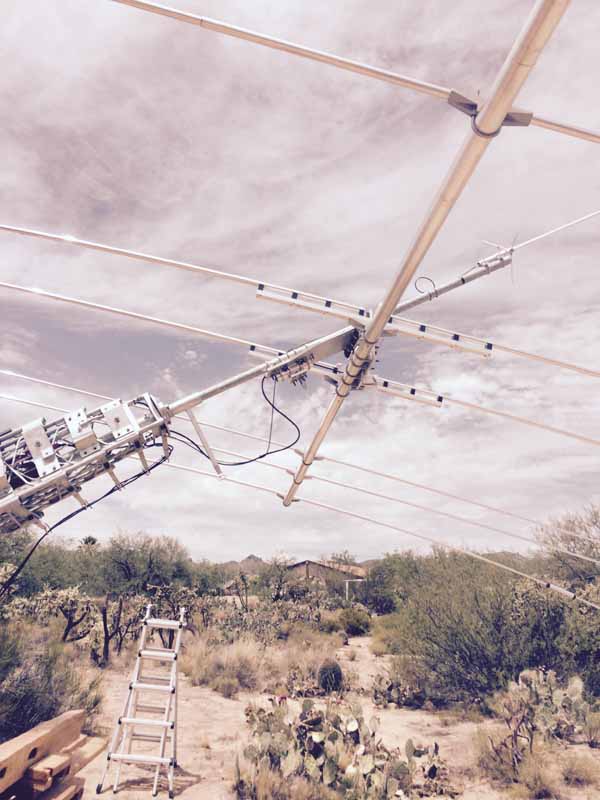
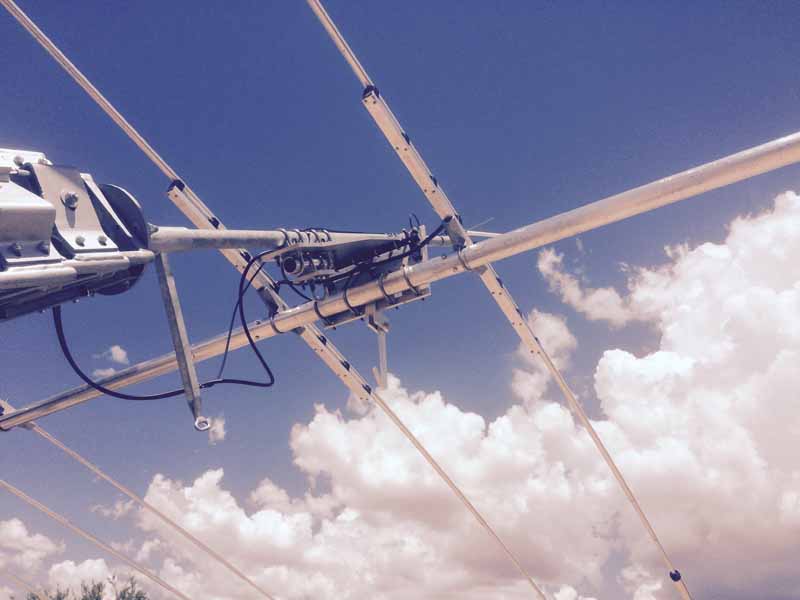
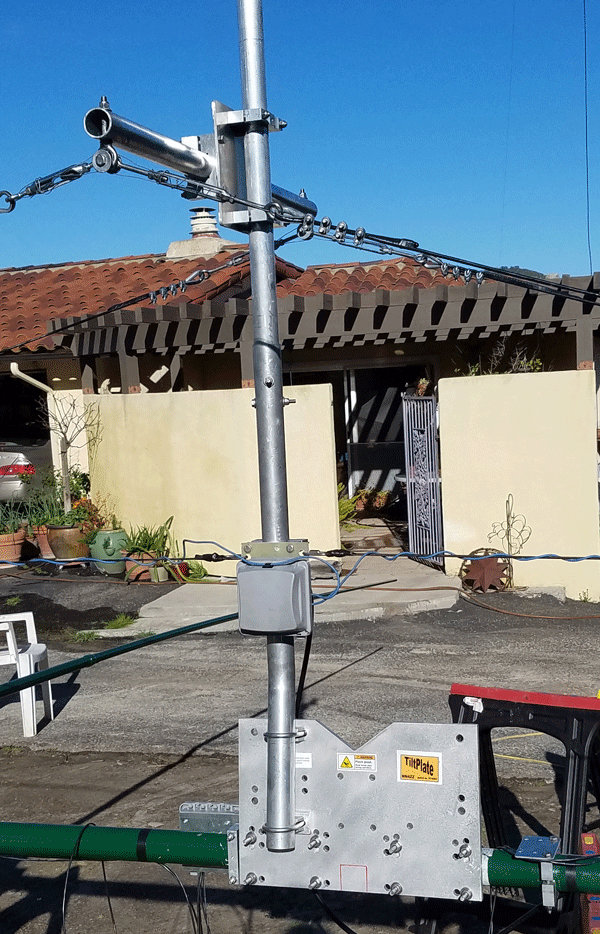
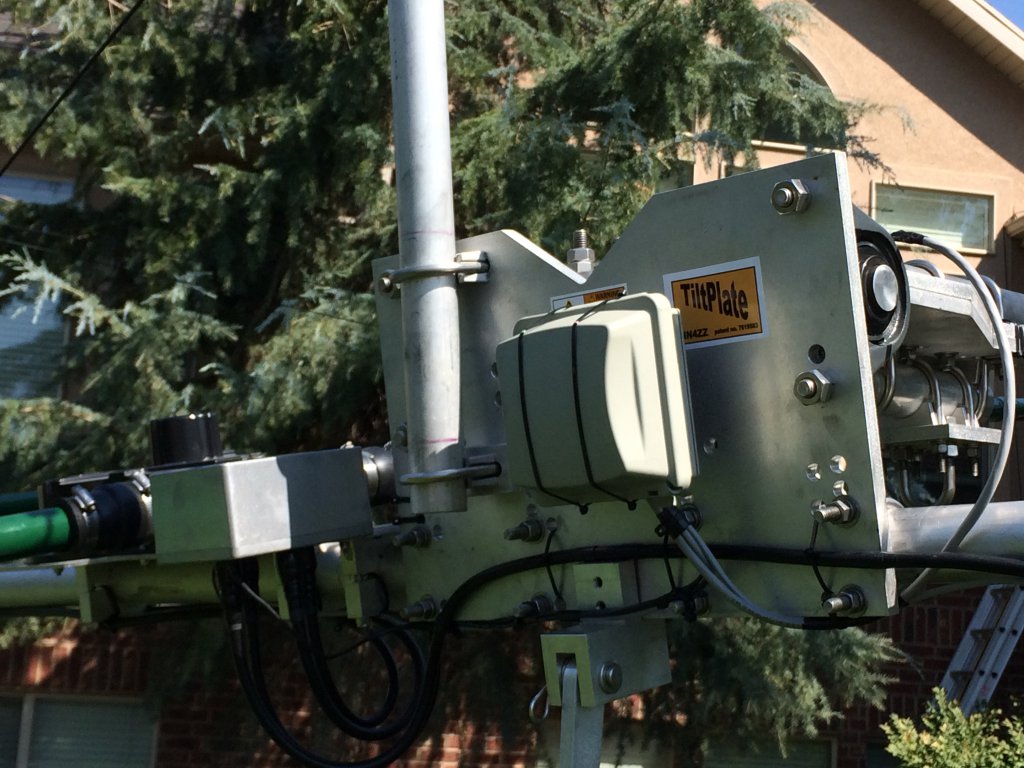
TiltPlate #002 and a Karlock with an M2 Log Periodic antenna. I originally bought this TiltPlate for use with another antenna and decided to add a KARLock and use it with the M2 Log Periodic shown below.
We found the "protractor method" spot on for the correct angle and to level the antenna.
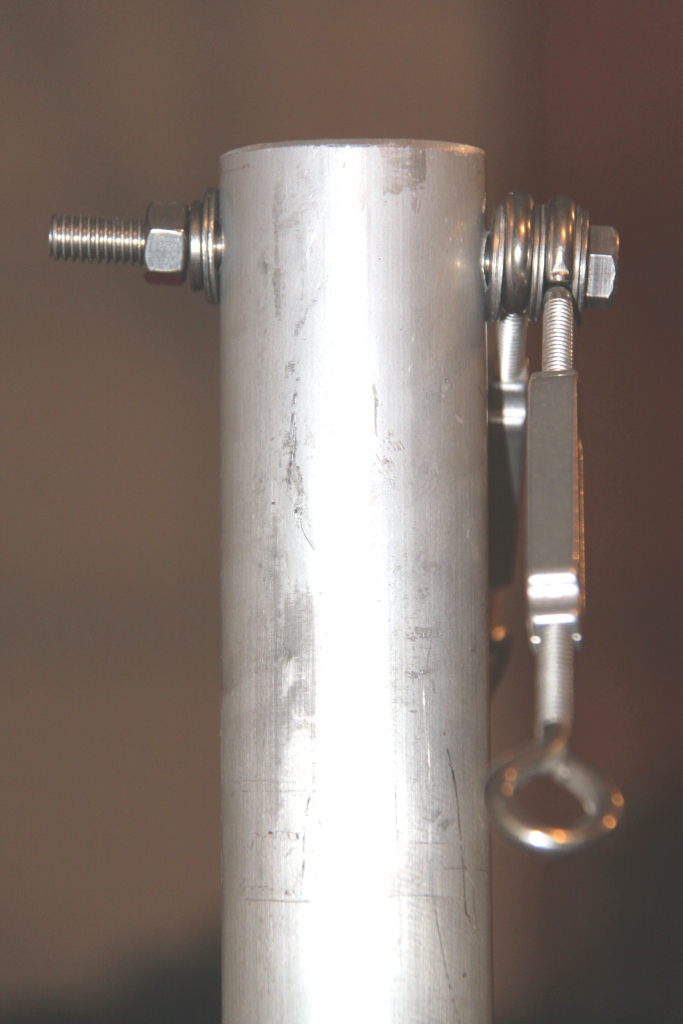
Hooking up the boom truss cables.....
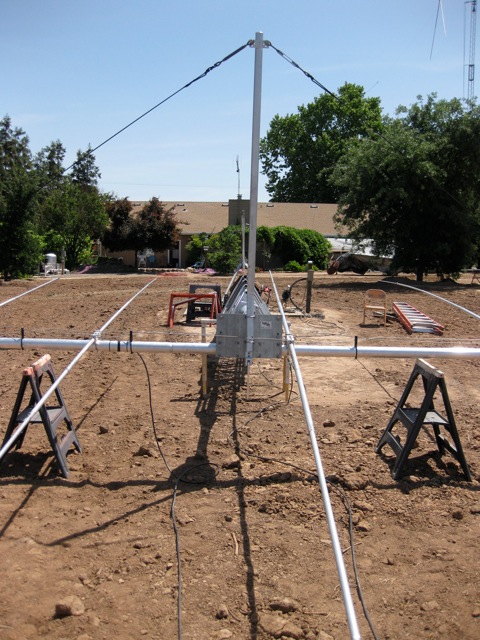
Front view.....
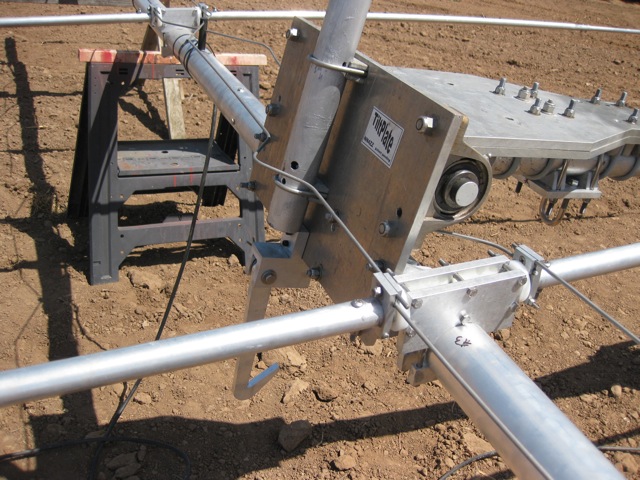
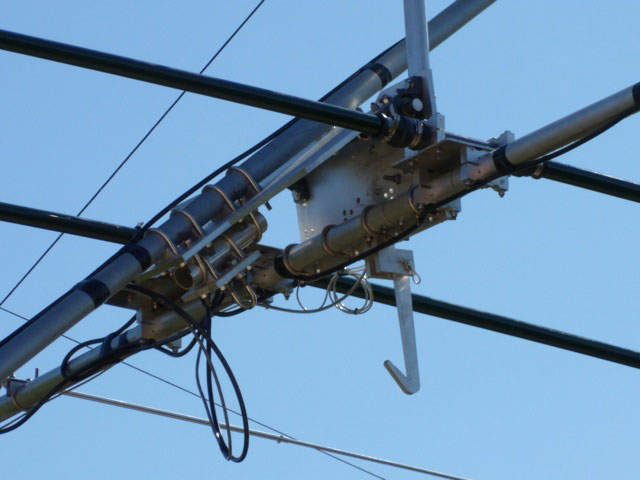
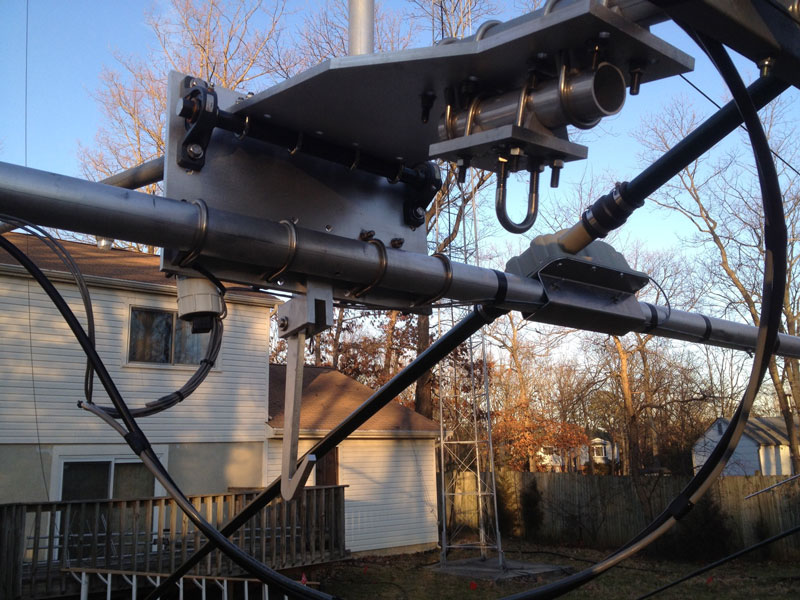
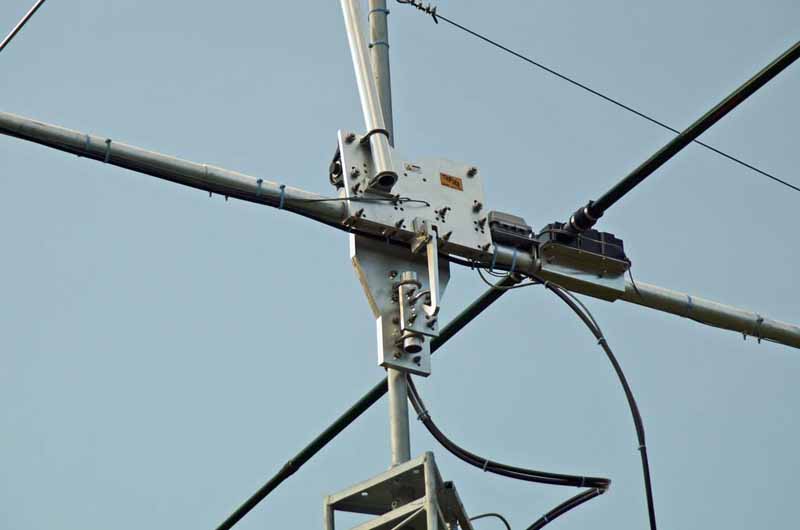
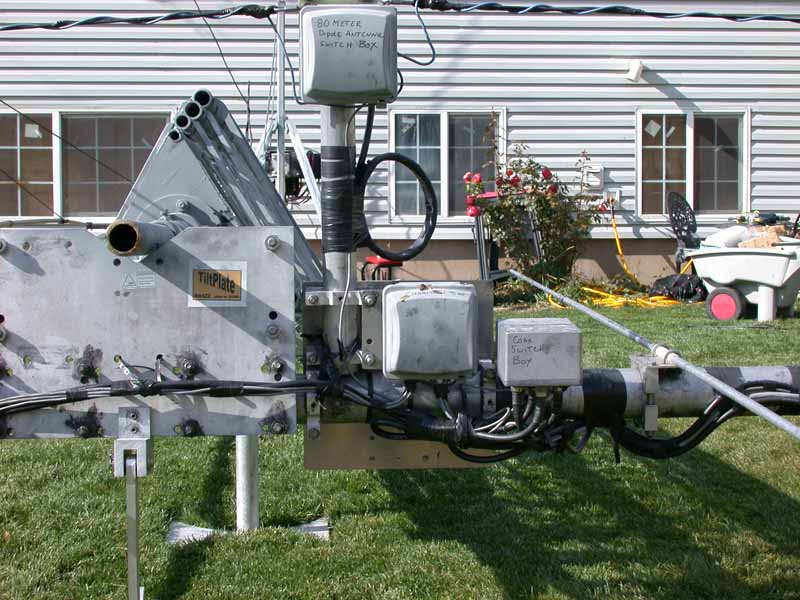
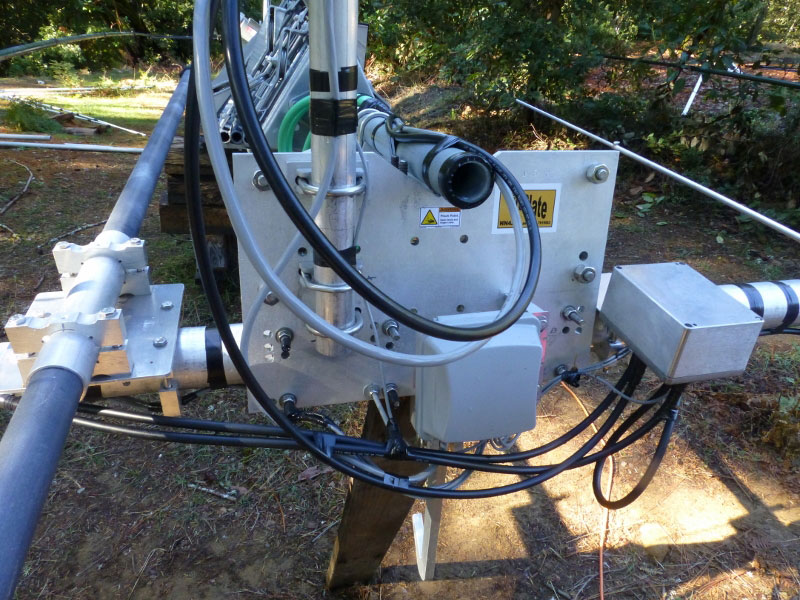
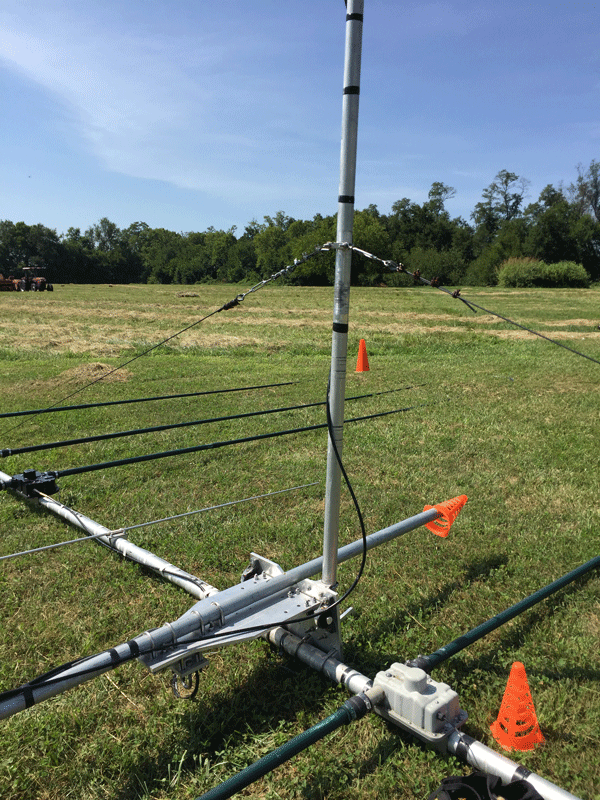
Note Phasing tubes routed around the boom truss mast.....
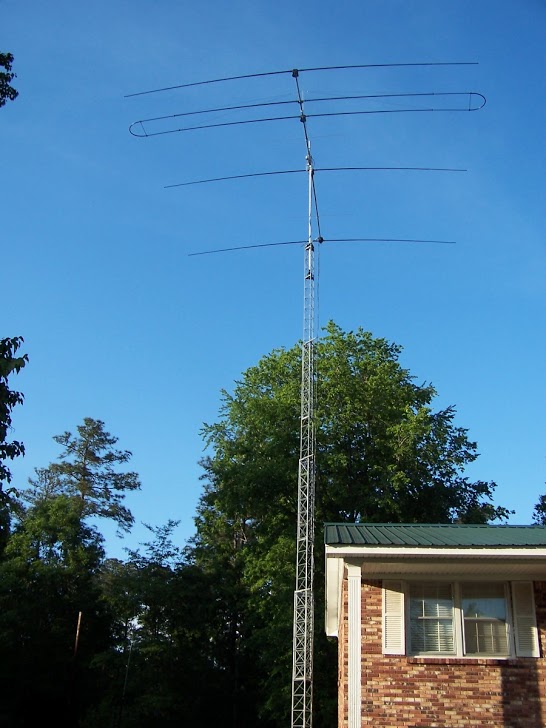
DreamBeam 18
Lou is using a stacked
TiltPlate with his Dream Beam 18E. He writes " My 6M
beam is not built or installed yet. That will fit about 5' above the
SteppIR on the main mast.
You have a well engineered
product. It works great.
73, Lou, W0FK
![]()
Lou
recommends that users with the stacked plate that also use the boom
support supplied by SteppIR for the DreamBeam 18E use the shim
supplied with the TiltPlate under the LOWER u-bolt. If a
longer mast is used, it probably won't be needed.
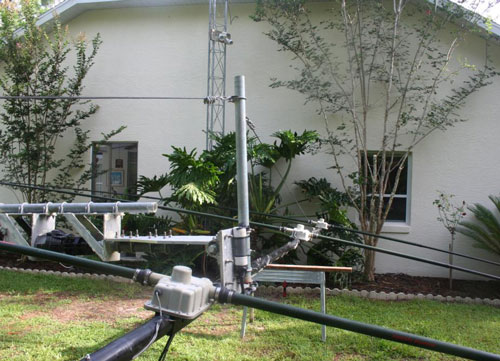
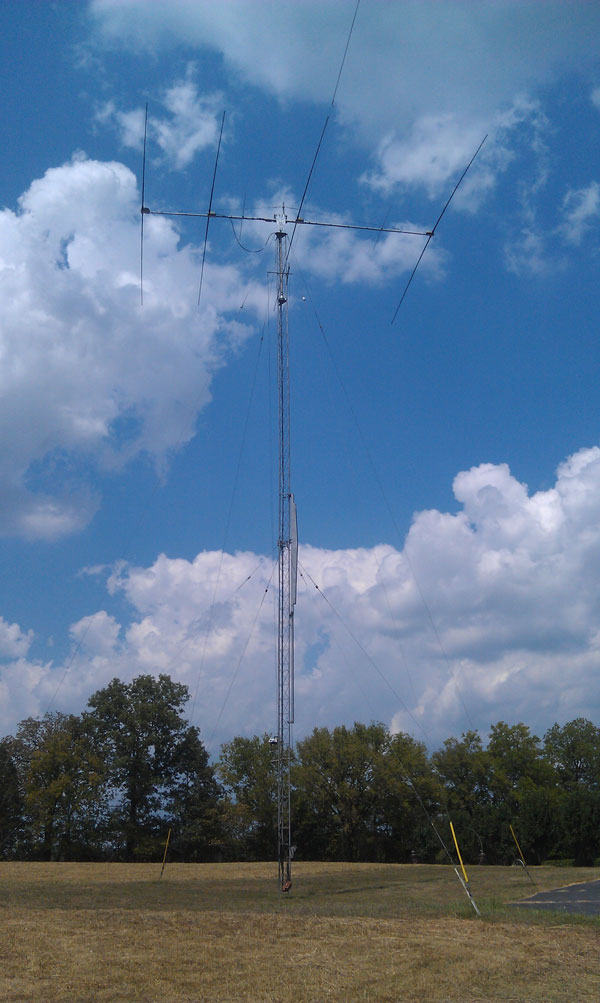
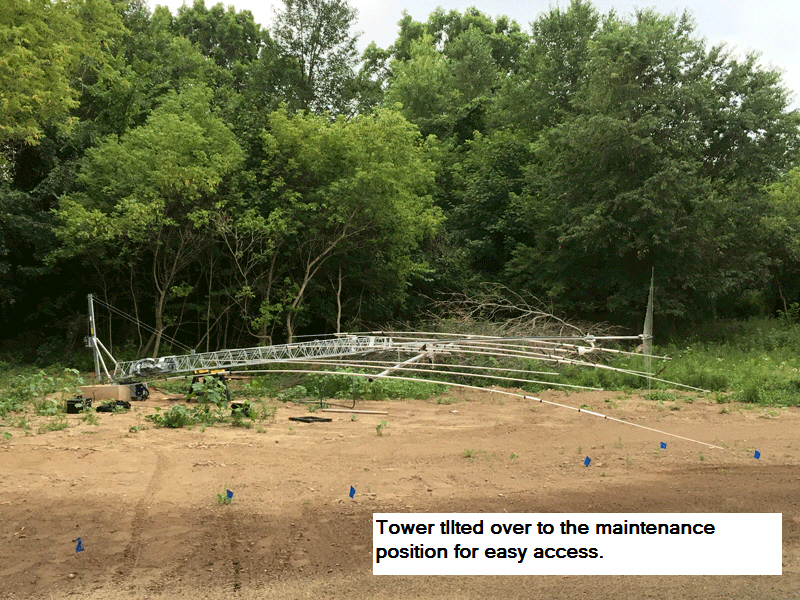
Mike has a 4el SteppIR installed on a Rohn 25 Tiltover tower. Click here for more information on using a TiltPlate with one of these towers.
With a TiltPlate installed the antenna comes down to ground level. Mike is going to send more pictures showing the tower tilted next time he lowers it for maintenance.
Here are some pictures of Mike's project. He says "everything went fine with installation and I’ve already had occasion to use it again."
DreamBeam 18
Paul says this assembly would not have been possible, in the small area that I have to work in, without the use of your Tiltplate. I sincerely thank you for a novel innovation and a quality product!
 Paul
/ W0PL provided some installation tips that might be helpful to others who are
assembling a DB18E on a TiltPlate.
Paul
/ W0PL provided some installation tips that might be helpful to others who are
assembling a DB18E on a TiltPlate.
CLICK for more information and
pictures
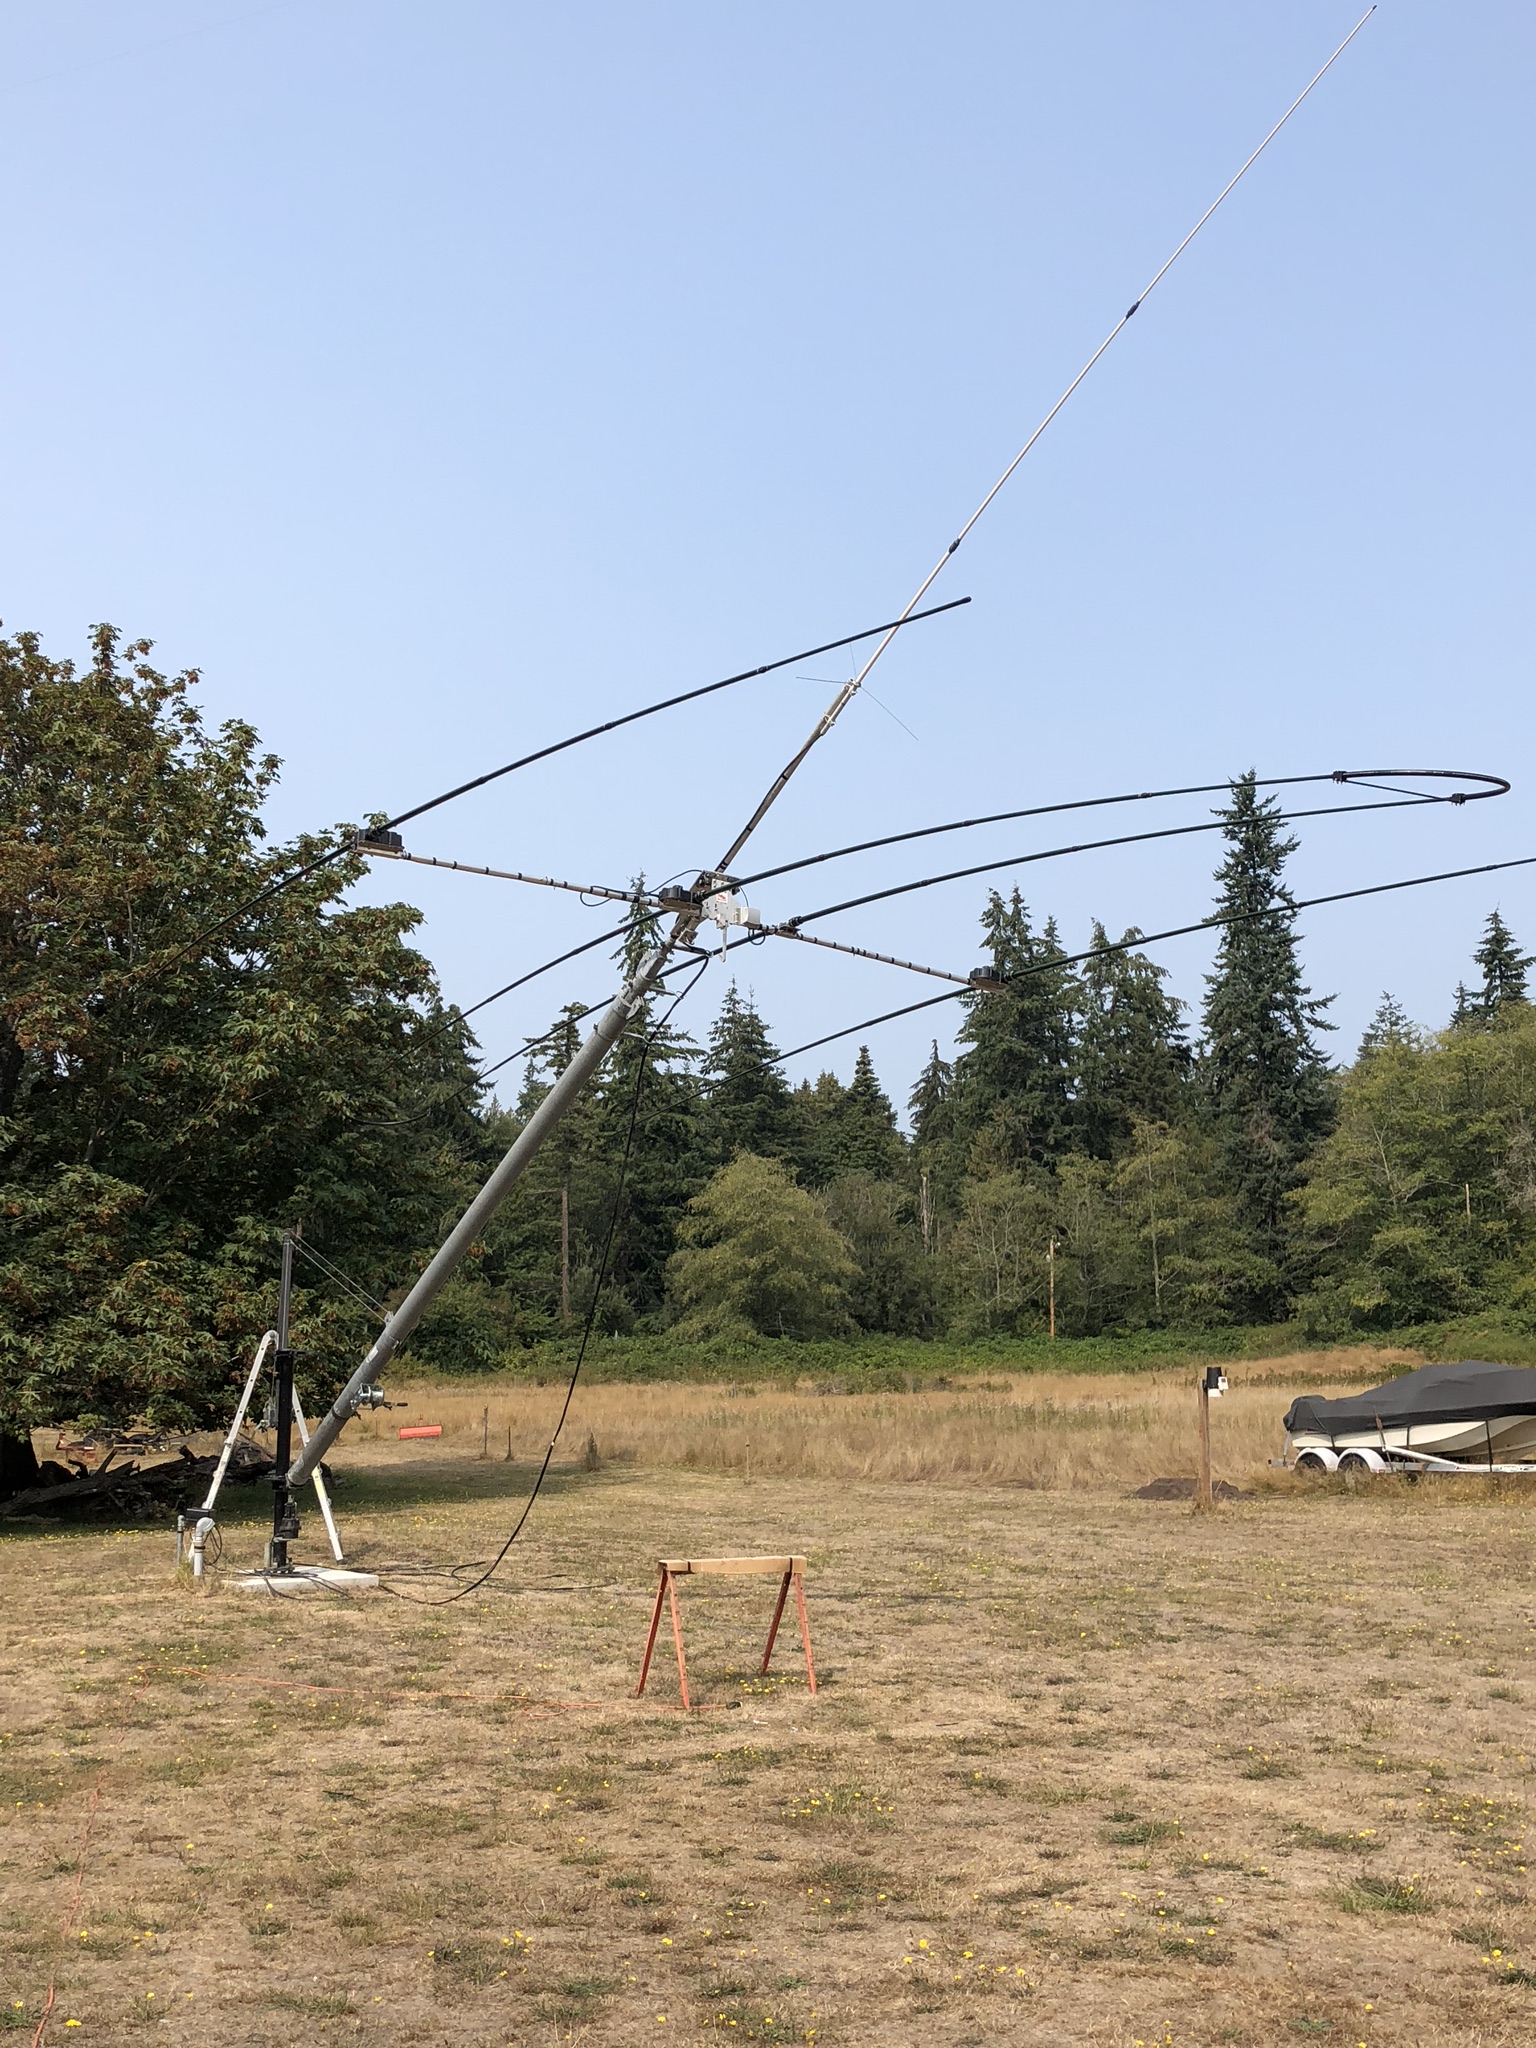
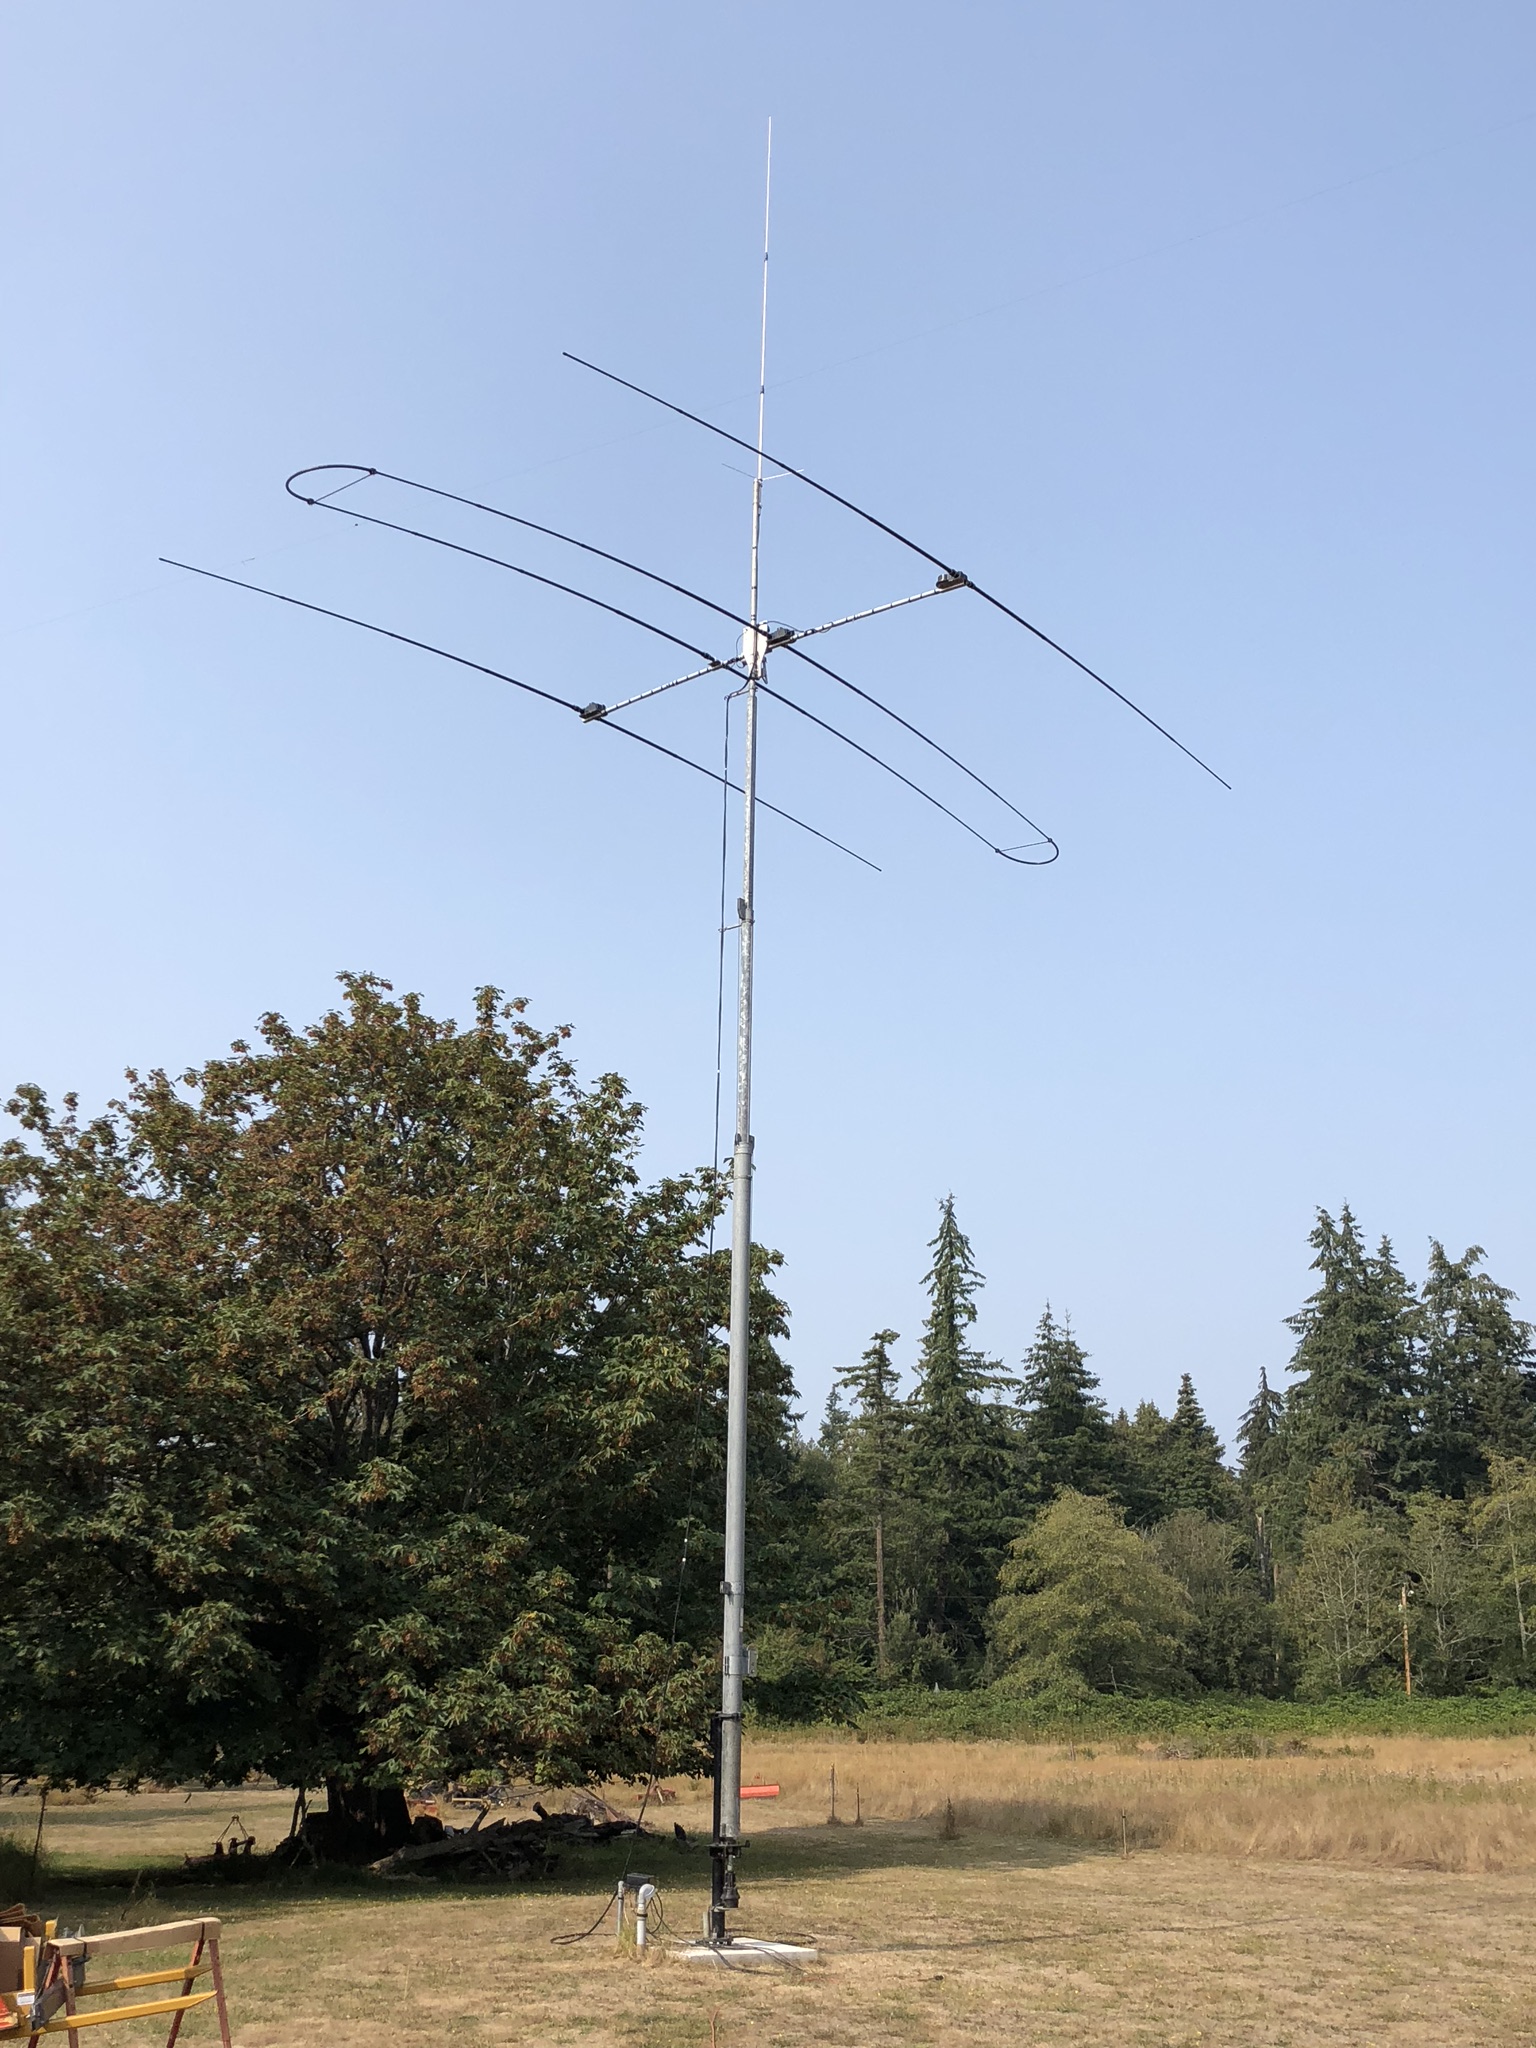
Tower ready to raise
View from the porch
Tower being raised....
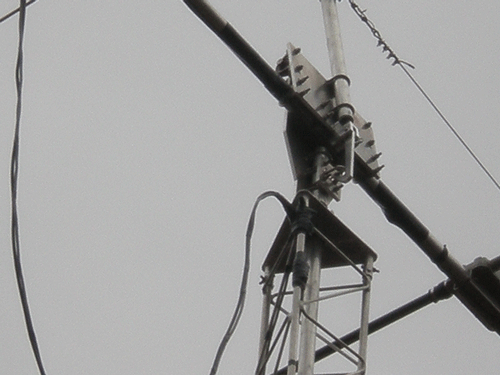
Closeup of the KARLock
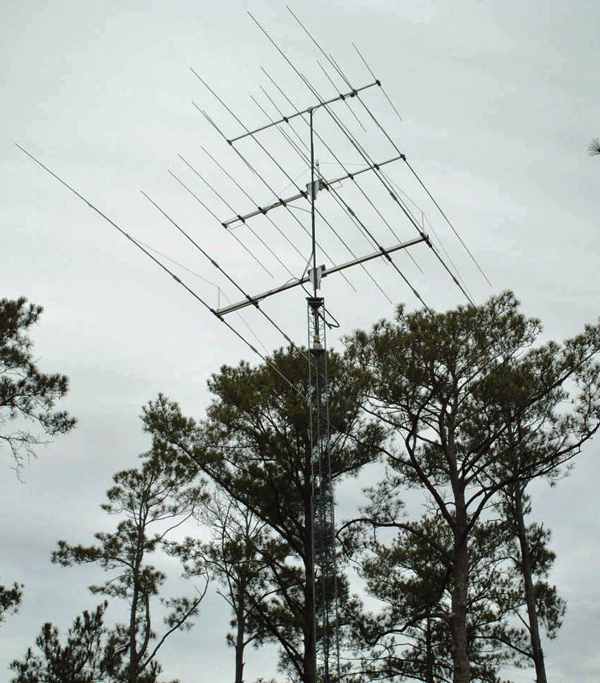
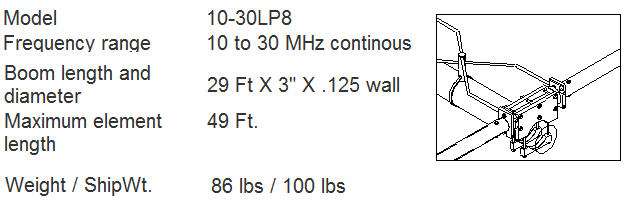
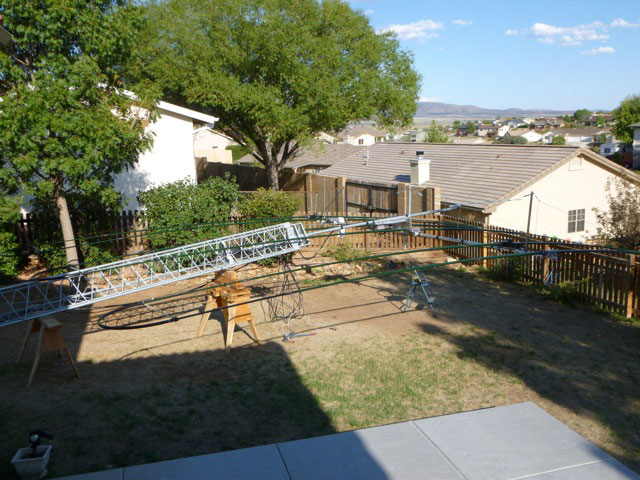
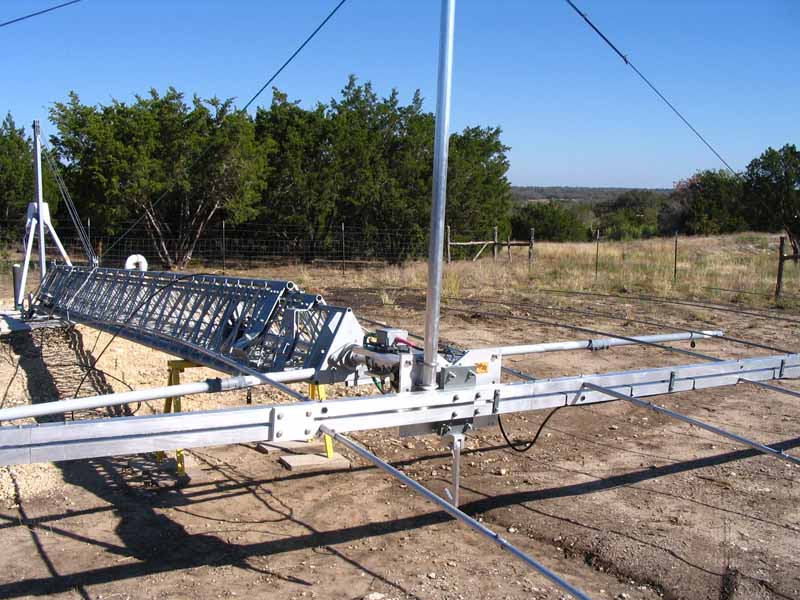
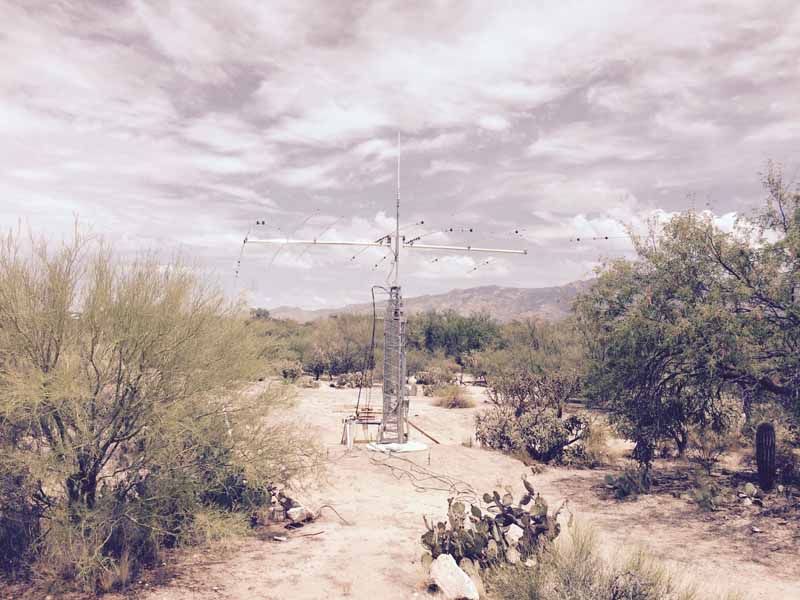
Russ / K4WB
Tennadyne T12.10-30HD
on an US Tower HDX-555.
Building
the antenna was a breeze considering the size – 36 foot booms with the longest
element reaching 53 feet. I attached the NN4ZZ TiltPlate to the mast, then the
T12 booms to the TiltPlate and built all the elements – right on the ground.
Very easy and no heavy lifting as it all sat on the sawhorses.
Thank goodness for Al’s TiltPlate. I built the T12 with the booms already attached to the TiltPlate and the tower in the horizontal position. Everything went together smoothly and it works great on all the bands

Click here for more information on
the Modification for the NEW Tennadyne HD
model T12 10-30 HD
TiltPlate
works great.... Thanks again for this great device.
73
Russ, K4WB
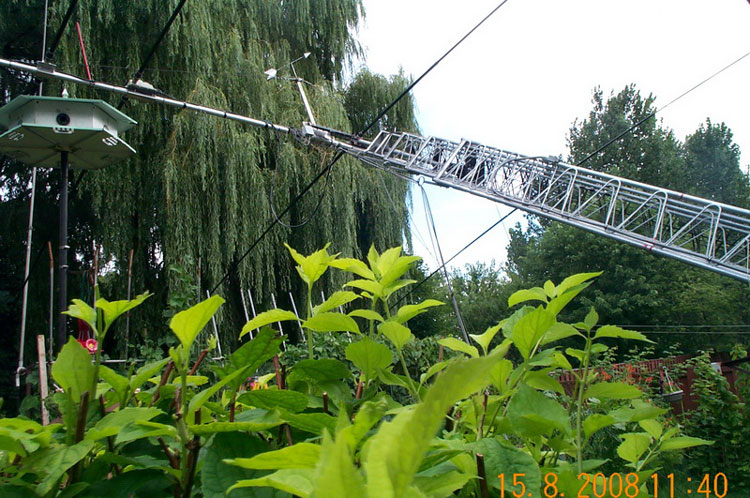
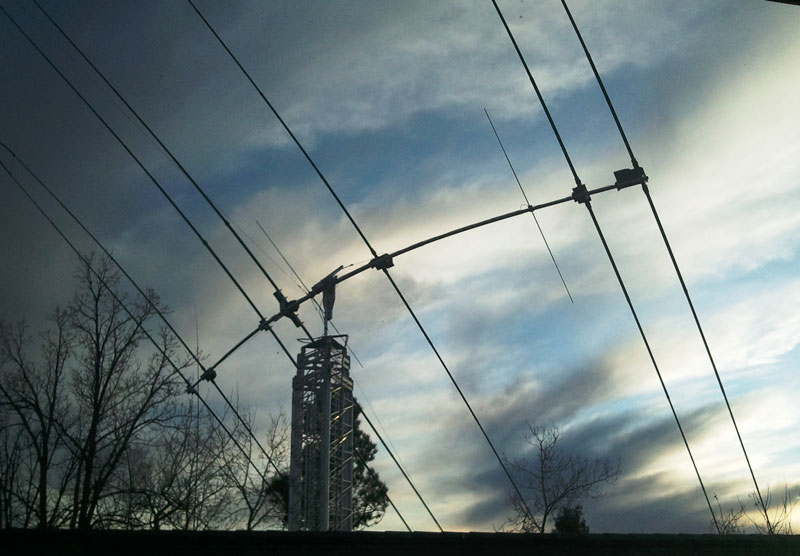
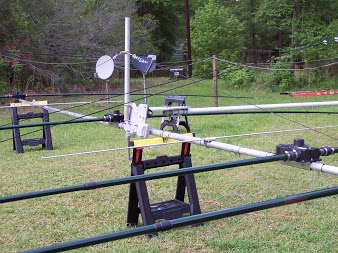
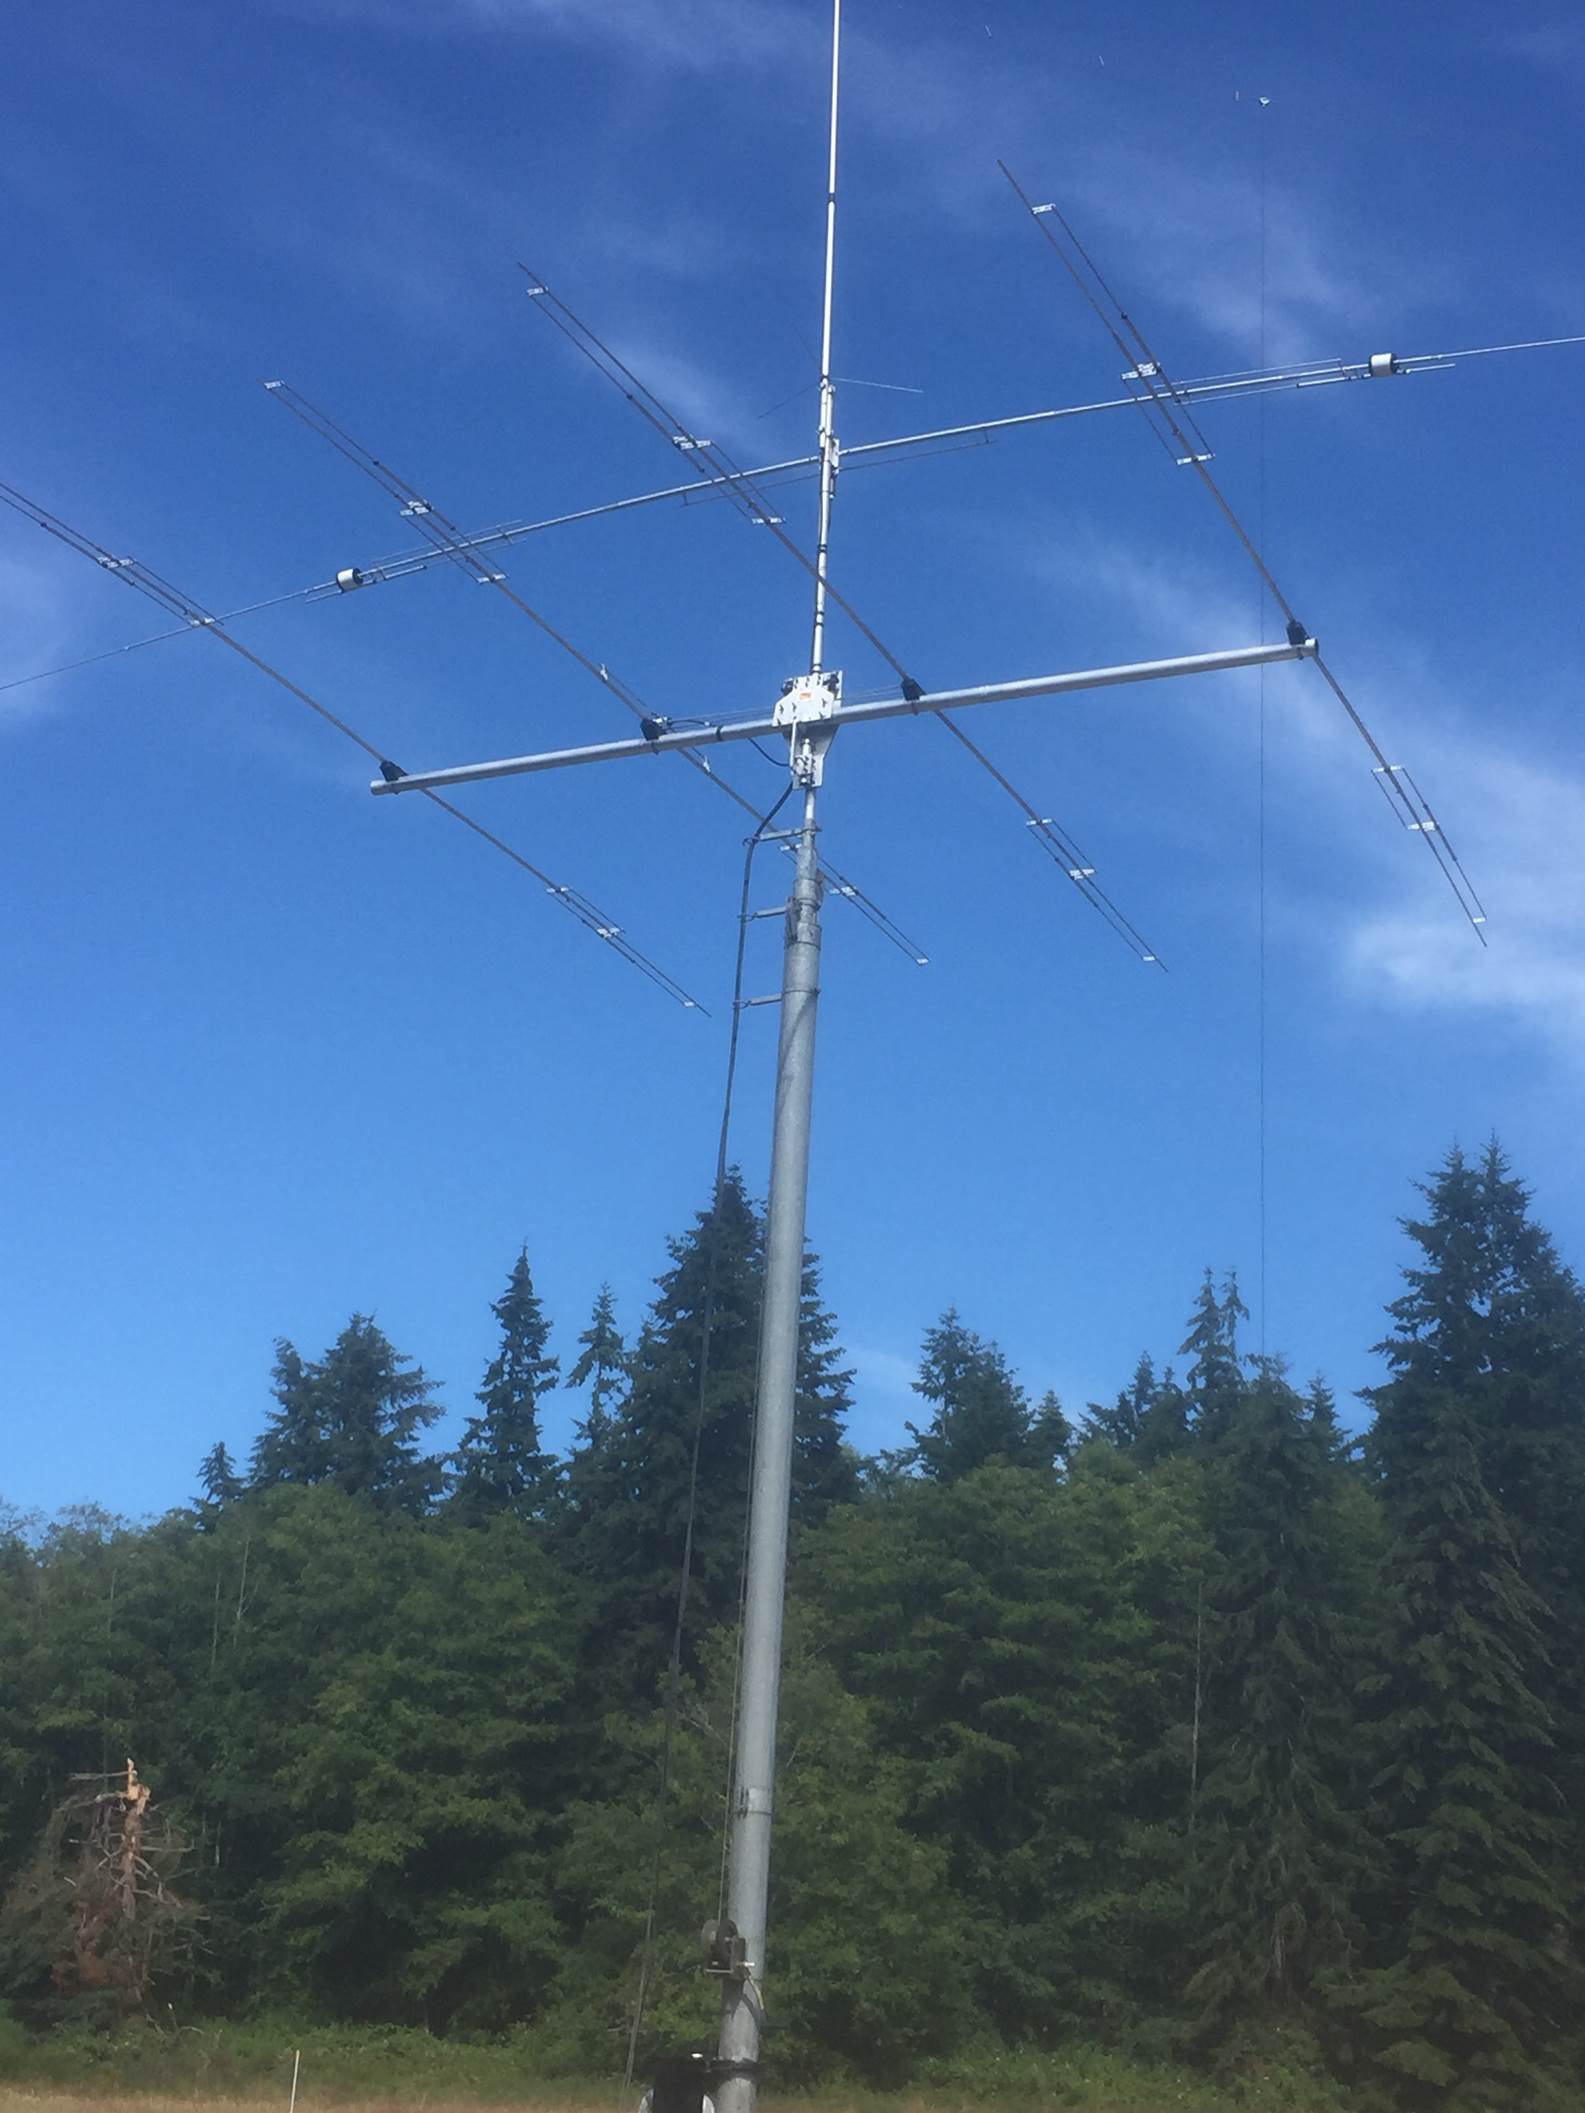
Jeff / W0JM
SteppIR Dreambeam 36
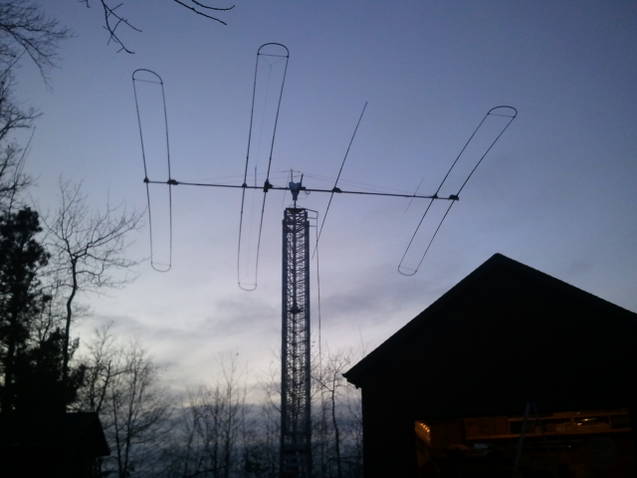
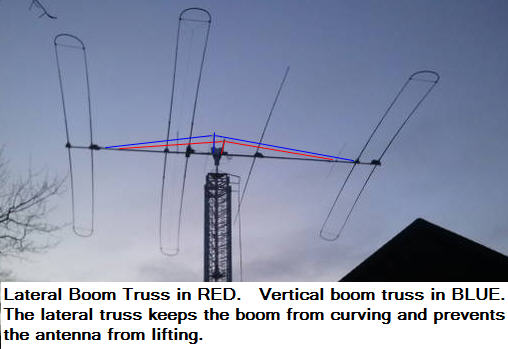
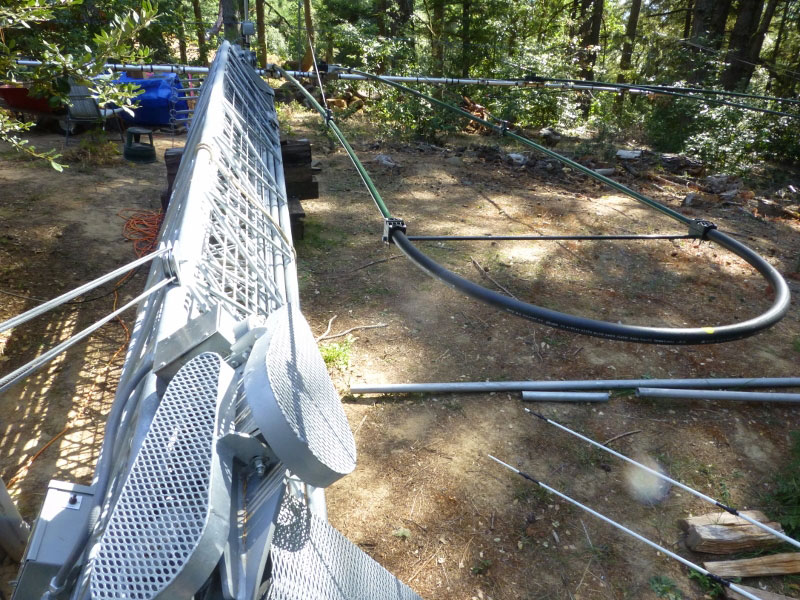
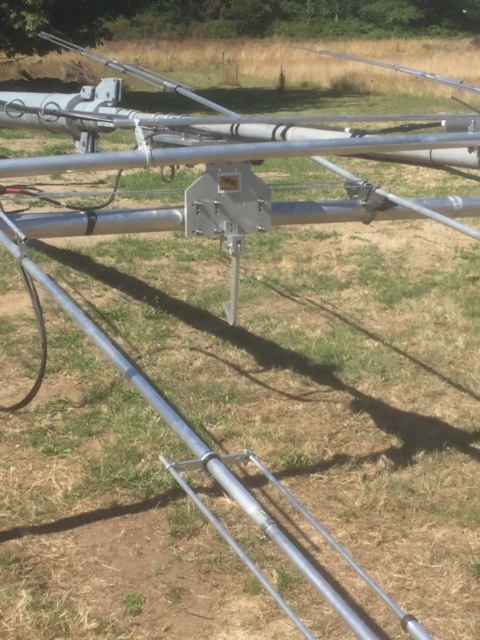
Jeff writes his DB36 is up and ready for the Minnesota winter now with his custom strut to address the problem some DB36 user have reported with a "too flexible" boom. If you look closely you can see both the vertical and lateral boom truss masts and cables in the picture above. Below is a closeup showing the cables highlighted in RED and BLUE.
Click
here to read more about the boom flex problem and solutions.
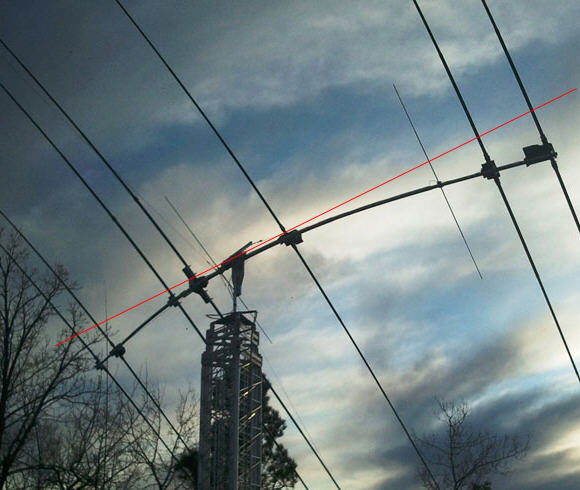
The picture below shows how the boom can bow under the weight of the trombone elements. Jeff does not have his lateral strut installed in this picture.
The RED line is added in the copy below to help see the bend.....
Here are Jeff's notes and closeup pictures for his strut mount.
Using your measurements as a guide, I fabricated a truss using 2" angled aluminum, 1/2 " plate aluminum and a couple of 2" element clamps that I had left over from my DB-36 project. The 3' tubing is left over from the aluminum antenna mast that I had cut to mount the tilt plate. I used 1/8" UV-resistant Dacron double weave rope and thimbles at each endpoint.


Great job Jeff! And thanks for sharing the pictures and notes for others that may want to make one also.
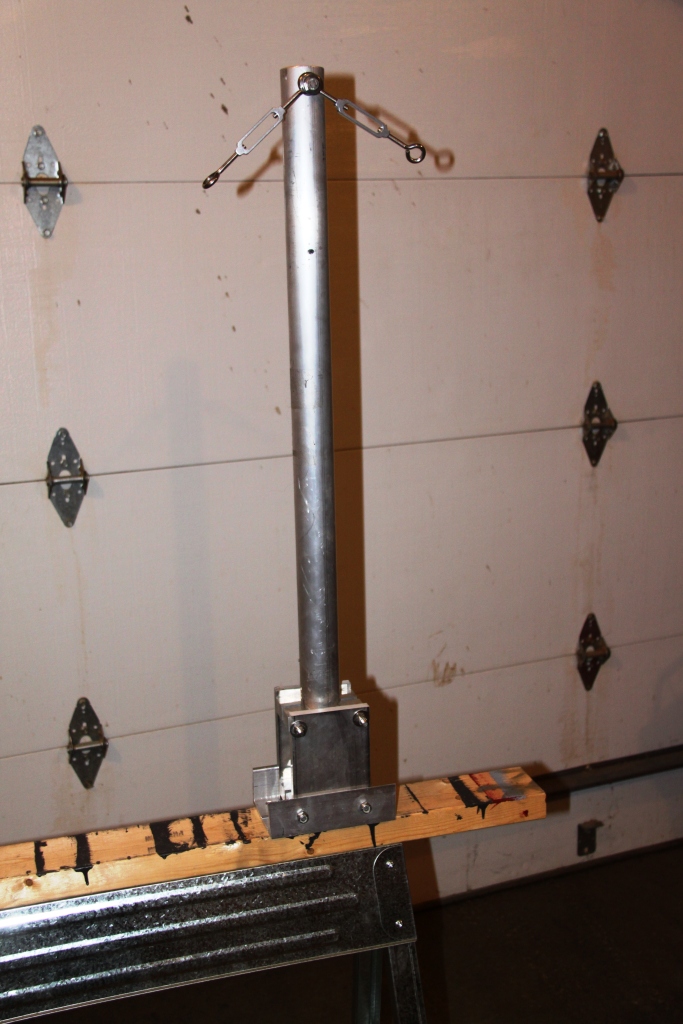
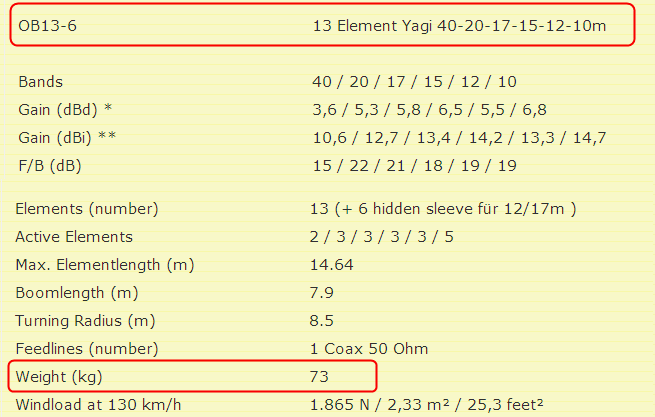
Optibeam 13-6
Thanks to Al and His wife now My OptiBeam OB 13-6 is up
easily without any problem....
I just changed a bit the location of the boom to mast plate place and swiched
the boom truss positions...
was very easy to put it up.. Great work exellent TILT PLATE i call it one man
job to put the antenna up...
No more calling for crain and helpers ...
Al keep the great work and well done God bless..
Adil
A65ee
Joe recently added a KARLock to his installation and comments:
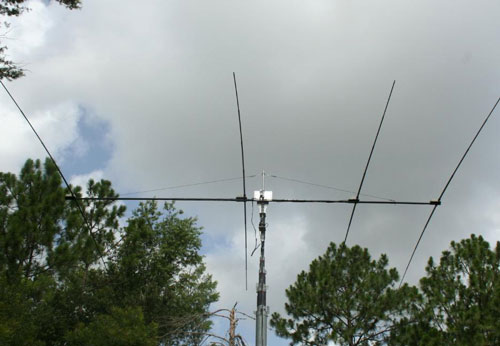
4 El SteppIR

SteppIR 4el
U.S Tower 572
HDX-555 tower with a 4EL SteppIR beam
Monster model and KARLock
Mark ordered the monster version in case he decides on an antenna upgrade in the future.
Here is a picture and his comments on how he leveled the
antenna to the proper angle on the Tilt-Plate. His method is a variation
on method 3 for SteppIR
antenna installation
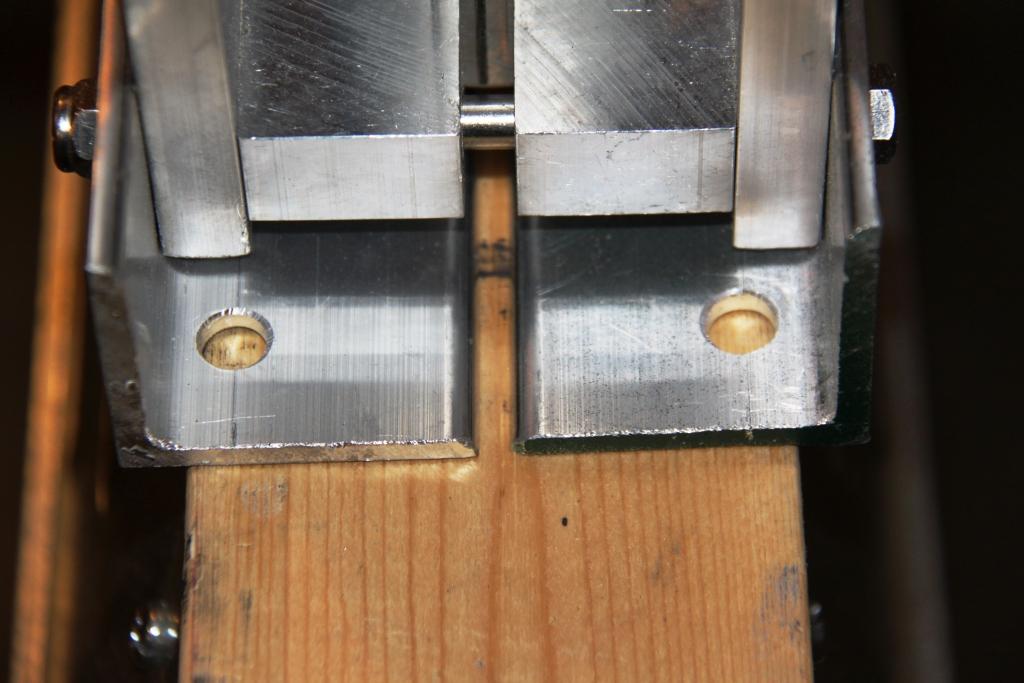
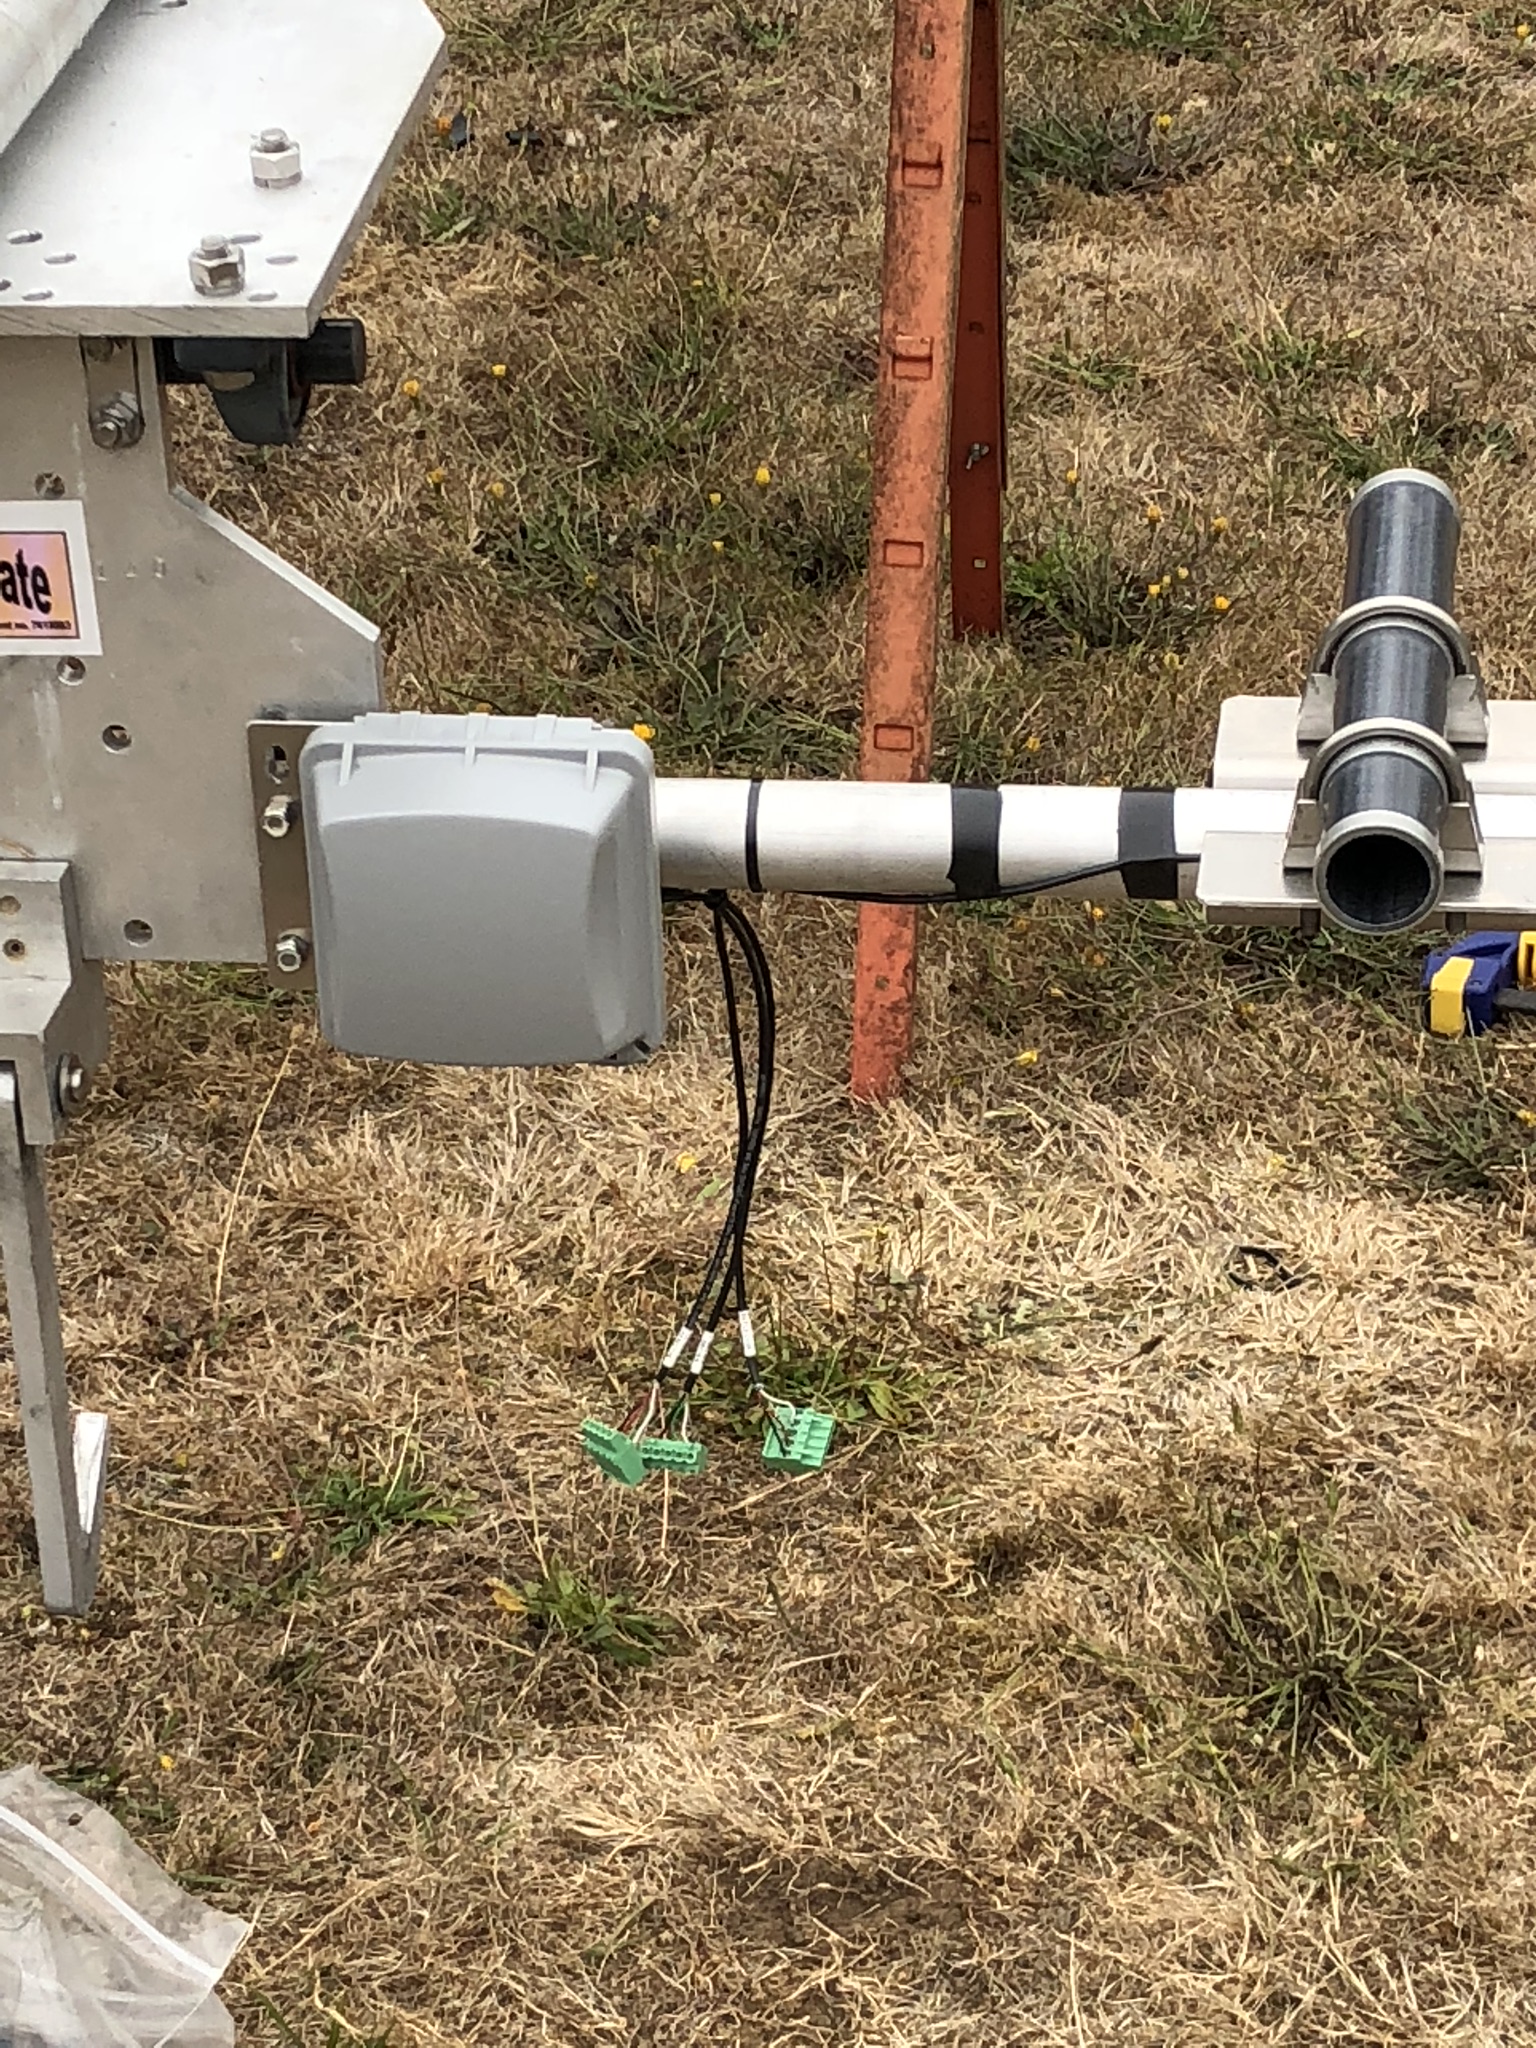
The EHU mounting plate on the SteppIR boom plate is visible in foreground....
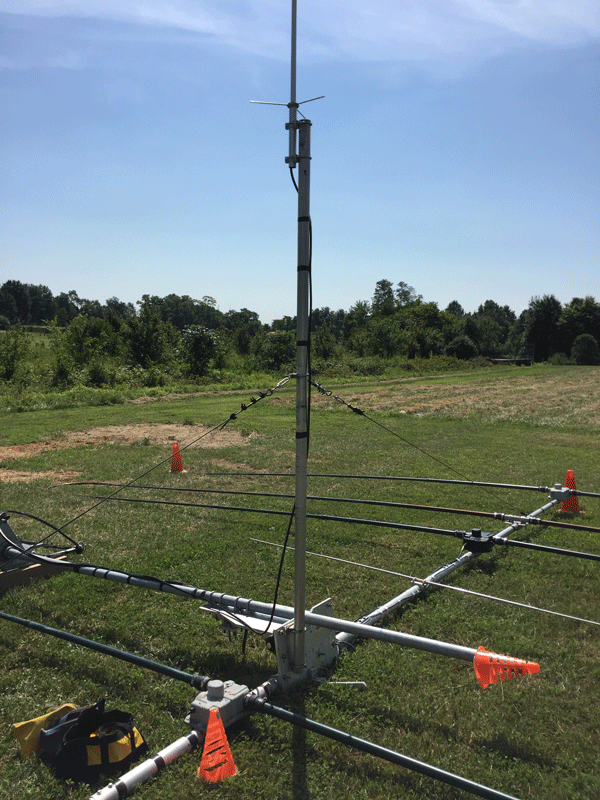
Here are some pictures describing and illustrating the installation process and Mark's first tests with the 4 el steppIR.
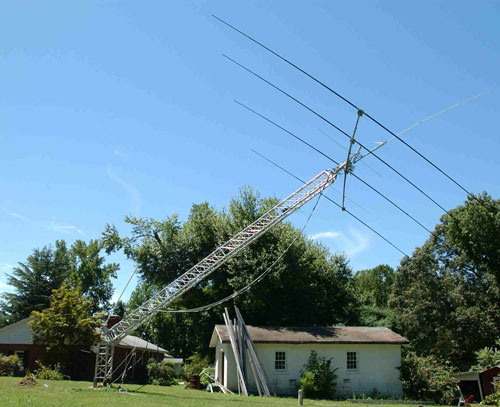
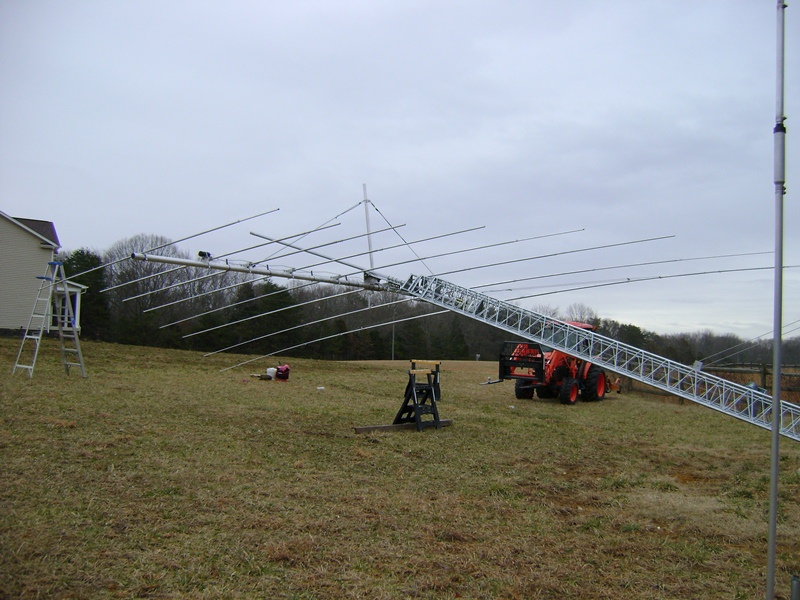
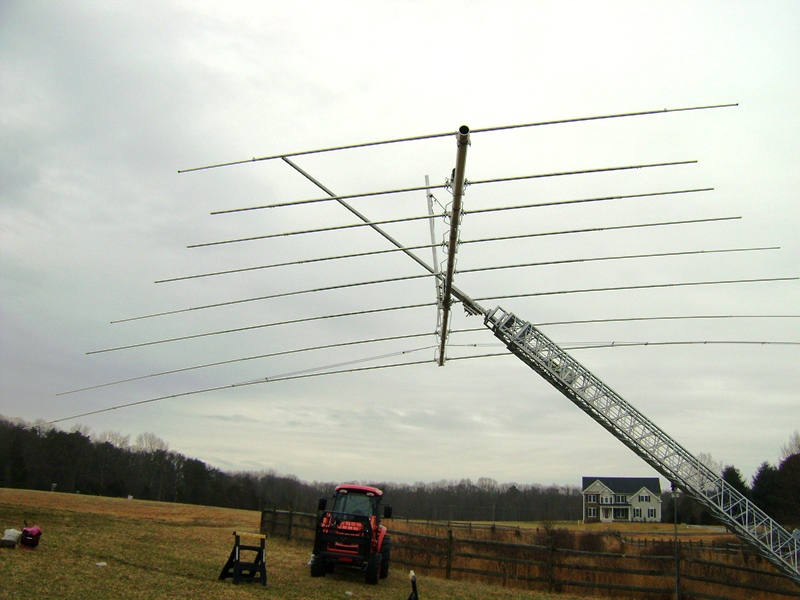
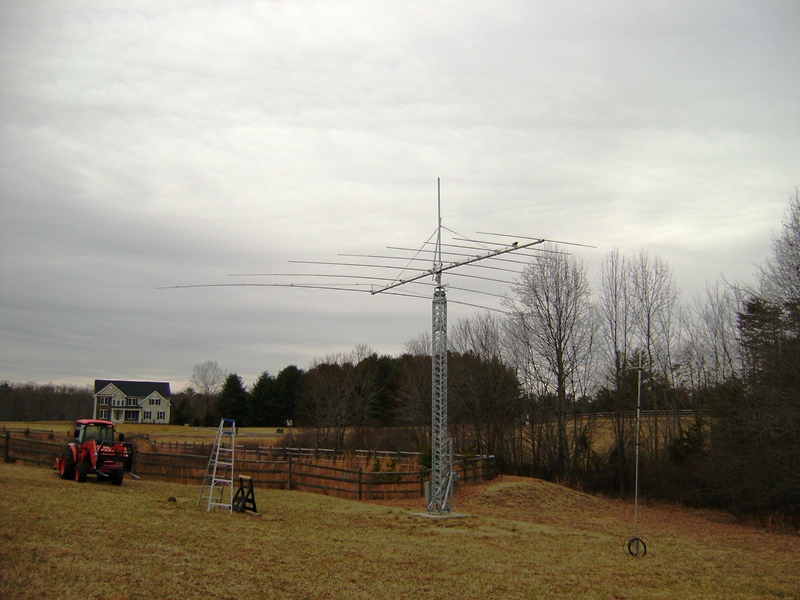
The weather dawned clear, cool and sunny Saturday morning, September 22, 2012. Just a beautiful day for an antenna raising party. George, N1GB (my right hand man through all this) and Bob, KB1IZU, arrived just before 9 am to help with the final assembly of the 4EL SteppIR beam and raise the tower vertical.
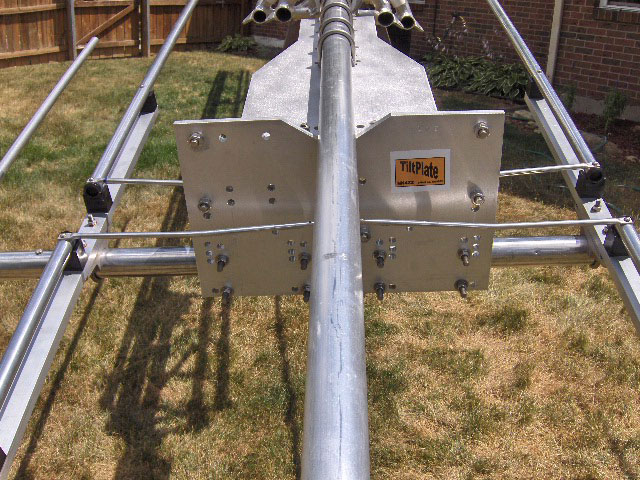
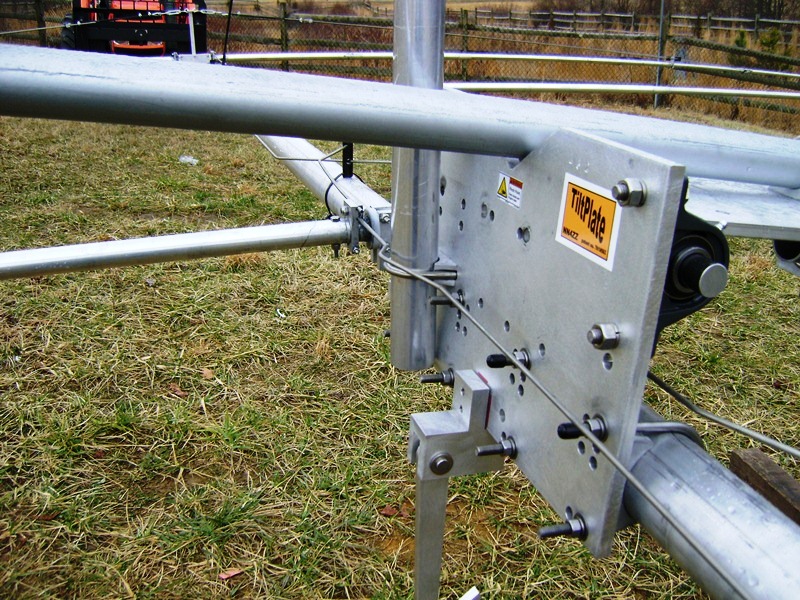
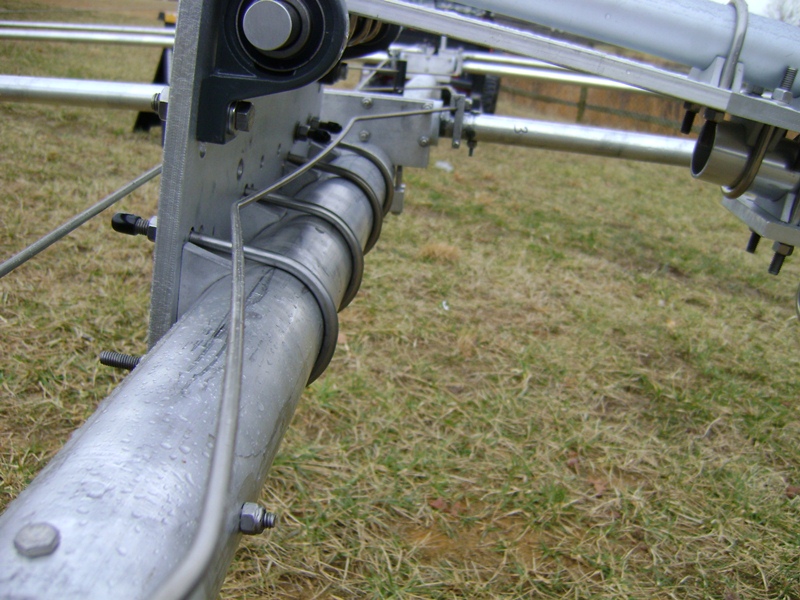
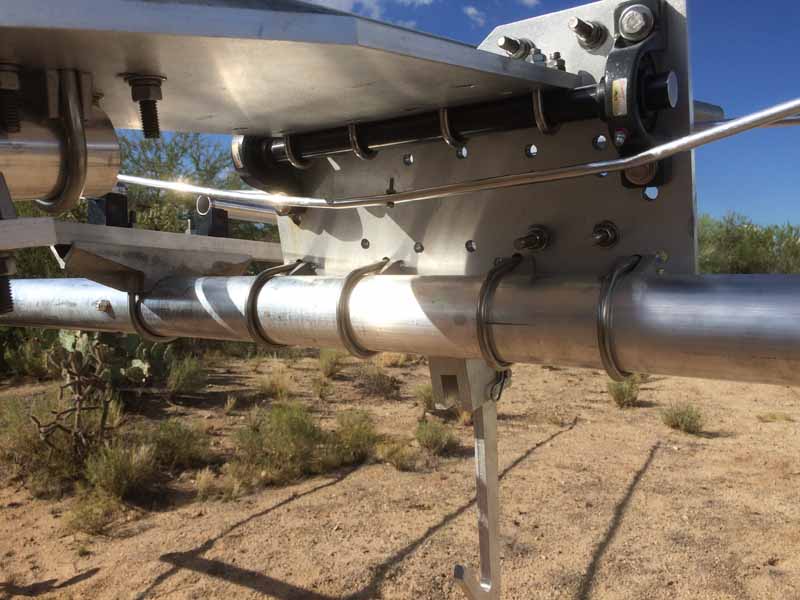
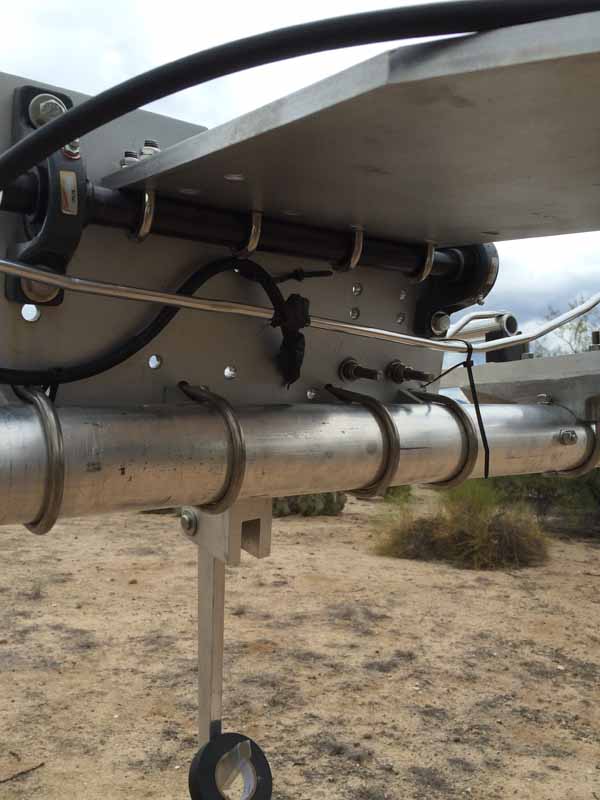
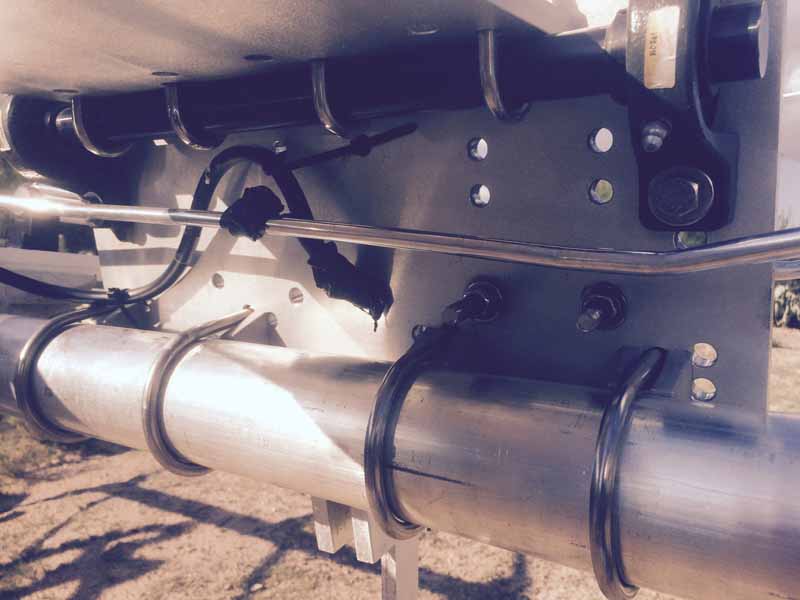
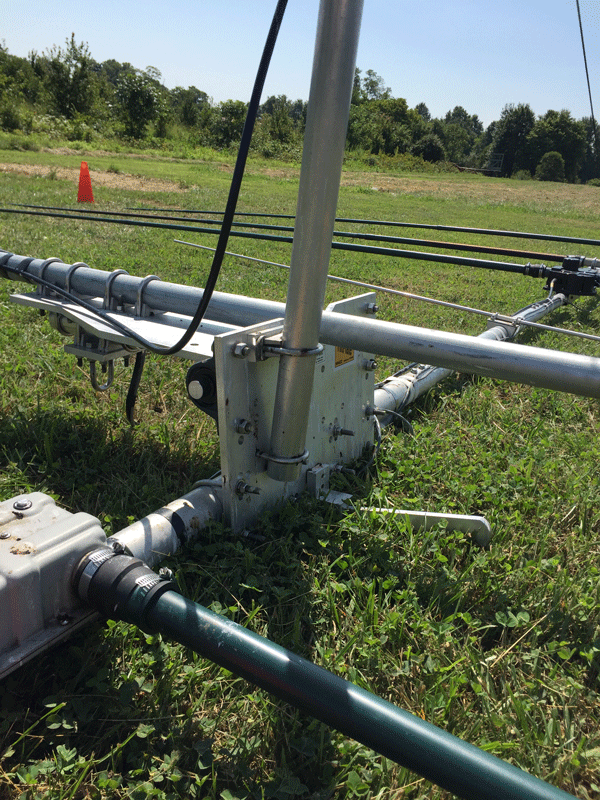
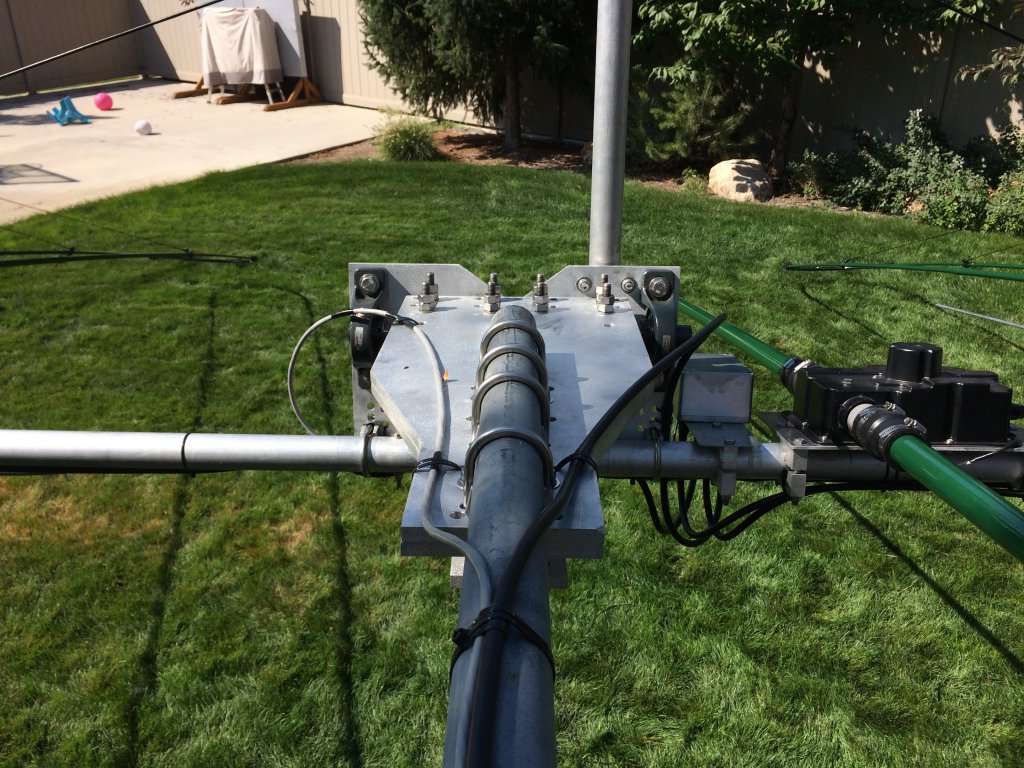
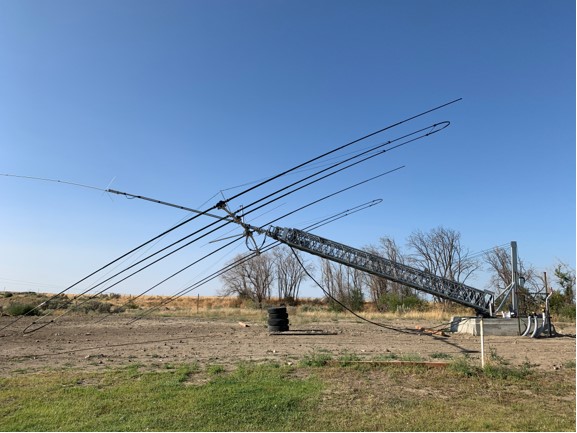
This picture is of the "Tilt-Plate" that allows the SteppIR to remain horizontal as it is raised to the vertical position. This means that there is absolutely no climbing necessary, ever! If the antenna rotates in the wind more than a few degrees that hook engages the U-bolt and prevents it from rotating any further.
I used two of the drilled holes in the tilting plate to
run the reflector and driven element control cables through the plate to route
them away from the boom. This eliminates any possibility of a wire-tie breaking
and the loose control cable being crushed by the boom to plate U-bolts. I used
some small rubber grommets to protect the cables from the holes sharp edges.
5-Oct-2012 update. All done and I have been working stations that I can't even hear on my other wire antennas! Your Monster Tilt-Plate worked flawlessly and if I decide to go bigger on the antenna I am all set. The Tilt-Plate made the assembly and raising of the antenna a breeze and extremely safe!
73,
WA2ILB,
Optibeam OB13-6
Monster model - stackable
I am really really pleased with the final result, it was a lot of fun being able to put everything together on ground level.
TH11DX
Standard model TiltPlate
Tom didn't need the KARLock in his location so he mounted the TH11DX directly to the moveable plate of the TiltPlate.
(Note: if you want to use a KARLock with this antenna, the adapter is needed. When you order the TiltPlate for this antenna the adapter is supplied. Click here for more information on this. -- Al's comment)
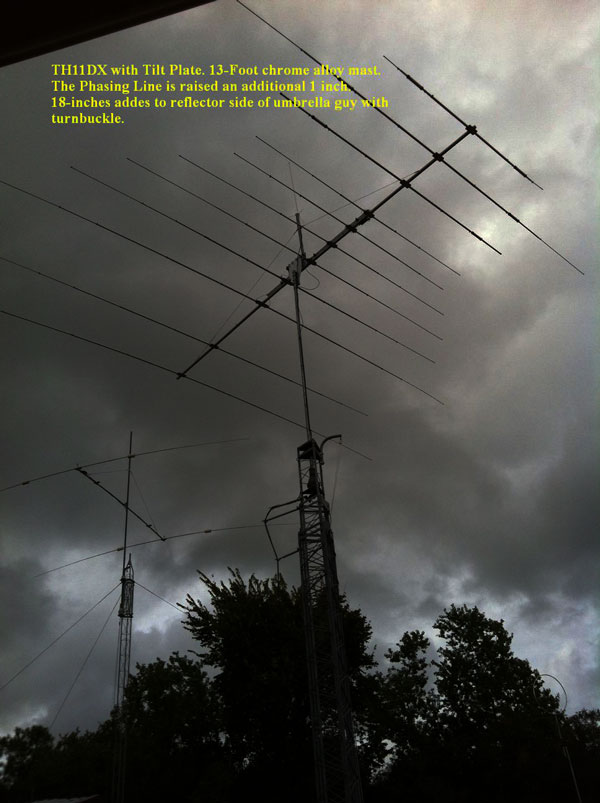
( Note: when using the TiltPlate with the supplied adapter, the antenna boom mounts between the plates. In Tom's installation he mounted it on the outside and had to raise the phasing tubes 1 inch to provide the necessary clearance. -- Al's comment)

73 de Tom K5AX
SteppIR with (2) 30/40 loops

Stacked TiltPlates
Force 12 5BA bottom
2 el 40M on top
Ivan's review on eHam (Thanks for the nice review....Al)

SteppIR DB 18
US Tower TX-472
2el SteppIR
Mini-TiltPlate
I could not have pulled this one off
without your TiltPlate . Photo attached of the 2 element SteppIR threading the
needle between two trees and over a hedge. Thank you for an excellent product!
Matt / KI6VJY
Bencher SkyHawk with a NN4ZZ Tilt Plate on a US Tower
Above the Yagi is a 40M dipole.
Pete / N4KW
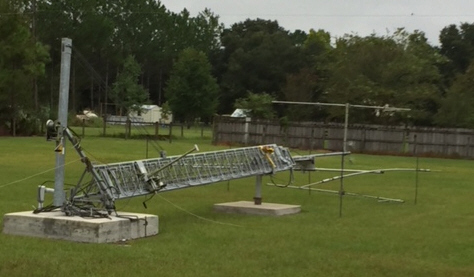
Nice installation and the pictures below show Herb's setup in all 4 of the stages.
- Operational
- Tower Nested
- Tilting over
- Final postion and resting on a bracket for maintenance or hurricane weather
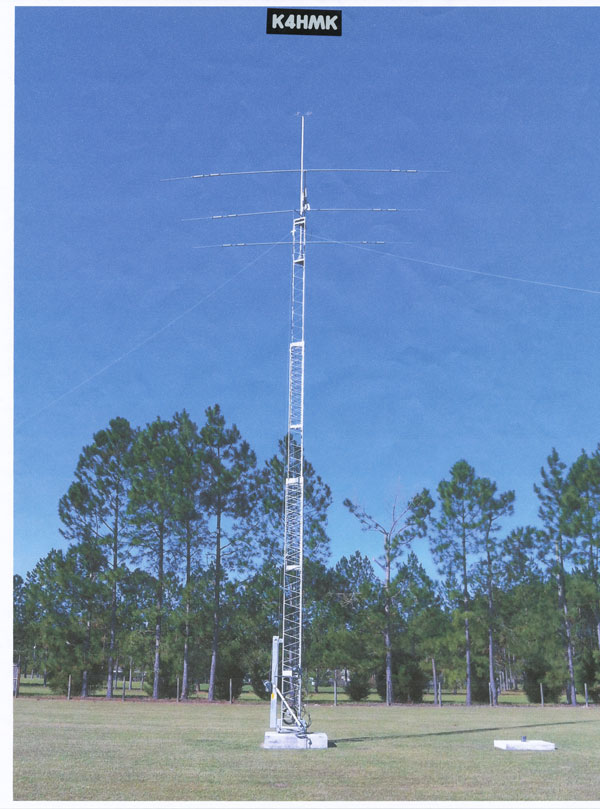
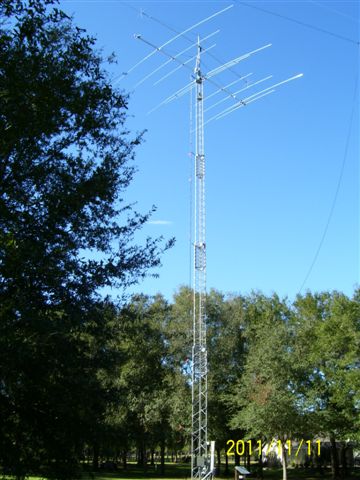
Operational
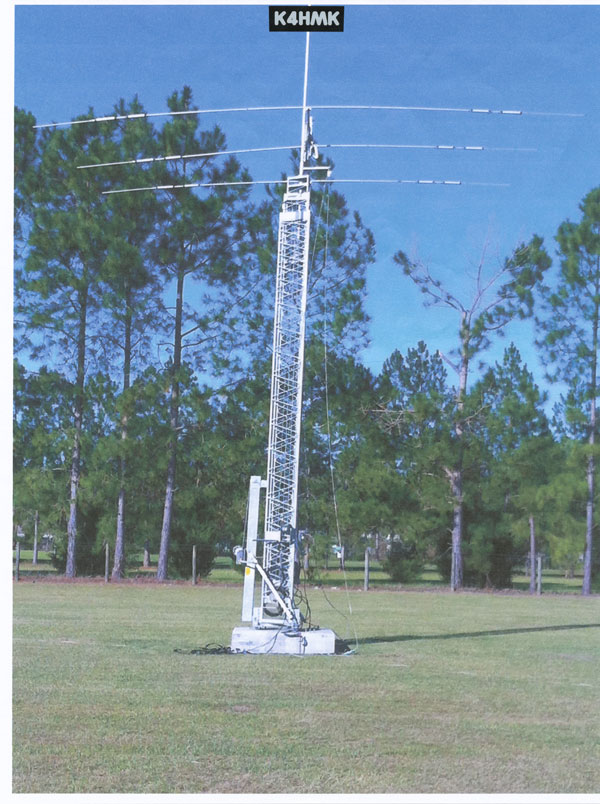
Nested
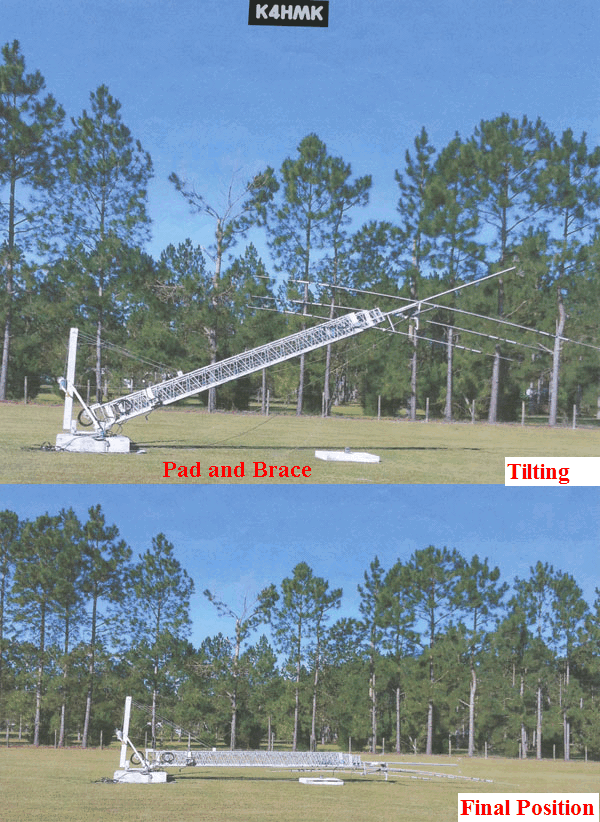
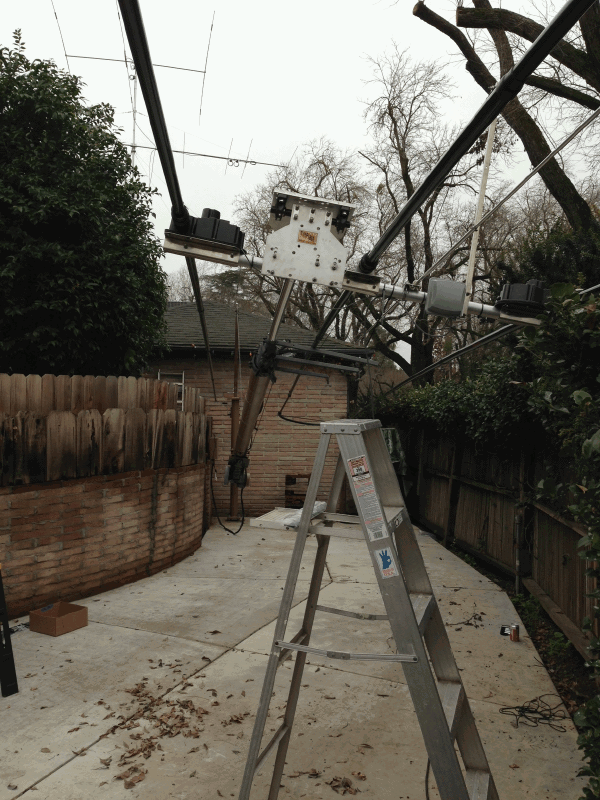
Herb brought us these pictures while we were in Orlando for Hamcation this year (2013). They were very helpful in showing folks how easy it is to work on your antenna, tower and rotor from the ground with a tiltplate. As Herb mentioned, all we need to add is a lounge chair and a tall glass of ice tea. Thanks again Herb!
2018 Update -- Here are some more pics of the tower folded over with the NN4ZZ Tilt Plate CONTROLLING the Yagi AND the 2 meter twin beams. The products continues to work FLAWLESSLY along with its KARLock since July 2011. Wouldn’t have it any other way. Thanks for your engineering feat.
Closeup of the tie down used for hurricane preparations.
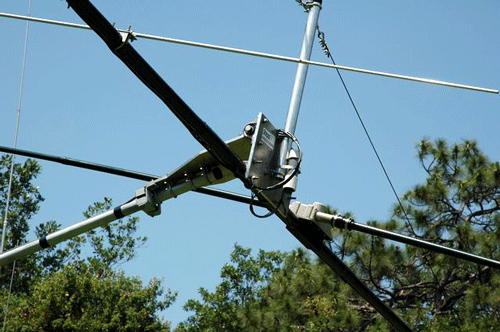
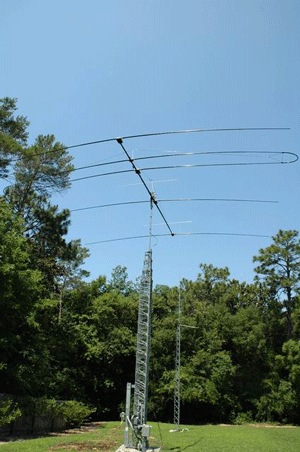
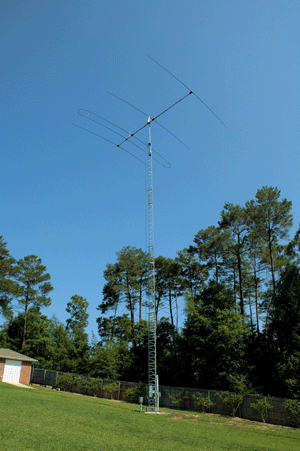
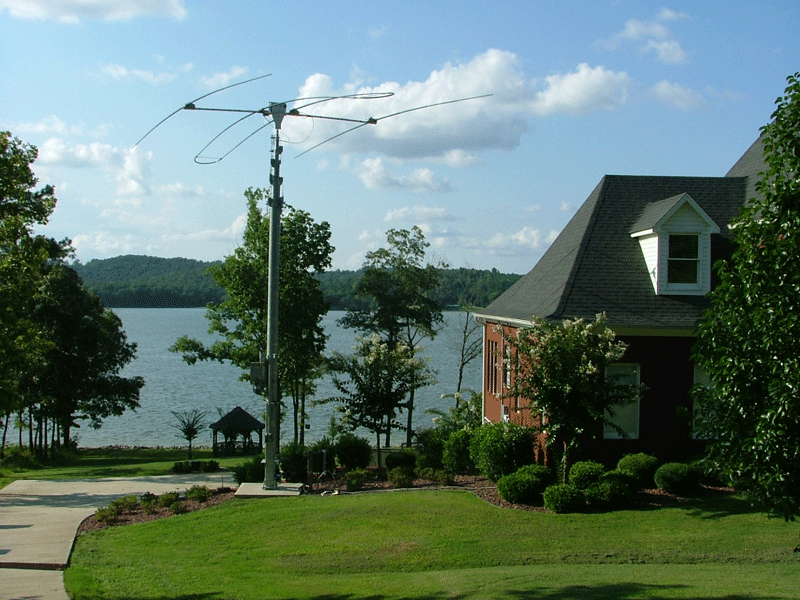
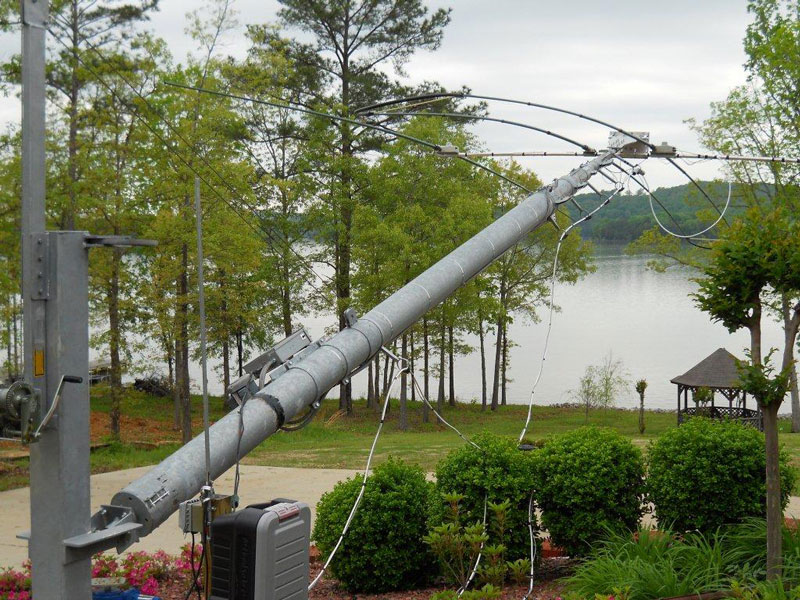
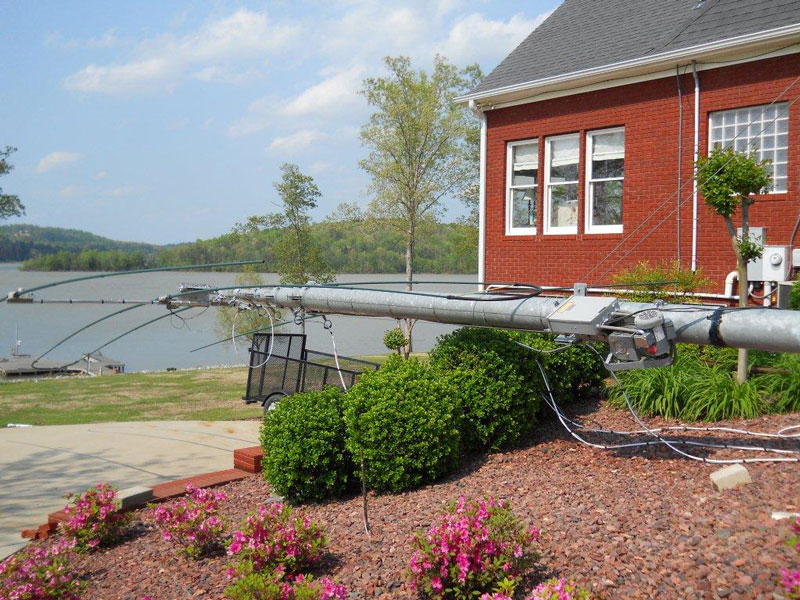
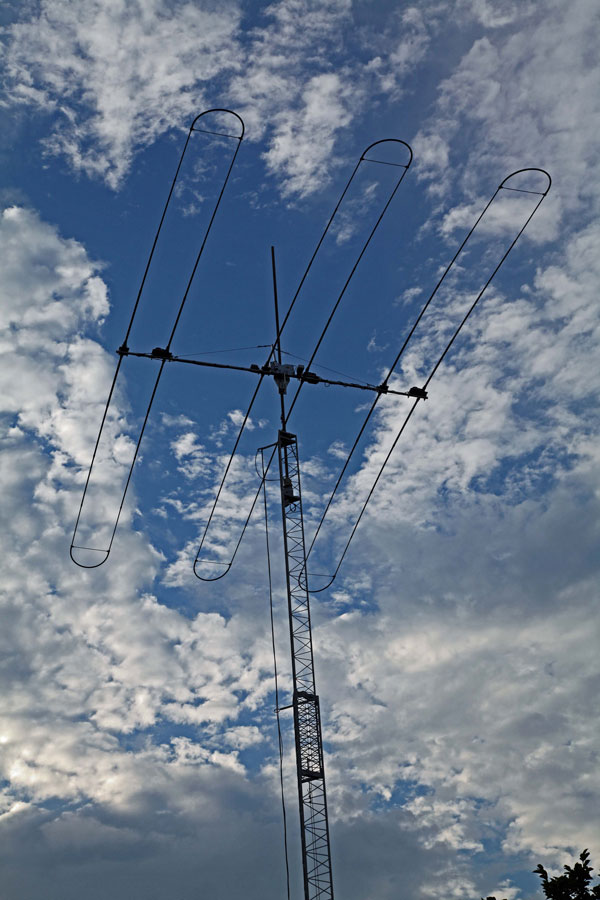
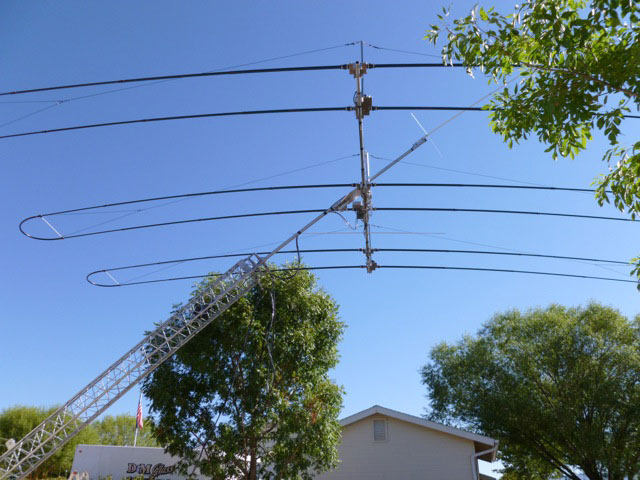
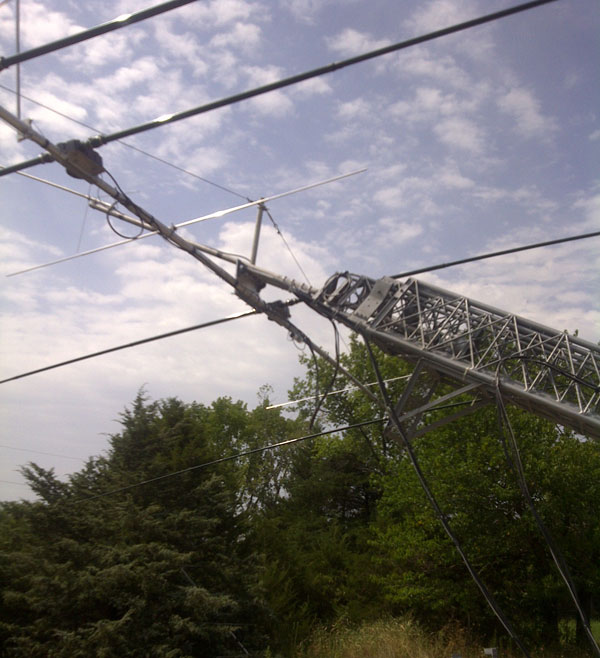
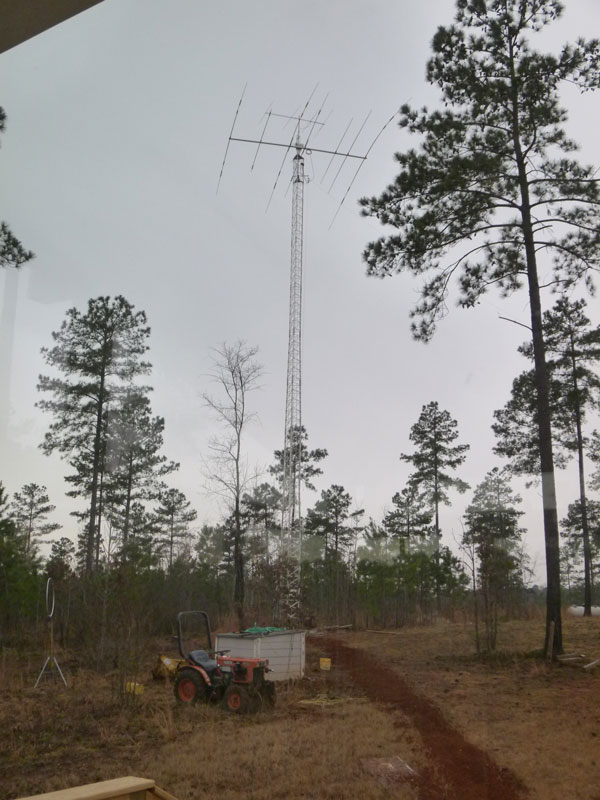
U.S Tower TX-455
M2 Antenna 7-10-30 LP8

Note: You can see how Will routed the phasing tubes for his log periodic. One in front and one behind the moveable plate.
Here are some pictures showing the tower being raised up to the operating position.....
Tower in fully extended and opeartional position. The UHF/VHF vertical is mounted above the LP.
I know I am preaching to the choir, but working at ground level to complete the antenna and raise it was just too incredible. Thanks again for your incredible product.
R/S
Will, K4AAV
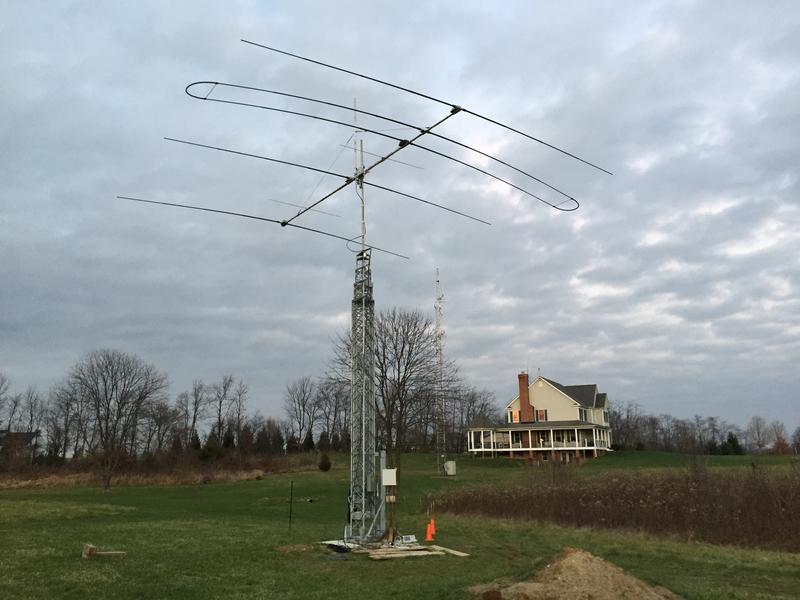
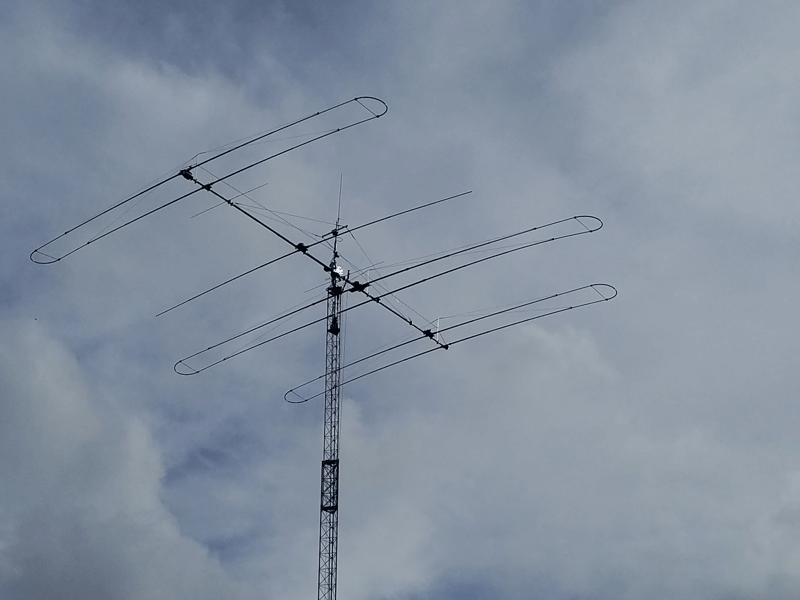
SteppIR DB36 with our optional "lateral truss support"
Here is a good example of when the ability to work on your antenna really comes in handy. Ron has a DB36 and discovered the loop return had come off. This first picture shows the missing loop. He discovered it on a Saturday afternoon at 3:30 pm.
This pictures shows the antenna and tower lowered so he can make the repair.

Thanks to Al NN4ZZ and his Tilt-Plate, the antenna was lowered, tilted, repaired
and operational in just 3 hours.
4 el SteppIP
Gary building the SteppIR on the ground on the TiltPlate
Tower tilted up and ready to raise.....
Gary commented "I would not have bought any Steppir without the availability of
your tilt-plate, to maintain and repair the antenna system. You can quote me. "
Thanks Gary!
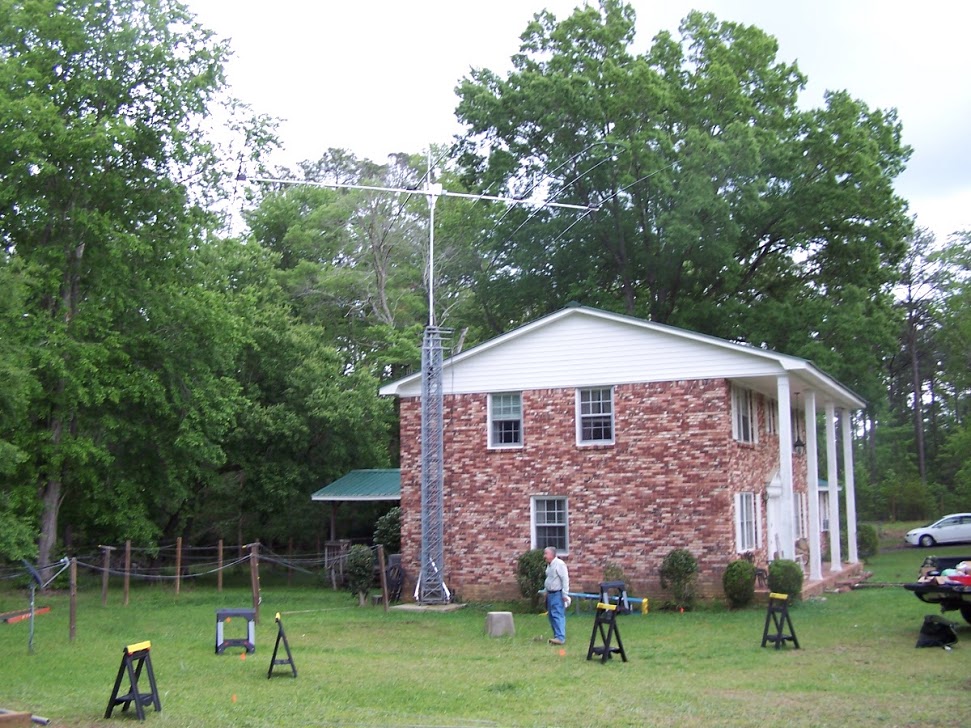
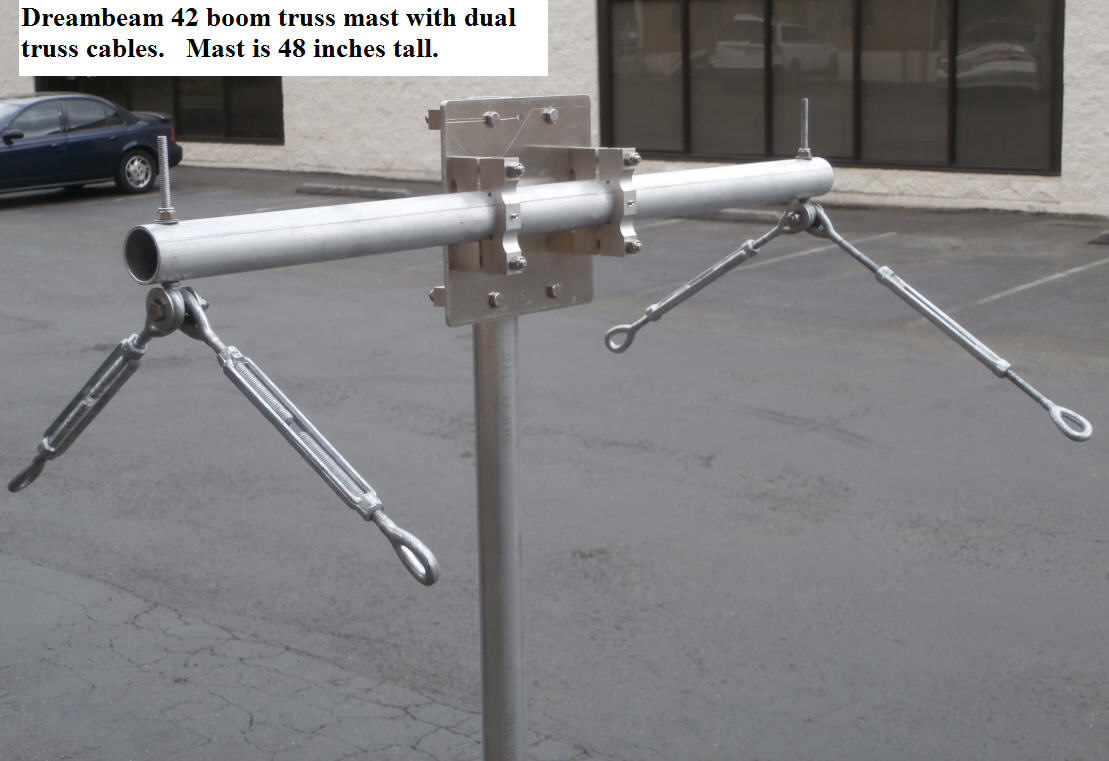
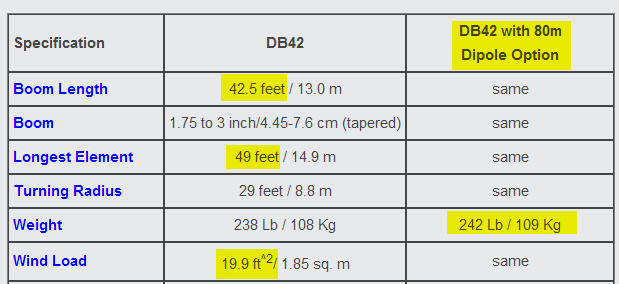
DreamBeam 42
UST HDX-572.
Overall, the tilt plate is a real work saver. I built the antenna on the
tilttplate mounted to the mast/tower. I had to lower and raise the tower (horiz
to vert) several times in the troubleshooting process. Can't imagine how I could
have accomplished that without a crane!
Jack / WE5ST
( The DB42 is a BIG antenna! Here are the specs.....Al)

Jack's DB42 - ready to go!

Closeup of the new boom truss support - provided by N6SJ
US tower TX-472 Motorized
Dreambeam 18E
Everything is up .... Again Tnxs for all the help
Bill Hardage
This looks almost too easy!
Closeup.....
DB18E installed at the Midland High School Amateur Radio Club site at Midland High School, in Midland, Michigan.

The people in the photos are either student
club members or mentor/advisors.
You can see the 144/440 yagi in this picture

Rulon Passey
W7QR
![]()

DreamBeam 18
U S Tower 472MDP
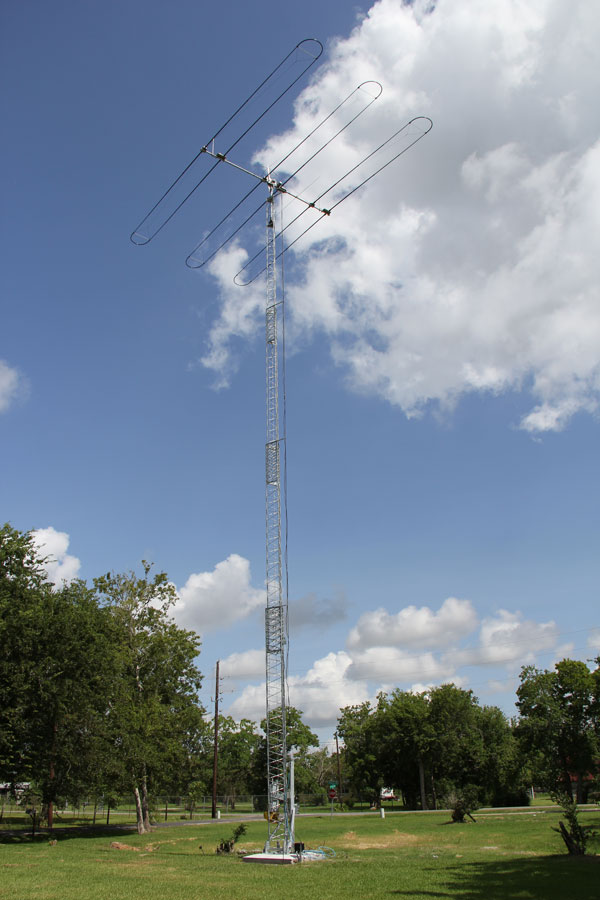
U. S Towers HDX 589
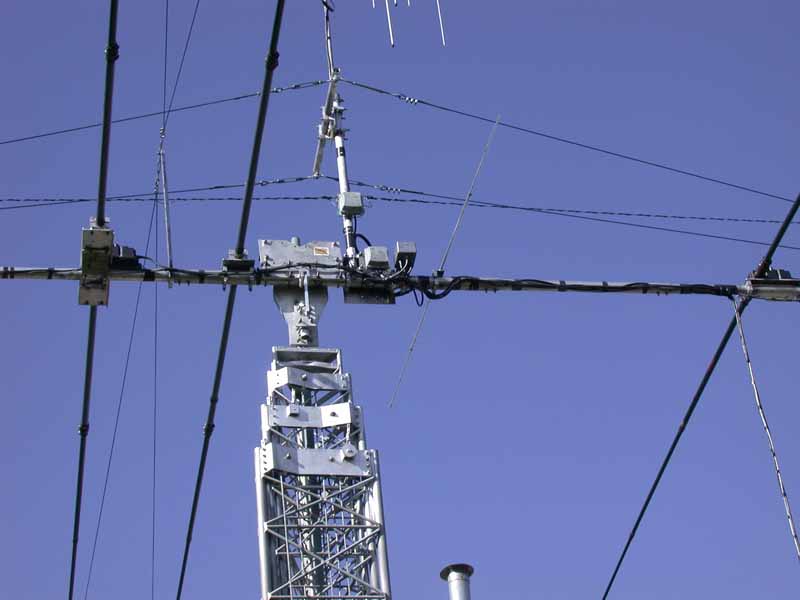
DreamBeam 42
Monster "stackable" TiltPlate and KARLock
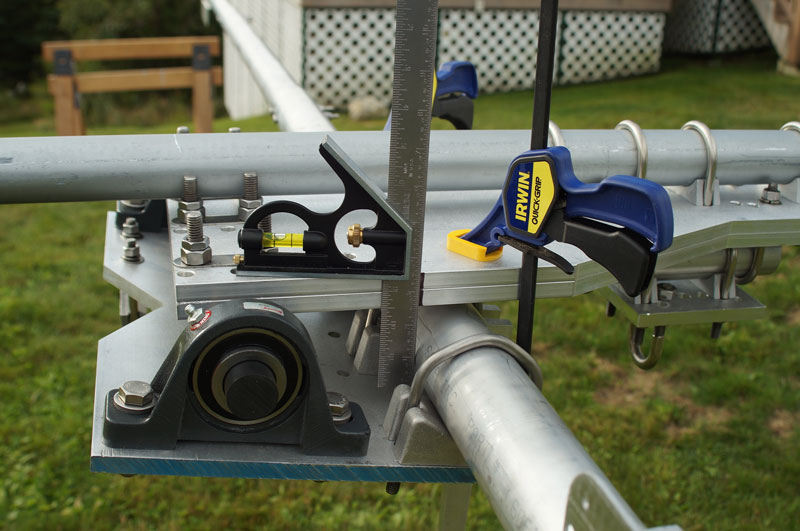
Steve provided some great pictures and tips for using the TiltPlate with the DB42. My thanks to him for documenting so well. This a complex antenna and there are always several ways to skin the cat. I'm sure other DB42 users will be able to take advantage of these ideas. Al / NN4ZZ
It took about 2 months of on and off work to finish everything. I built the DB42 right on the TiltPlate on the end of the mast on my tilted over tower. The biggest problem was getting everything square and parallel while working on sloping ground with lots of brush in the way. I didn’t want to clear-cut the area because the brush helps to screen the tower from the house. I probably spent the first two weeks fiddling with a 4’ level and carpenter’s square before I felt confident tightening all the element brackets onto the boom.
To get the elements level on the tower, I first closed the TiltPlate with clamps and attached the DIR #1 element plate with ½ of the center fiberglass tube attached. I used masking tape to attach a carpenter’s square onto the TiltPlate surface that’s clamped to the mast. Then I stood back and visually lined up the tube with the square. The carpenter’s square and long piece of fiberglass gave me more confidence than the rather short pieces I saw one of your other customers use for the same procedure. I found if I stood back about 50 feet and used binoculars to look at the two edges, I could clearly see when they were perfectly lined up. Once that was done, I visually lined up all the other elements to be parallel to this first one. The result was a level antenna with parallel elements.

For the boom truss mast, I didn’t want to allow the mast to lean over with the
TiltPlate as this would greatly reduce the angle of pull on the far side of the
boom, making SteppIR’s new double-truss design much less effective. I used
some additional DX Engineering V-clamps and your furnished shim to offset the
upper edge of the mast from the TiltPlate. This resulted in the boom truss
mast only being tilted by 3 to 4 degrees off vertical. The truss tightened
up fine with good purchase on both sides of the boom for lateral stability.
I chose not use mount the SteppIR mast-to-boom plate like another of your
customers did. I didn’t want to offset all those components horizontally,
especially since I also had the 80M dipole option. I used a couple of
un-used 3” SteppIR clamps to mount the connector junction box right onto the
TiltPlate. I used one existing hole and drilled one additional hole in the
plate and used leftover 5/16” SteppIR bolts to hold it on. The photo shows
how I added a threaded rod standoff to tie down the cables as well, attached to
another empty hole on the TiltPlate.
This photo shows how close the big center element, DIR #1, ends up to the
tilted over US Tower HDX 589. Until the element truss was tightened up,
the inner fiberglass pole was lying right on the steel, and I wasn’t sure it was
going to clear the tower!
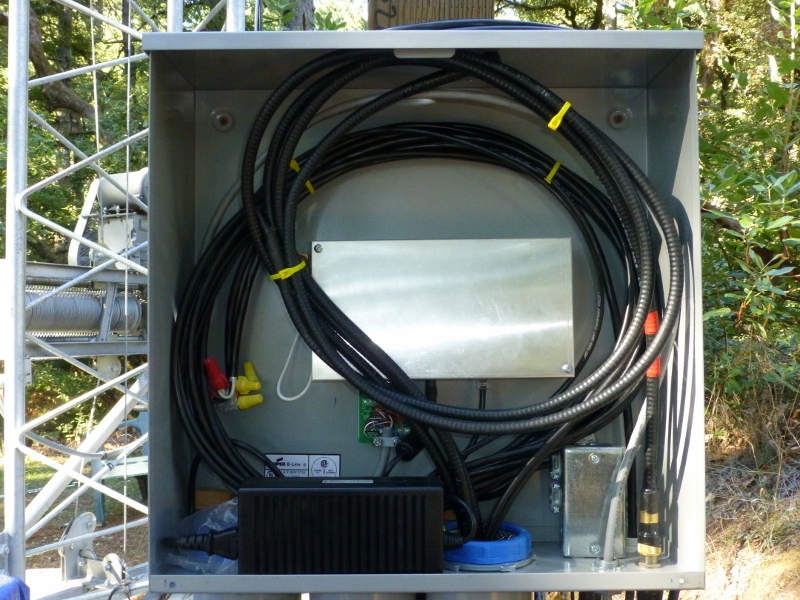
You can see the KF7P curved standoff at the top of the tower. This is an after-market part that Chris made on order for me. It provides a gentle sweep-90 bend to get the coax into the vertical plane without creating the sharp right angle bend

The last main task was running AC power through liquid-tight conduit between the breaker box and electrical panel at the end of my conduits. That’s where I installed the Remote Driver board in a little LMB aluminum box I found at HSC Electronics in Sunnyvale. You can see the 33V wall wart at the bottom of the panel.
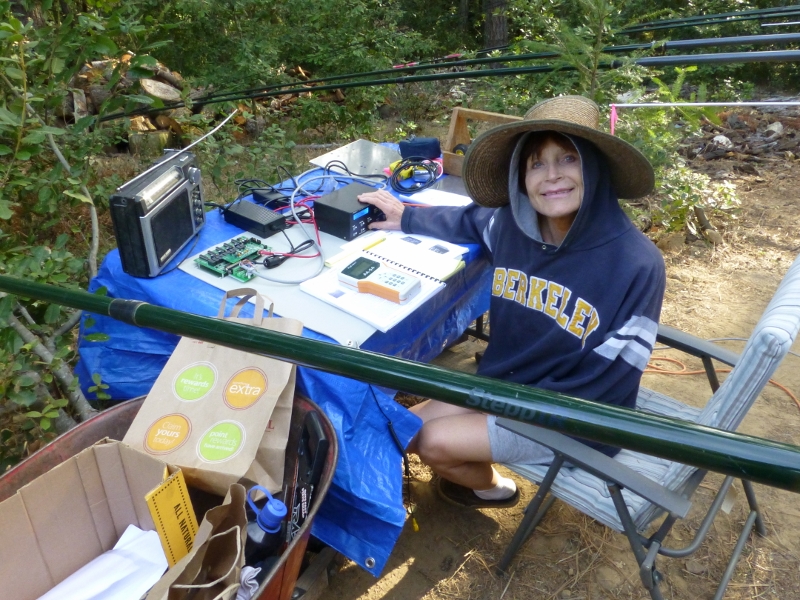
I had Valerie run the controller while I listened to the happy sounds of copper
beryllium scraping along the insides of the fiberglass tubes. I tested it
with all the final cable runs coiled up on the ground just to be sure I wasn’t
installing any bad cable.
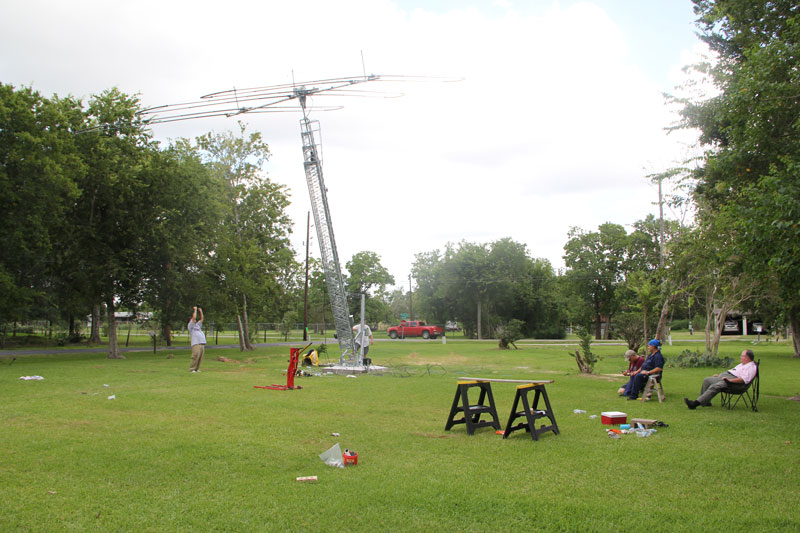
Time to tilt it up!
The hardest part of using your fine TiltPlate was convincing myself I had gotten
the first DIR #1 element square with the main mast. I must have fussed
over lining up the carpenter’s square and fiberglass tube for several days!
Once convinced, everything else was easy. The TiltPlate is a great
way to build a 240 pound antenna on the ground with no sawhorses and no helpers!
It was sundown as I soldered the PL 259 onto the vertical coax run Sunday
afternoon. I went inside, heard a pack calling S21ZBB and worked him on
17M for my first QSO on this antenna, an auspicious start!
73,
Steve
N6SJ
Mosley PRO 67C
Heights 72ft tower
Picture during construction and assembly
The Mosley PRO 67C has phasing tubes between the driven elements.
CLICK here for more tips on assembly and the phasing tube set up for the Mosley PRO 67B & 67C
Click here for more pictures of Tad's tower and antenna procect.
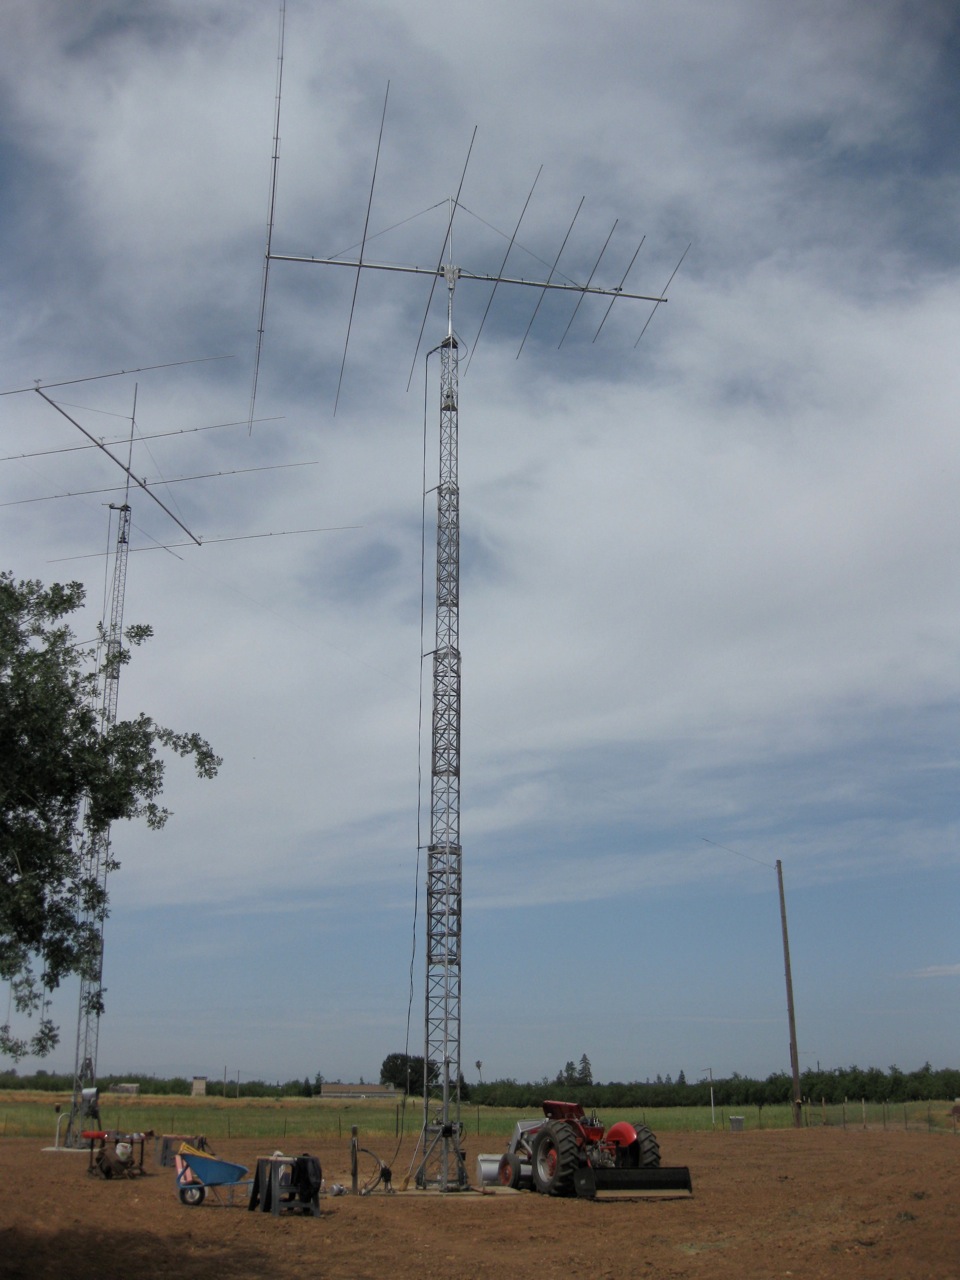
Stack - 4el SteppIR & 2el Optibeam OB2-40
2el OB2-40 on a non-stackable TiltPlate on top
4el SteppIR on a stackable TiltPlate on the bottom.
Project went up on 6-Apr-2014 - first picture below
US Tower TX455
3 el Steppir, weather station, vertical and small yagi above
Now maintenance work and repairs can be done from the ground.

73, Mike
4 el SteppIR
Standard model TiltPlate and KARLock
Antennas: 4el SteppIR & 2el 40M yagi
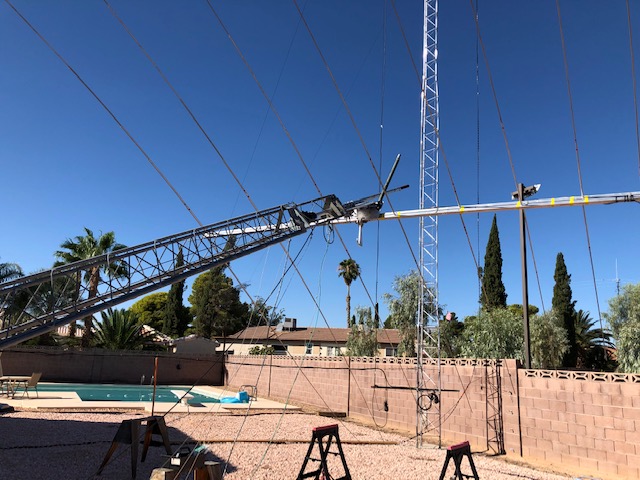
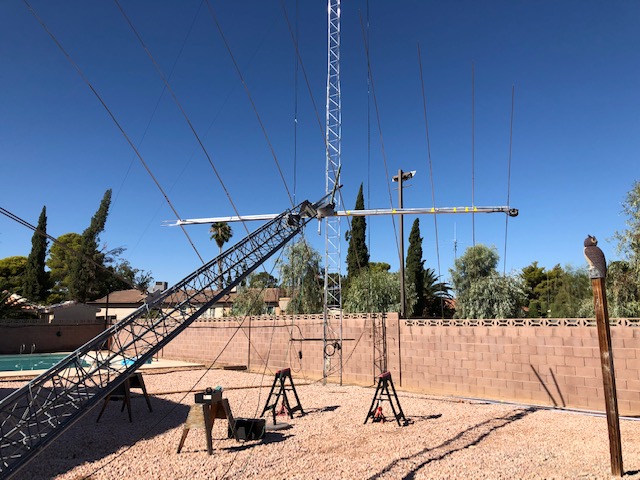
Richard has a unique situation. He wanted to mount a 4el SteppIR and 2el 40M yagi on TiltPlates in a tight location. There is plenty of room for the antennas once they are in the operational position. But he had a challenges tilting the tower over with the 2 large yagis due to a phone line running behind his property. We came up with a solution that may be helpful to others.
Warning: this solution is ONLY acceptable for avoiding phone lines (or trees) but would NOT be acceptable for avoiding any wires carrying POWER.
Here is a diagram illustrating the challenge. The upper antenna is the 2el 40M yagi and the elements are 46 feet long. With the 40M mounted on the upper TiltPlate the tips of the elements overlapped the phone line (in BLUE) by a few feet when tilting the tower. There is a wall at the back of his lot which is seen in some of the pictures below and shown here in RED for reference.
Swapping the locatiions of the two antennas on the tower was considered but keeping the 40M on top was the preferred location.
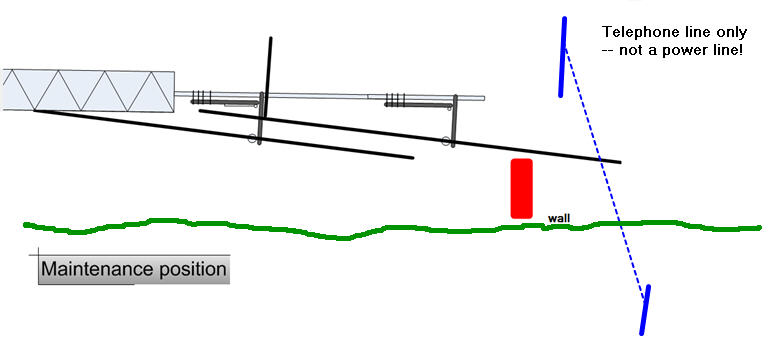
View looking back to the wall and phone lines beyond.
The phone wires are the lower ones in this picture. The upper lines in the picture are power lines but they are much further away that they appear in the picture and not an issue.
The antenna will swing freely on the TiltPlate so it could be tipped down to avoid the phone line when raising or lowering the tower. But he needed a way to tip the elements when the tower up beyond his reach. The solution was to mount a short tube on the boom with a rope that can be pulled to tip the antenna. Only the upper 40M yagi is shown in the following diagrams.
Lever boom and rope seen in this picture.
Here are some closeups of the antennas mounted to the TiltPlates
4EL SteppIR mounted close to the tower

It's nice to be able to access the antennas and tower from the ground but there was one additional challenge for the 4EL SteppIR. The boom extends over his pool. If he needs to access those elements or EHUs he has a good solution. You can see the extension ladder across the pool used to make a platform. (At least there is no climbing involved)
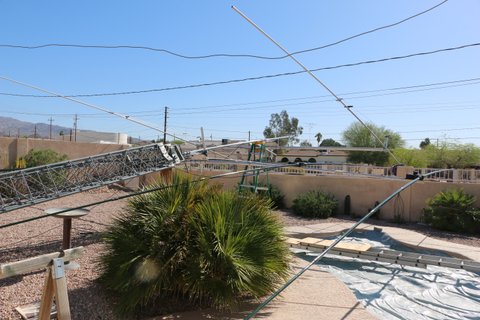
40M 2EL mounted near the top of the mast. You can see the lever and rope attached to the boom.
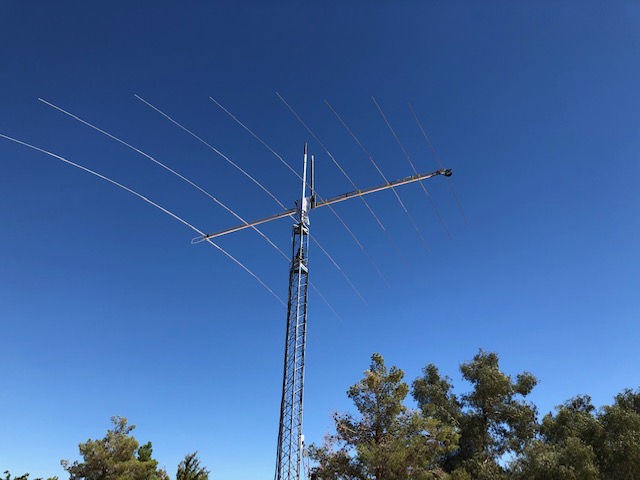
Here are some pictures of the tower in the operational position.
Richard worked through all of the challenges and says everything is working fine.
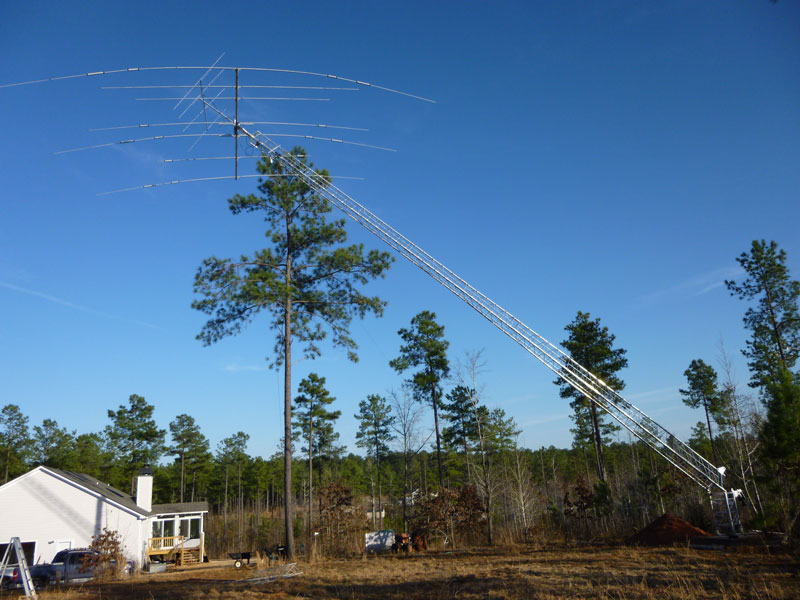
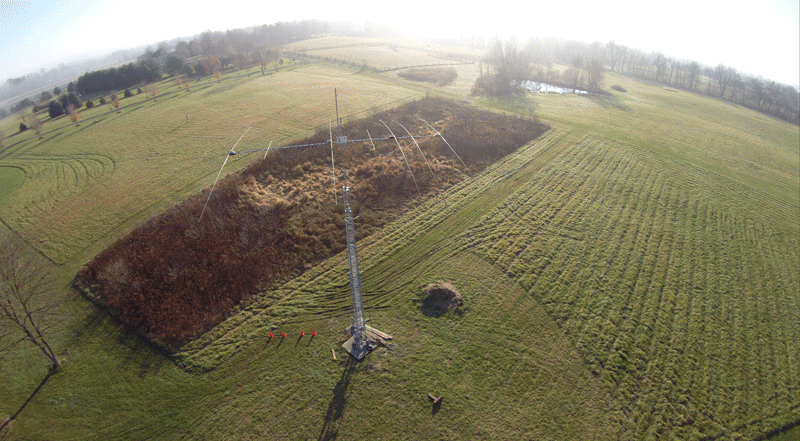
Mosley Pro 67-C-3
US Tower MM562
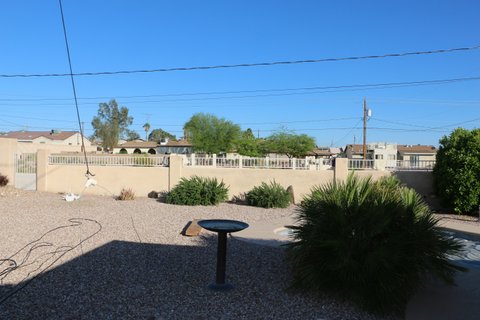
Fred installed his tower, antenna and TiltPlate in July of 2015. He provided a lot of really great pictures and feedback that could be very helpful ot others so I'm posting most of his comments and pictures here. Here is one of Fred's QTH in Tucson , AZ ( Al / NN4ZZ)
It was last July when I finally got to work on the installation of the US Tower MM562 crank-up and the antenna. The installation went very well, I had a crane assist me for one hour to get the tower on its hinges and then I finished the entire job on my own, without assistance. All of this is thanks to the installation of the Tiltplate and the ease with which all fell into place. I finished the job in August of last year and have been tinkering around with other things in the radio shack but the tower.
Thanks to the types of components and the quality of the tower, the Tiltplate and the antenna all the work went without a hitch, followed the instructions carefully and finally it all went up were is been ever since working beautifully to specifications. The phasing lines of the antenna did not represent a problem at all, I just followed your instructions to the letter. The Mosley PRO 67antenna has proven to be an exceptionally good buy, the instructions were clear, the assembly of each element took place as expected and the assembled antenna just looks great and works according to specifications and has provided me with great joy and satisfaction.
I could have not possibly assembled this large tower/antenna project, single-handed, without the NN4ZZ Tiltplate, the fact that I can lower the antenna to 3 feet of the ground without any additional help or assistance for service/repair is also a great resource to the Ham operator. Hope you keep making and selling the Tiltplate, it is a great product of superb quality and I endorse it wholeheartedly.
Tower delivered and ready to install.
Mast and TiltPlate installed
Boom installed on TiltPlate
One Phasing line between plates
Other Phasing line outside of moveable plate
Roll of tape on the handy KARLock hook.....
Antenna assembled.
Tower raised and ready to extend.
Ready to operate.
I could have not possibly assembled this large tower/antenna project, single-handed, without the NN4ZZ Tiltplate, the fact that I can lower the antenna to 3 feet of the ground without any additional help or assistance for service/repair is also a great resource to the Ham operator. Hope you keep making and selling the Tiltplate, it is a great product of superb quality and I endorse it wholeheartedly.
73s and good DX!
Fred Bresani
W2HZ
Mini tilt plate with the KT34a and MA 550 tower.
The antennas from the bottom up are, KT34a, KT31WARC and GP9 on top
Maintenance position -- Mini-TiltPlate
Tower being raised
Almost back up
Ready for some DX
*** UPDATE ***
I purchased the Mini Tilt plate w/KARLock for my MA 550 tower 2 years ago for the installation of a KT-34 beam. I thought you may be interested in my change of antennas. I just completed installing a 3el Steppir with 30/40 loop. My Call Sign when I purchased the Tilt Plate was N7JAP, my current Call Sign is N7JP.
Having the Tilt Plate made this antenna transition very easy.
Mosley Pro 67C on a Monster TiltPlate and KARLock
TX 455 tower
This shows the awesome ability of the monster tilt plate model and my US Tower TX-455 with a DX engineering reinforced cro moly mast with my Mosley pro67 c3 and a uhf vhf beam sitting a foot or two off the ground !!

The Mosley design
forces a very close tight clearance from the tilt plate. I used two separate
plastic wire looms over the phasing lines to keep them insulated from the tilt
plate.
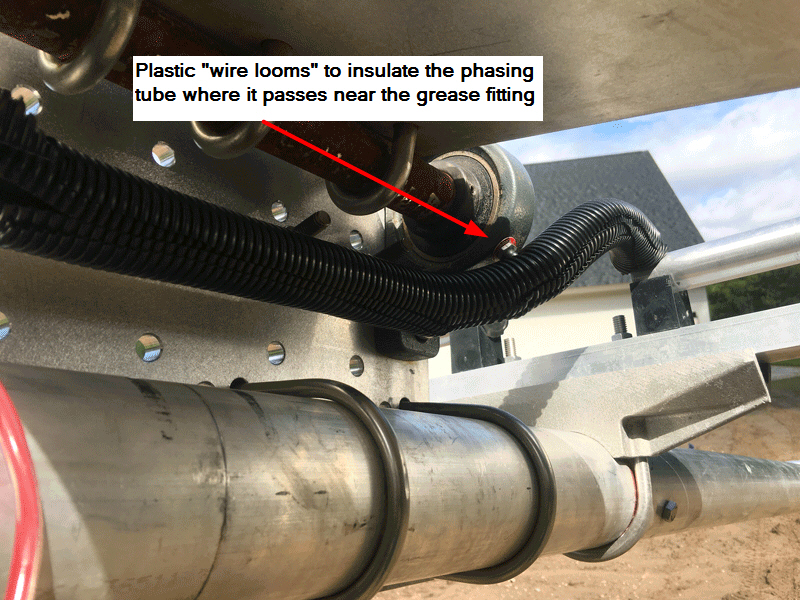
73, Keith / KJ8DO
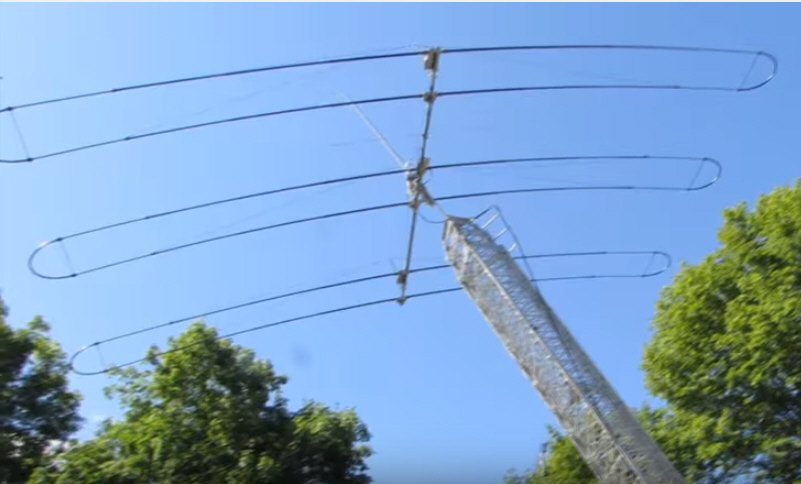
U S Tower HDX 572 MDPL
SteppIR 4el with 40/30 loop
Standard / Stackable / KARLock
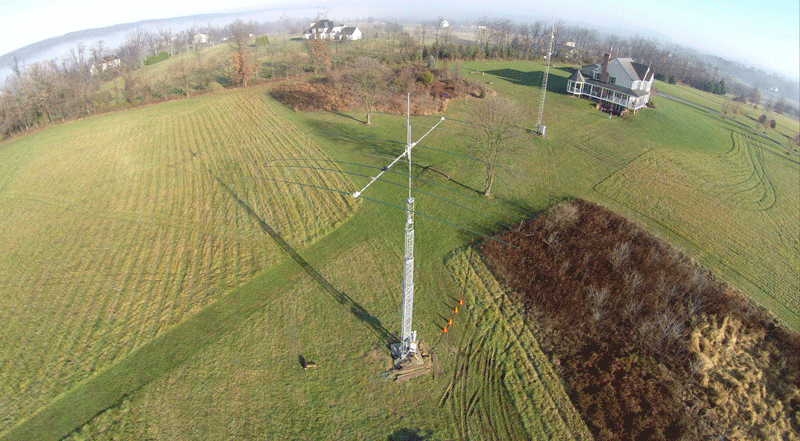
Heights 84' crankup / tiltover tower
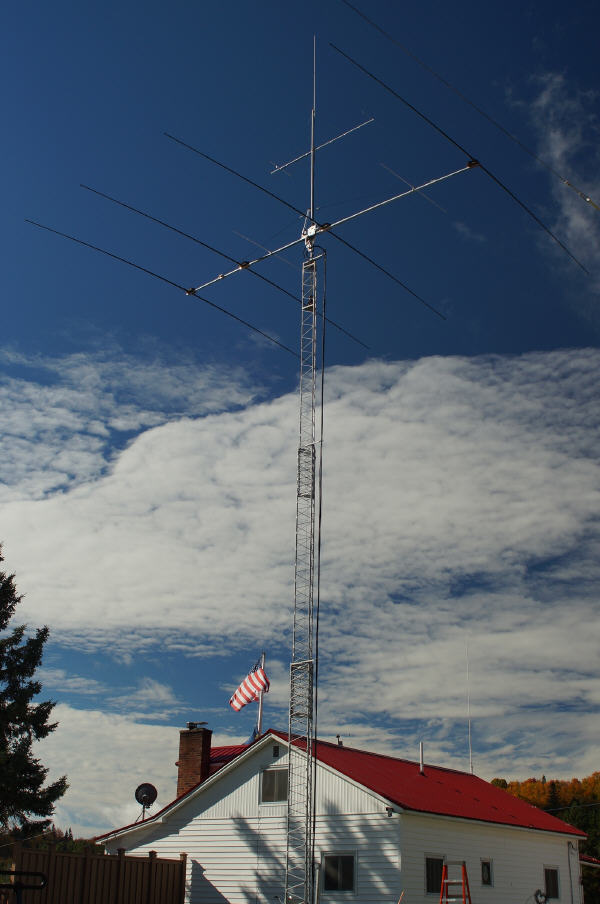
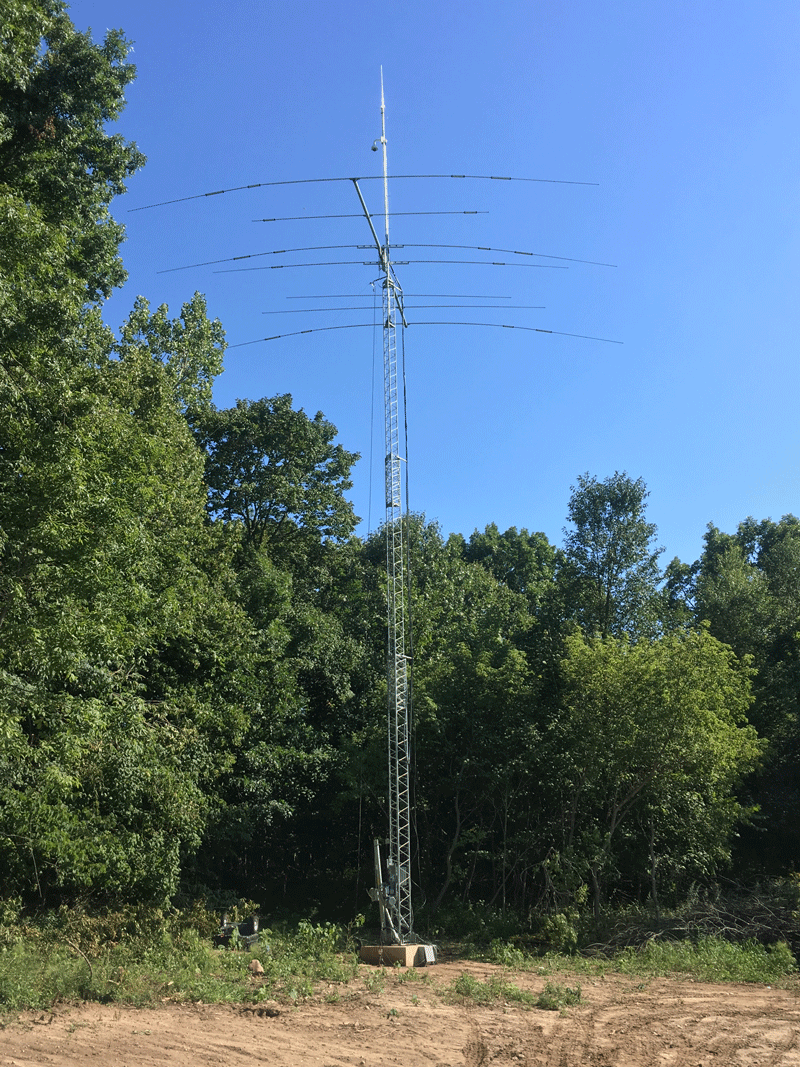
SteppIR DB18E
Al provided three excellent videos of his setup. They provide great details on his tower installation, the assembly of the DB18E and operation of the tower and TiltPlate.
*** This video shows the finished product and demonstates the system ***
CLICK on the TITLE page to see the video.

*** This video details building the DB18E step by step on the TiltPlate ***
CLICK on the TITLE page to see the video.
*** This video details the installation of the Height 84' tower ***
CLICK on the TITLE page to see the video.
Here is a picture of the tower going up....
I have used the tilt plate now for 2 years and it has served me very well. Every time I tilt over the tower, I smile to myself and am happy that I installed the tilt plate. It sure makes life easy as the years add up and doing inspections of the antenna, rotor and feed lines does not require a ladder or climbing.
73, Al – K0CN
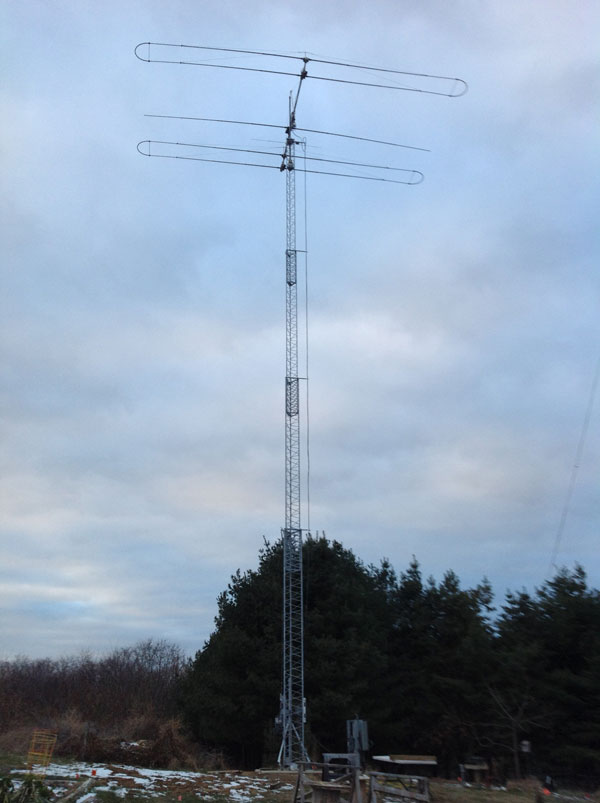
TiltPlate Monster - SteppIR DB36
T-Bar truss and "bent" truss mast tube.
Kent used a unique method to install and level his TiltPlate and DB36. Here is an outline of his steps.
He started with the DB36 mostly assembled and sitting on saw horses.
Attach the TiltPlate to the boom while still on the saw horses. The Tiltplate is not attached to the tower at this point.
Level the TiltPlate using a bubble level to insure the mast plate is vertical and the elements are hozirontal.
Dissamble the mast plate from the boom plate by removing the 4 bolts that secure the bearing blocks. (Al's note, the bearing block are slotted so it would be a good idea to mark/outline the bearing blocks with a sharpie to reassemble the plate in the same location)
Attach the mast plate to the tower which is tilted over.
Move the antenna with the boom plate already mounted next to the tower and re-attach it to the mast plate.
Install the KARLock.
Install the antenna element tubes and finish up the wiring etc.
Antenna assembled on saw horses -- Shown after leveling the TiltPlate and disassembling the mast plate

Closeup showing the optional 2" "bent tube" boom truss mast with the SteppIR T-Bar 1.75" truss nested and bolted in place.
Completed and ready to go!
SteppIR DB-18 on a LM-470 tower
Max installed his DB-18 on a "monster" TiltPlate in case he decides to upgrage to a bigger antenna in the future. He did an execllent job documenting his SteppIR build and installation on the TiltPlate with hundreds of picture and 2 excellent videos. I only posted a few of his pictures here but included the links to them down below.
Here are the links to his videos. These should be very helpful to anyone building and installing a SteppIR on a TiltPlate.
 Part 1
Part
2
Part 1
Part
2
Ready to go!
Front view and SteppIR control box mounted
Rear view from the top
Rear view from below
Links to hundreds of additional pictures:
http://www.nc7j.com/pa/main.php?cmd=album&var1=NG7M%2FSteppIR%2FDB18%2FReady+to+Tilt-UP/
http://www.nc7j.com/pa/main.php?cmd=album&var1=NG7M%2FSteppIR%2FDB18%2FPre+Trumbone+Trusses/
http://www.nc7j.com/pa/main.php?cmd=album&var1=NG7M%2FSteppIR%2FDB18%2FBoom+Build/
http://www.nc7j.com/pa/main.php?cmd=album&var1=NG7M%2FSteppIR%2FDB18%2FFiberglass+Pole+Painting/
http://www.nc7j.com/pa/main.php?cmd=album&var1=NG7M%2FSteppIR%2FDB18/
http://www.nc7j.com/pa/main.php?cmd=album&var1=NG7M%2FLM-470+Tower/
Great job Max and thanks for sharing. Good DX and 73....Al / NN4ZZ
Mosley TA 54 XLN 6/40
The TiltPlate and antenna went together without a hitch.
Two of my boys visited and helped me get the Mosley TA 54 XLN 6/40 into position on four sawhorses. I was able to do the rest of the installation by myself. I adjusted the tower height to meet the TiltPlate clamps and just slid it on. Your marks for the KarLock were perfect. Fortunately the adjustment angle on the antenna was on the money and was level on the first try. I was so certain it would take a couple of attempts to get it plumb that I did not connect the feedline so I had to crank it down anyway.
We had a storm event last week with 85 mph wind gusts heavy rain and some snow. Everything came through fine. Thanks for developing a really valuable device. I have always dreaded lowering the tower for repairs-not anymore.
73, Rick K7RCS Reno, NV
3 el Ultrabeam for 40M thru 6M - Standard Model TiltPlate and KARLock
Click here for more information about the Ultrabeam 60MM square boom adapter
Closeup of TiltPlate
Another view
The photo is of a US Tower HDX-555, SteppIR DB18E, M2 2M12, and Diamond 300X on top.
I bought a TiltPlate from you back in May, and got the tower and antennas up yesterday just ahead of the snow last night!
The TiltPlate and Karlock performed flawlessly!
Thank you for such excellent products. I can’t imagine how much harder this project would have been without them.
I really appreciate your help and advice along the way.
Thanks again and 73,
Ed N3CMI
The antenna is a SteppIR DB32 (4el with a loop). His tower is the HDX-572. He has the stackable model with a vertical at the top.

Tracy found an added benefit -- the TiltPlate makes a good shelf for tools and parts during the build.
Build complete....raising the tower
Ready to go!
"...thank you once again for the great service and advise." Tracy / KC7WFD.
Tennadyne T-8 -- The antenna will be replaced with a new T-12 HD when it arrives from Roger. This device is amazing! I can’t believe that I can now do all antenna work whenever I desire by myself and safely at ground level.
Thank you Al for the Tilt Plate! More pictures to come with the new antenna.
73,
Scotty
K7MIX
Your Pictures here.....
Your pictures could help
someone that has a similiar antenna or tower setup.